Having completed the application development process, it’s time to reveal your unique app to the world on the Google Play store. It can be an exciting as well as a challenging experience. However, there is no need to worry. We will walk you through the Play Store release process today, which is the leader in terms of the number of published apps and users.
Android users typically download apps from the Google Play store, so having your app prominently displayed on it will make it more likely to be downloaded.
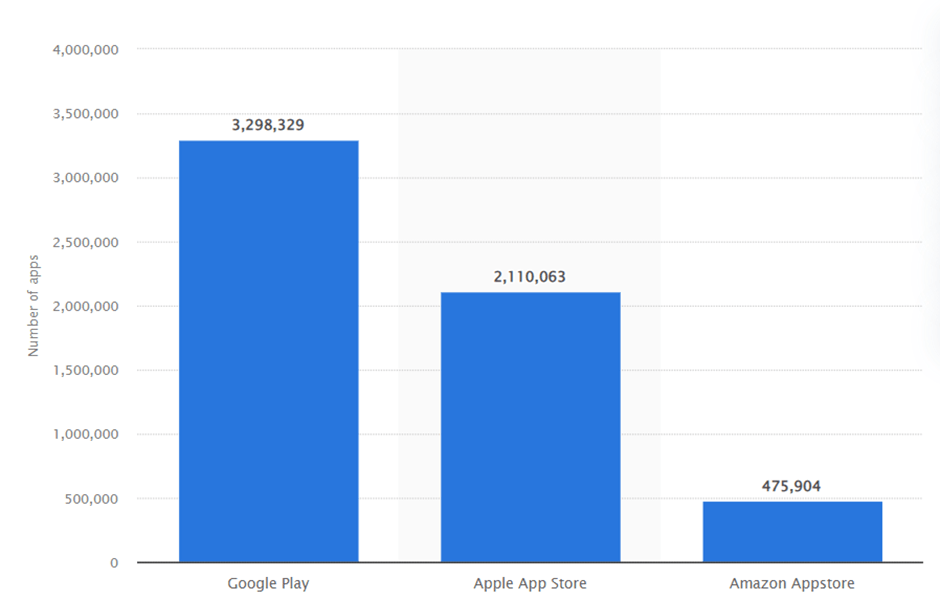
Have you ever wondered how many apps there are in the Google Play store at present?
By the first quarter of 2021, Google Play Store had a total of 3.48 million apps.
If you are wondering “How to publish an app on Google Play Store”, then you have come to the right place. In this post, we have covered all the steps in the process of Google Play uploads. Let’s jump right into Google play publish.
Now let’s publish our first app!
Prerequisites:
Before publishing your app on the Google Play store there are certain prerequisites that you must ensure:
- Create an app that is ready to publish on Google Play Store!
- Unique Bundle ID for your app
- all APKs should be digitally signed
- APK expansion files will be needed if your app is too large (the Google Play store allows APKs up to 100MB).
- Study Google Developer Policies
- Sign up to Google Play Console as a Play publisher
7. If you plan to sell via your app on Google Play store -Link Your Merchant Account
Once you have completed all the above steps, you can submit and publish your app on Google Play.
Step-by-Step Process to Upload App to Google Play Store via Google Play console
Now that we know the basics, let’s look at how we can submit an app to Google Play Store. To avoid any mistakes in the process of Google app publishing, be sure to follow each step sequentially.
Step1: Creating the App on the Google Console
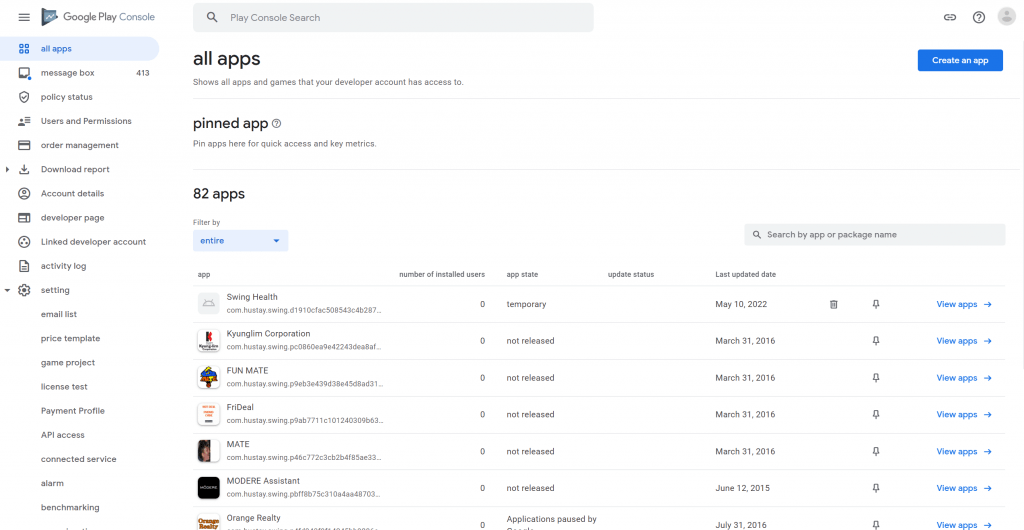
Log in to the Google Play Console Using your Google Play publisher account.
- From the left-hand menu, select All applications.
- Now click on the Create Application
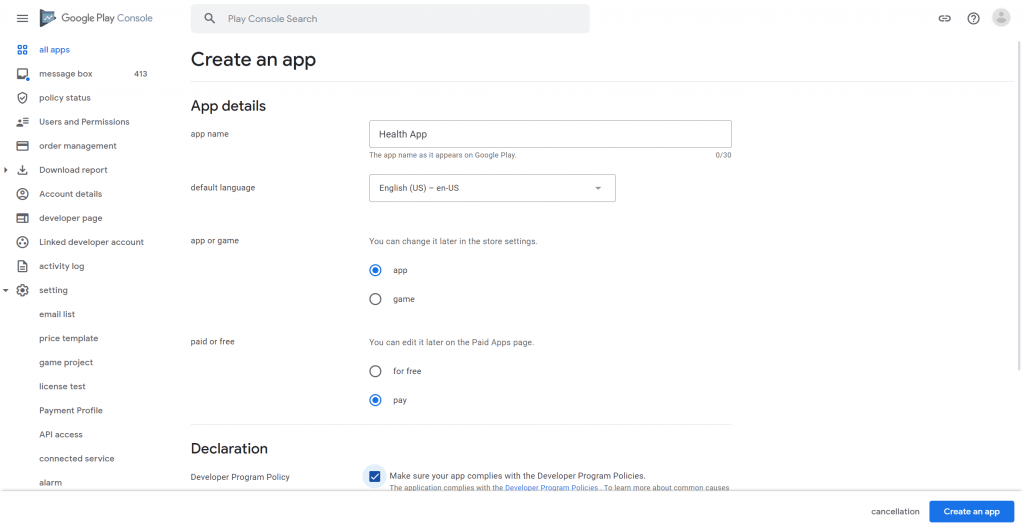
- Choose the app’s default language from the drop-down menu
- Add a Short (50 characters) app description (you can change it later)
- Tap on Create
Short description: A summary of your app. This will be shown on the listing of the app on Google Play Store and is important for attracting people to download your app. In 2-3 lines you should write the most important or unique function of your app to convince people to download your app via the Google Play store.
Full description: Write the in-detail introduction about your app. The maximum word limit is 4000 characters. So, it is crucial to highlight the key benefits and features.
Screenshots: This is one of the most essential steps to show your app and it’s working. Click on “Add screenshot” and upload the screenshots of your app that display various features of your app. You may add at least 2, but not more than 8 screenshots. Choose the ones that show the app functionality and value the best. To be featured in the “Designed for tablets” section of the Google Play Store, upload screenshots of your app running on a 7-inch and 10-inch tablet.
The screenshot image requirements for the Google Play store are:
- JPEG or 24-bit PNG (no alpha)
- from 320px to 3840 pixels
- the ratio should not be more than 2:1
Hi-resolution icon: This is the icon that will be displayed in Google Play Store and on your users’ home screen when downloaded
The icon image requirements for the Google Play store are:
- 512px by 512px
- 32-bit PNG (with alpha)
- Maximum file size: 1024KB
Feature graphic: Despite being tagged as optional; a feature graphic is essential for your app to be featured anywhere on the Google Play Store. Simple, bold, and vivid images that promote your brand with minimal text are the best.
It is displayed in various places on the Google Play Store, for instance, on the homepage.
The requirements for the Google Play store are:
- JPEG or 24-bit PNG
- 1024 pixels x 500pixels
Video link: Additionally, you can include a link to a video of your application. A link to your YouTube channel can be added if you have a promo video. On the Google Play store’s app’s page, this video will be shown before the screenshots.
Application type: First, using the drop-down menu, choose the application type: game or app. Then pick the category that your app fits into.
Category: Business, travel, education, etc.
Tags: You can choose from the list the most relevant to your app keywords for better App Store Optimization (ASO). However, you cannot add any custom tags.
Localization: If your app supports multiple languages, you need to mention all of them in the Google Play console. Also, you need to add translations of your app’s information as well as include localized screenshots and images.
Make sure all your information is correct in the contact details and add everything like email, website, etc. Then click on “Save Draft” to save all app information that you added.
Let’s get started with the next steps.
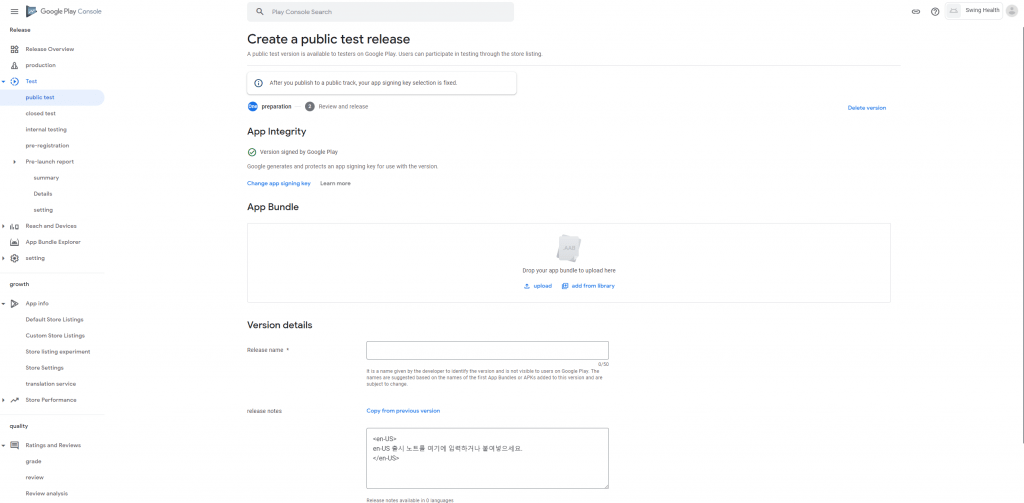
Step2: Upload the APK or app bundle files to Google Play Console
The next step is to actually upload the files. After you’ve verified that you have all the required prerequisites (unique bundle ID, signed app release, and extension files if your app is large), it’s time to submit the release. To do this, click on the App releases section from the left menu.
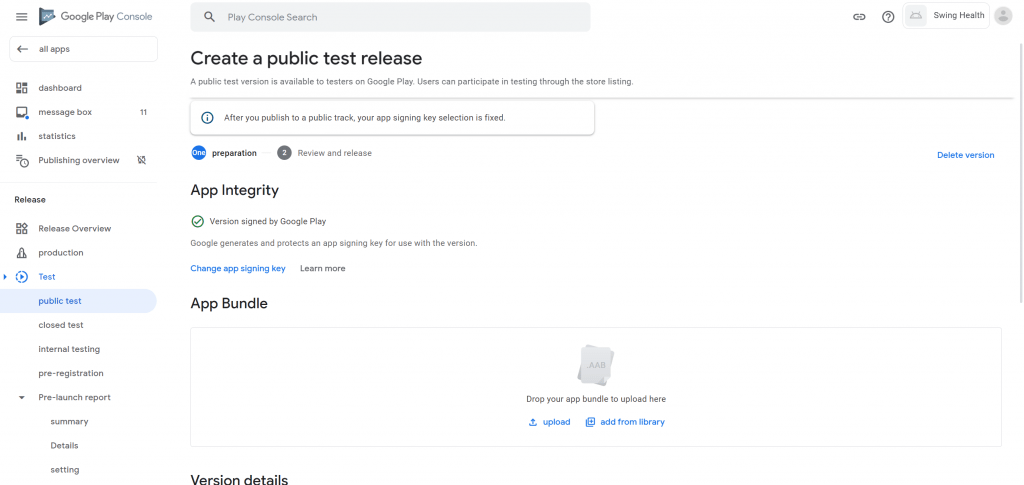
You can choose the option of the type of release. Production refers to submitting a live version of your final app to Google Play. You can test your application with beta and alpha releases before a final release to get valuable feedback.
After this, click on Create Release to go to the “production page”. Then:
- Choose if you want to use the Google Play app by signing on your app or choose opt-out and sign in locally.
- Click on the Browse Files.
- Choose the app’s APK or App Bundle files to upload on Play console.
- Then click on Review, this confirms and submits your app’s release information.
Before sending your app out into the Google Play store, it needs a content rating and pricing plan.
Step 3: Content Rating
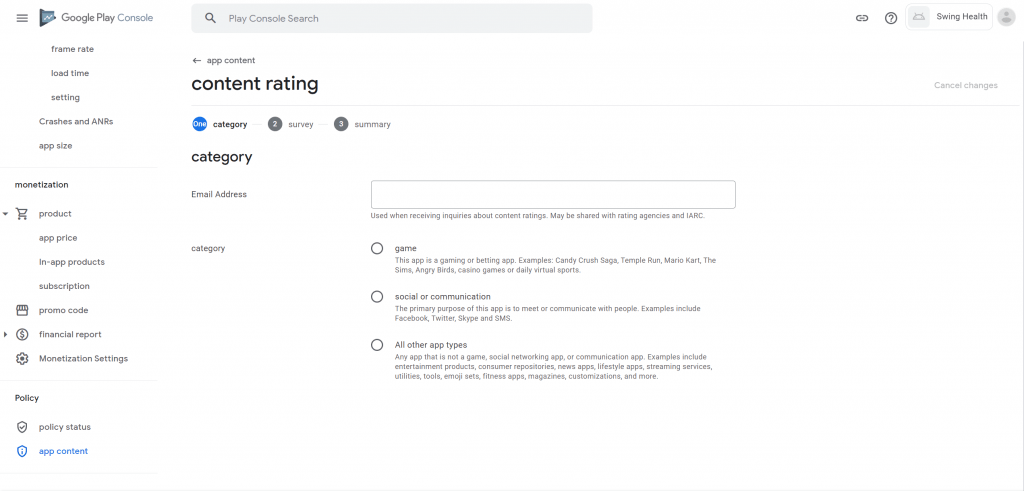
The only way to avoid being marked as an Unrated App (that may lead to app removal) is to pass the rating questionnaire. This section can be found on the left-side menu.
Be sure to provide accurate information. The Play Store might suspend or remove your account if your app’s content is misrepresented.
Once you’ve completed the survey, click on Save Questionnaire.
Then, click on Calculate Rating.
Finally, click on Apply Rating to confirm the rating and proceed with pricing and distribution
Step 4: Pricing the App
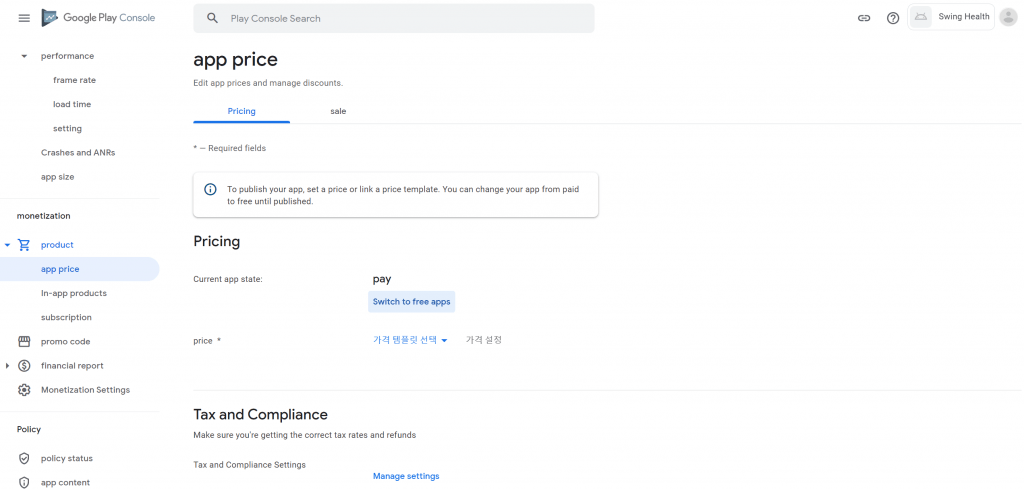
In the Pricing and distribution section of Google Play console, you need to fill the following details:
- The app is free or paid
- Countries where the app will be available
- If the app will be available only on the specific devices
- If your app has sensitive content which is unsuitable for children under 13 years of age
- Whether the app contains ads or not
A key point to remember is that you can convert your paid app to a free one, but you cannot do the opposite. If you decide later that you want to make it paid app, you’ll have to create another app.
Step 5: Publish your app via Google Play console
Your work on the Google play console is nearly finished. After making sure you’ve taken care of everything else, the next step is to evaluate and push out your release.
Make sure the store listing, content rating, price, and distribution sections of your app all have a green checkmark next to them before you review and release it.
Select your app and go to ‘Release management’ — ‘App releases’ once you’re confident you’ve filled out those data. Review your intended release by pressing ‘Edit release’ next to it.
Then, on the ‘Review and rollout release’ screen, click on ‘Review.’ You may check here to see if there are any issues or cautions that you may have overlooked.
Finally, click on ‘Confirm rollout.’ This will publish your app to all users in the target countries on Google Play.
How long does it Take for an App to be Approved on Google Play Store?
Usually, 3 days is the average time for a mobile app to be reviewed and approved by Google Play Store. However, it may take longer for certain apps.
As per Google App Review Guidelines, a few apps may require multiple reviews, and this may increase the approval time up to 7 days or even longer.
Hence, Google suggests the developers should take 7 days of extra time between submitting their app and launching it.
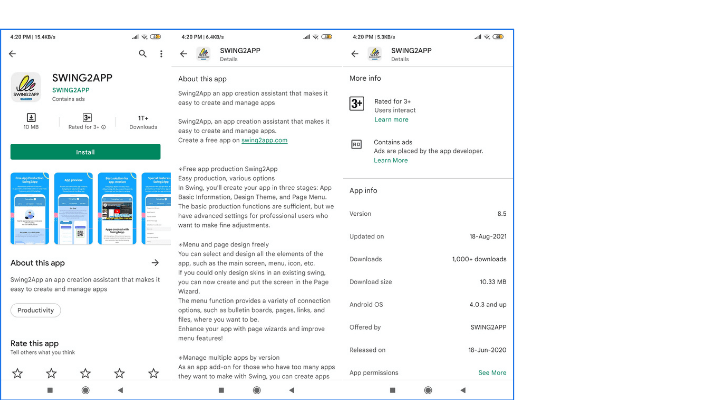
With Swing2App’s dedicated team you can save your time of uploading and publishing the app in just a $5 store upload ticket.
Read more about: How Long Does It Take To Get Approved On The Google And Apple App Store?
Publish your app via Swing2App
Even though we explained the entire process of publishing your app on Google Play, some of you still may feel overwhelmed.
As a first-time publisher, we understand your nervousness, so we help you with the most challenging part of the process.
If you create an app using Swing2App no-code app builder, you will need to pay $5 for an upload ticket to the Google Play store, and we will handle all further steps.
Even if your app is rejected for any reason, we will assist you to overcome the problem and get your app published as soon as possible.
In addition, you will receive lifetime app support. You can always contact us if you have any issues, and we will be there for you every time.
Also, read about: How To Submit Your IOS App On The App Store?
What’s Next?
You’ll be able to successfully publish your app if you complete all of the procedures above. But don’t get too relaxed just yet. Your work is just getting started.
To get the most out of your new app, you’ll need to advertise it so that people are aware of it and find it appealing enough to download.
Also, make sure you invest in the long-term maintenance of your app. Continue to improve and update it, as well as assess its performance, in order to make it an even better offering for your consumers.
However, if you use Swing2App you can manage your app updates, and send push notifications, pop-ups, SMSs, coupons, and other marketing schemes to attract your users. Swing2App is truly a one-point solution for all app developers.