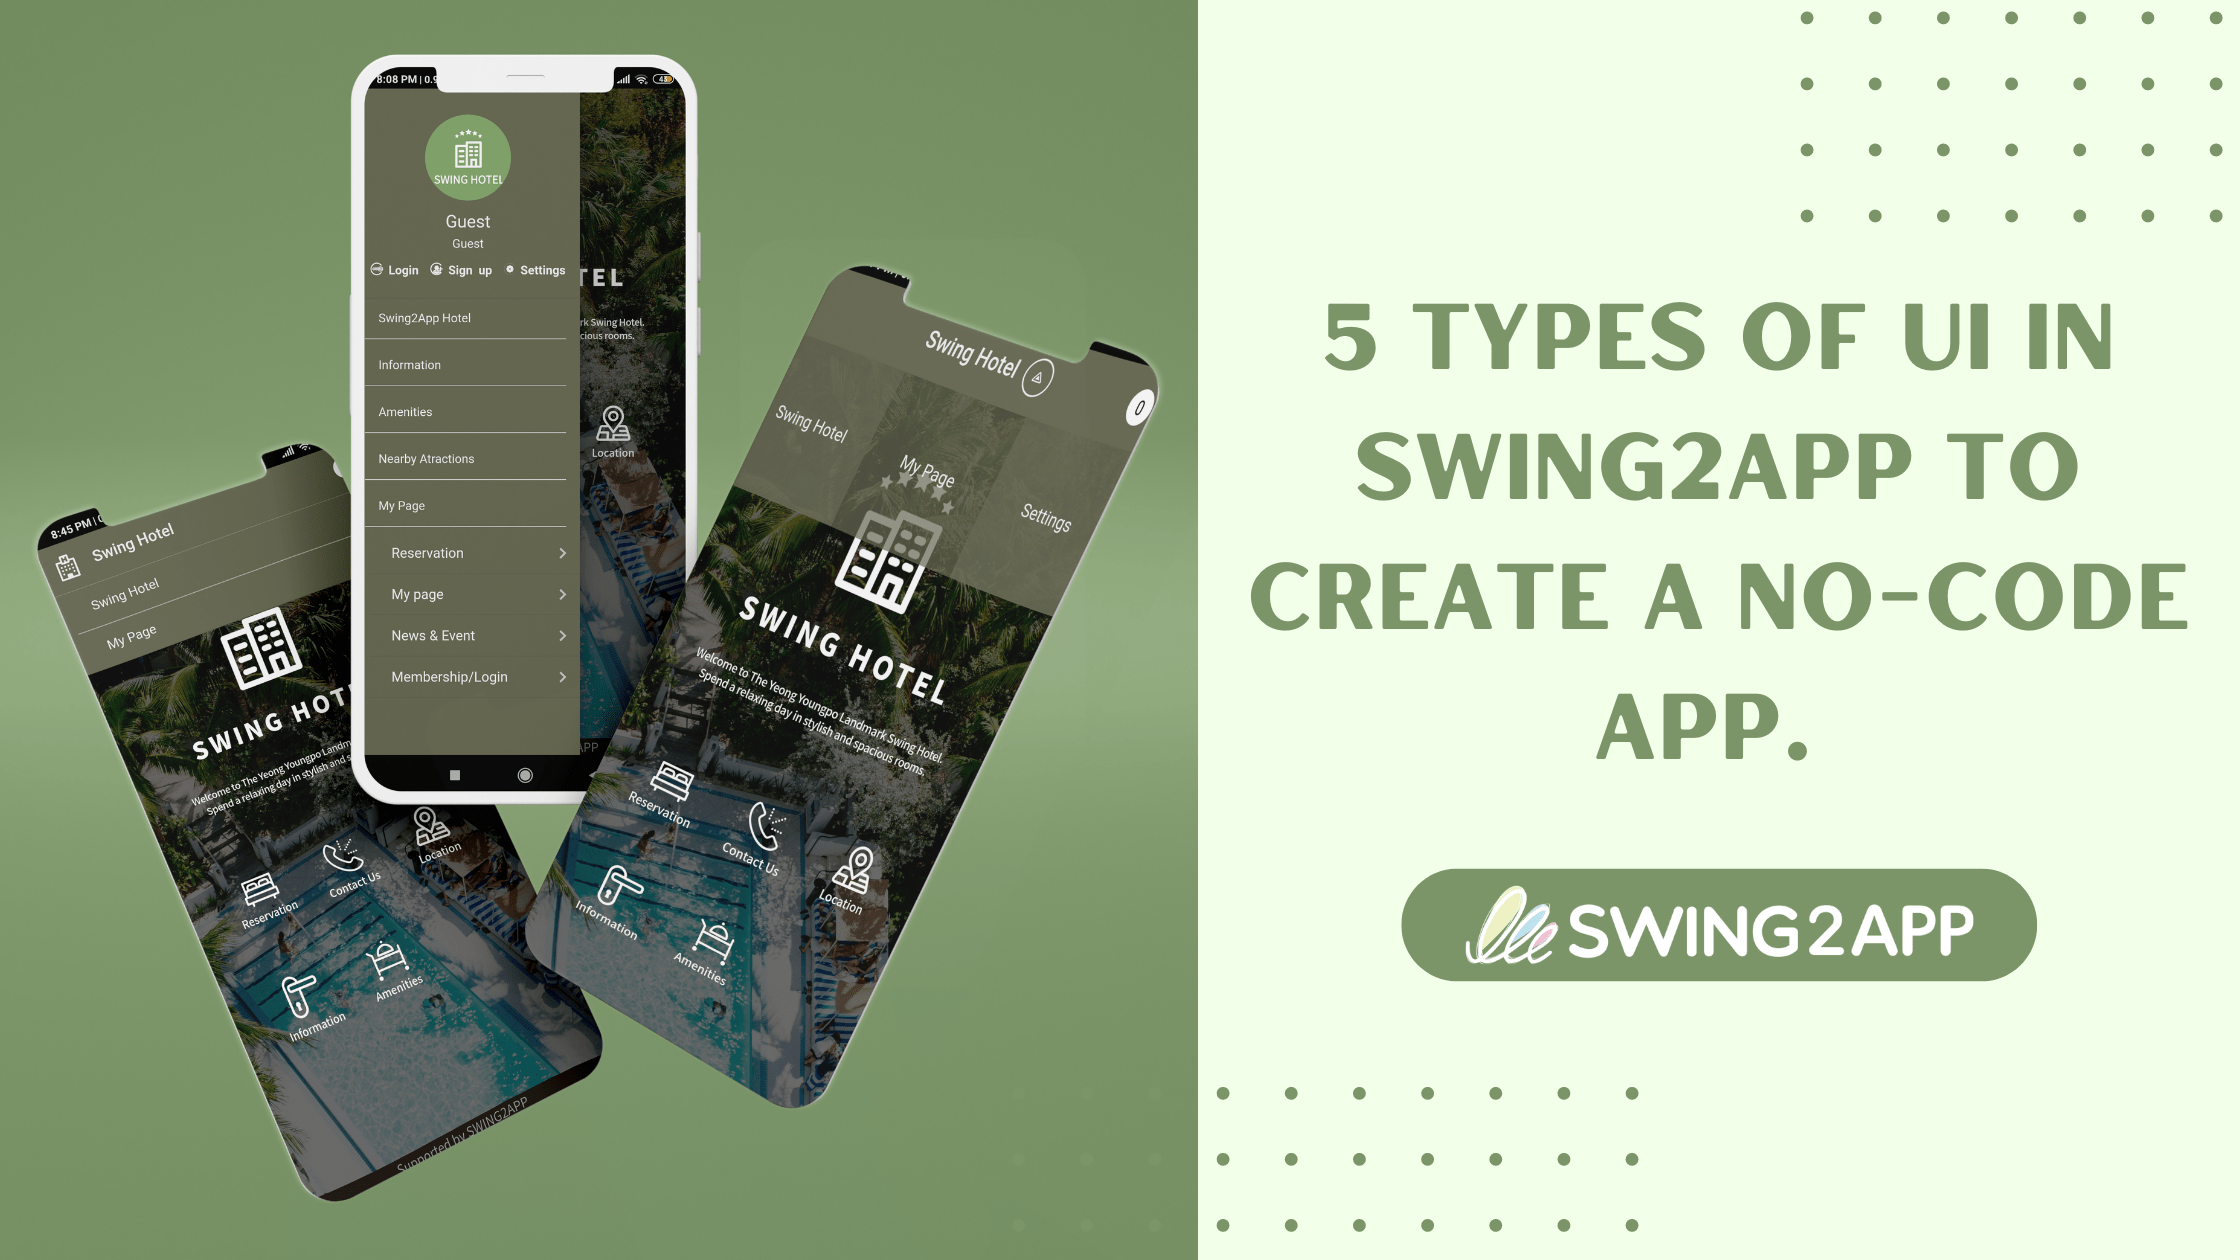
Tired of designing your own apps? Use pre-built Swing2app prototypes instead.
There are some useful tools that can be used with DIY options available for almost everything. A no-code mobile app builder based on this DIY concept has just been introduced to the mobile domain. The use of such tools is a holy grail for SMEs, startups, and anyone who wishes to build their own mobile apps.
It is difficult for amateur app developers to create an effective prototype and design for their apps due to the complex coding involved. In addition, the process is very time-consuming.
You might be wondering why Swing2app?
Swing2app provides you with 5 Prototypes (Mobile UI) on which your entire application will be created.
These pre-designed prototype frames used in app development instead of creating one from scratch, which is really time-consuming. Since no-code app development advocates faster time-to-market and rapid app development, templates are a great tool to achieve this goal.
What is the Swing2App prototype?
A prototype (Mobile UI) is the basic outline or design (like a wireframe) of your app, where the menu outlay and home screen are pre-set in a particular way that they will be displayed to the user.
The 5 Prototypes (Mobile UI) provided by Swing2App are:
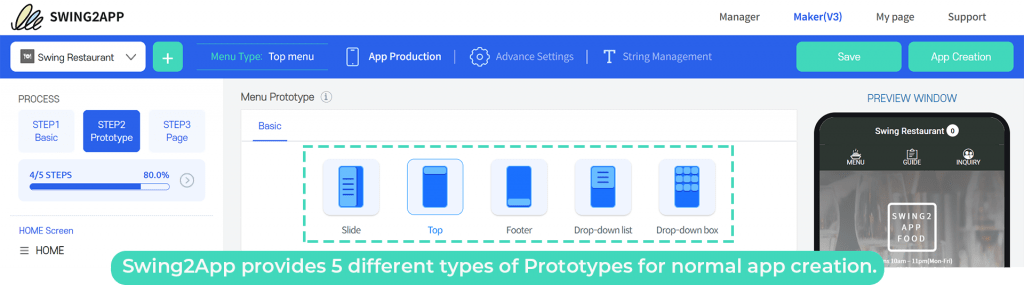
Types of Swing2App prototypes
- Slide
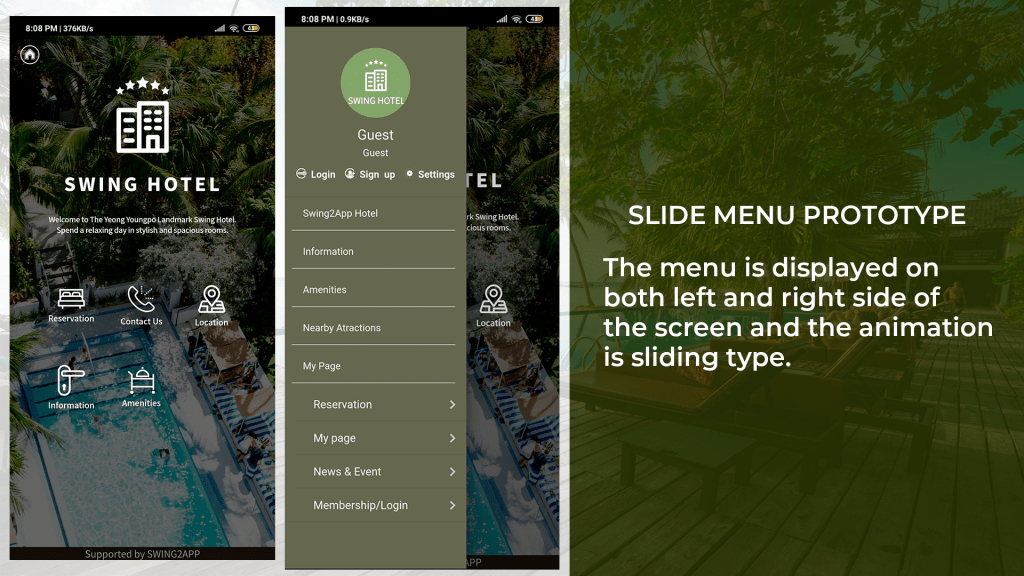
In the Slide prototype, the menu is displayed on the left and right sides of the screen and the animation is sliding, hence the name. This type of Mobile UI is generally the most used one in the app industry.
Swing2App has certain default menu options and features in each Mobile UI, which can be easily edited or even deleted. Furthermore, you can also add a new menu and assign features according to your choice.
2. Top
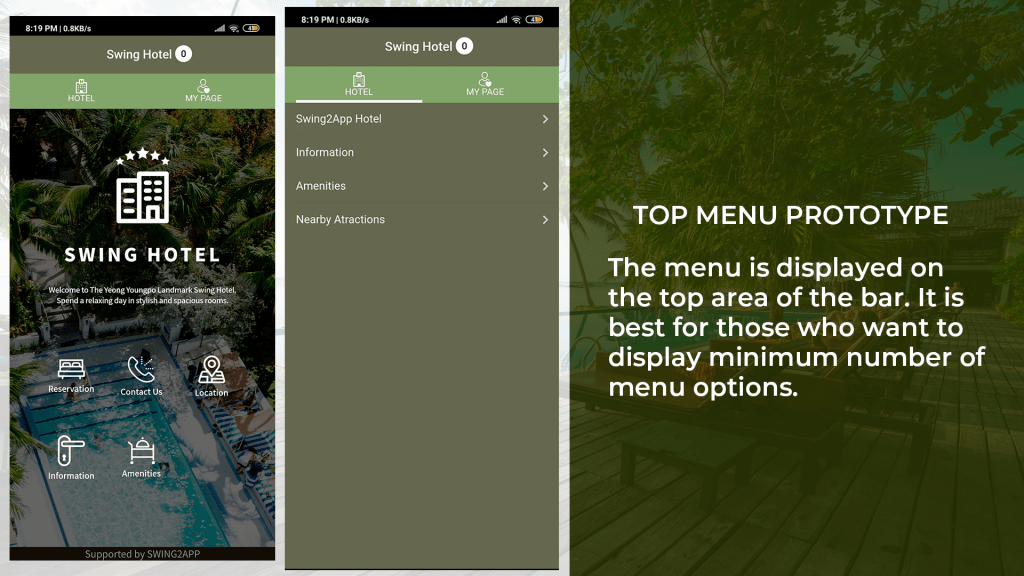
This is the second type of Mobile UI is the Top prototype, here the menu options are displayed on top in a bar. It is best for those who want to display a minimum number of options on the screen (4-5 menu functionalities). However, you can add sub menus easily under the main screen menu options, which makes your app appear professional and concise.
3. Footer

The third type of mobile UI is exactly the opposite of the Top prototype. The menu options are simply displayed at the bottom of the screen in a bar in a similar way as in the top prototype.
4. Drop-down list
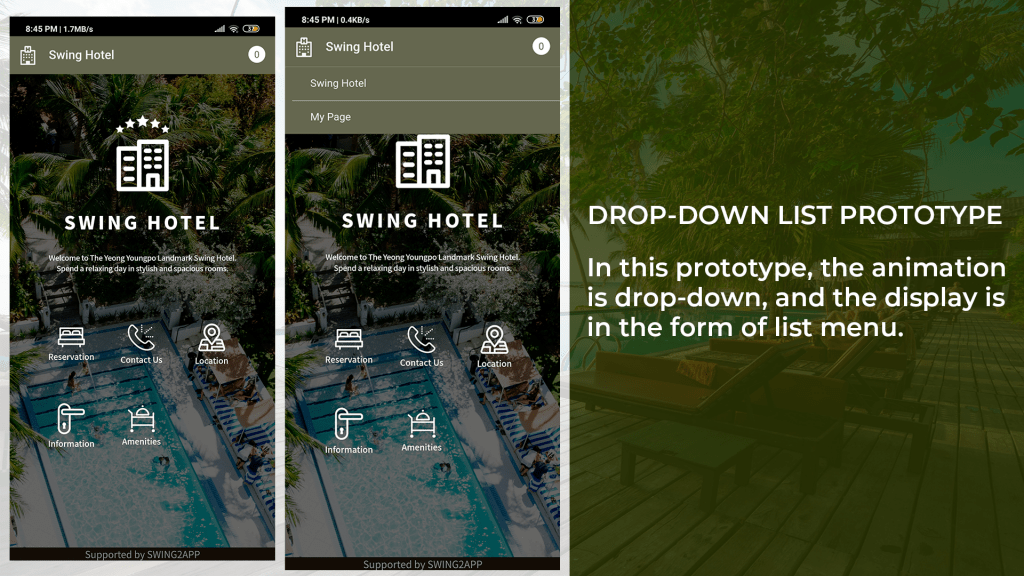
The Drop-down list prototype is quite different from the other Swing2App prototypes. In the Drop-down list Mobile UI, the animation is drop-down, and the display is in the form of a menu list.
This Mobile UI is like the Slide menu except the animations are quite different which is a stark difference in terms of Mobile App UI.
5. Drop-down box
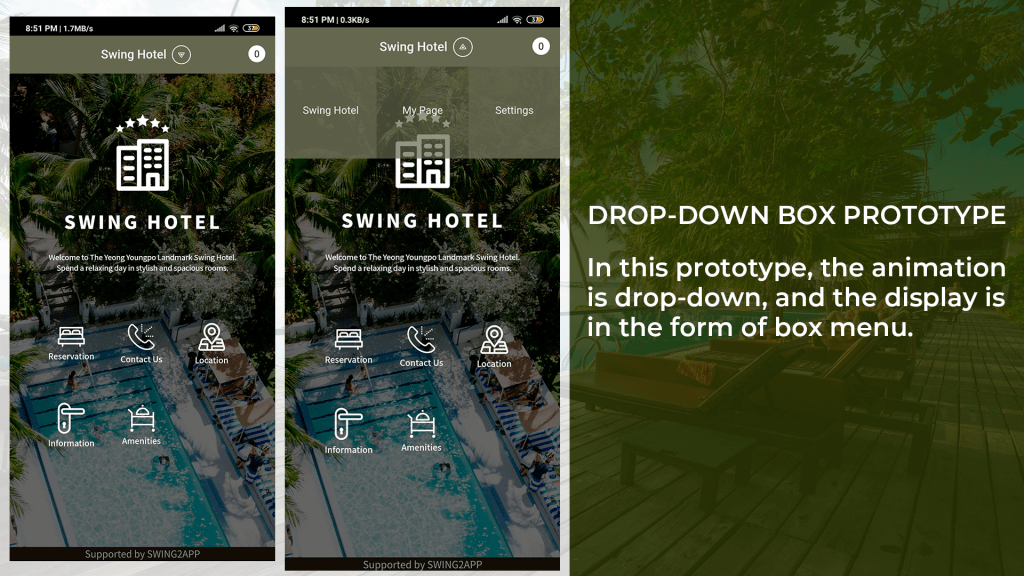
The drop-down box prototype is somewhat similar to the Drop-down list Mobile UI, the only difference being the menu is not in list form er in 3 columns box form.
With Swing2App, without any need for learning to code, paying for an in-house team, resources, and technologies, one can easily create a mobility solution with minimum steps.
Let’s see how you can use Swing2App prototypes to create an app from scratch that too without any coding!
Step-wise Guide to use Swing2App prototypes to create a no-code app.
For any app, customized written content, rich media content, and easy-to-navigate services are some of the most crucial aspects. With Swing2App prototypes users can instantly create their own apps and customize them in accordance with the colour-scheme of the brand/app, the aesthetics the business wants to portray and the brand image to be conveyed.
Users can easily change the logos, background colours, and basically the whole appearance of the template to fit their needs. It is an effective alternative to expensive and time-consuming UI/UX designing.
Here’s how you can integrate these prototypes into your app and start building your no-code app!
Step1 BASIC:
Click on the “+” icon to create a new application.
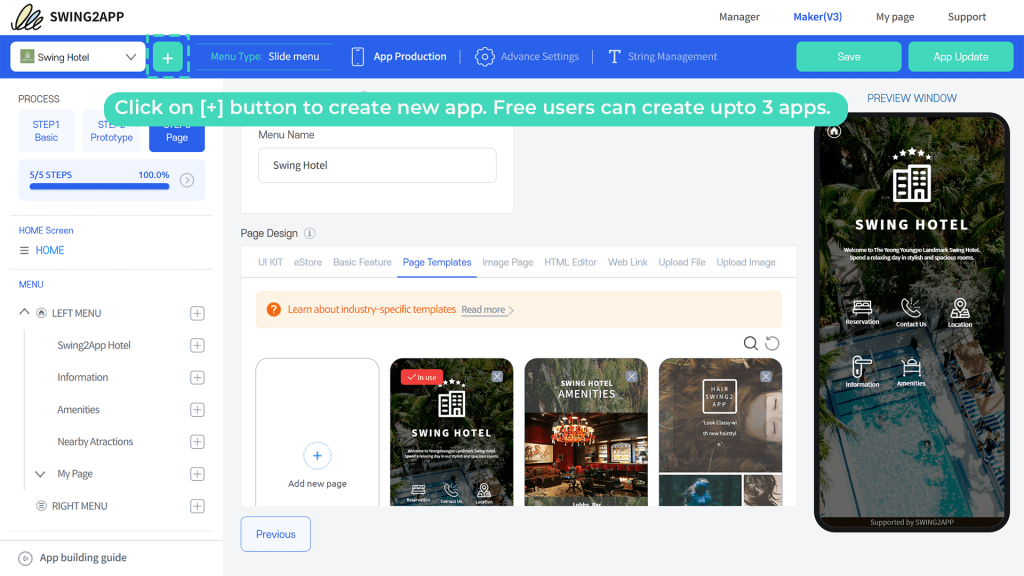
A dialogue box will pop up where you need to select “Create Custom App” where you can create app from scratch. Then click next.
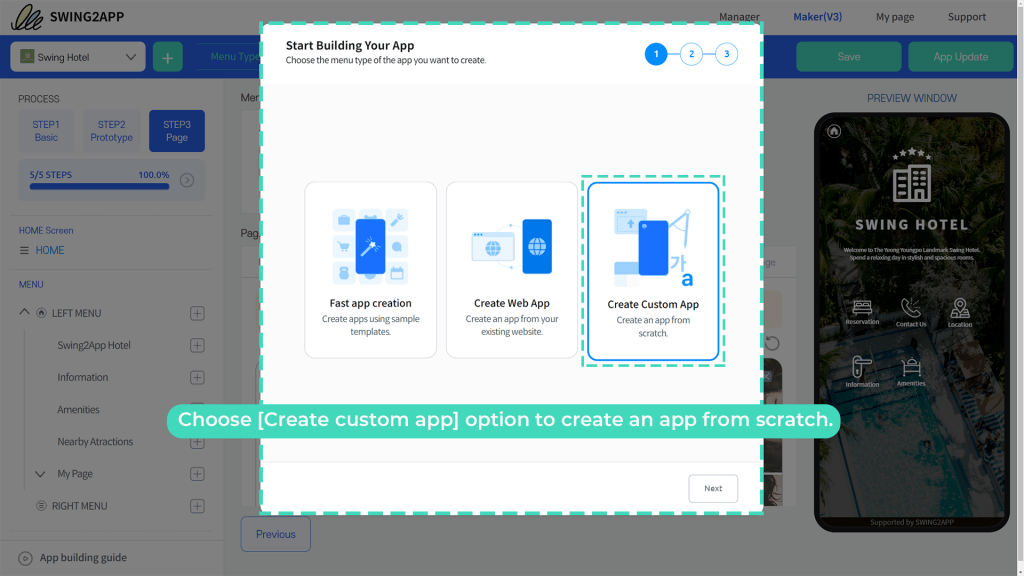
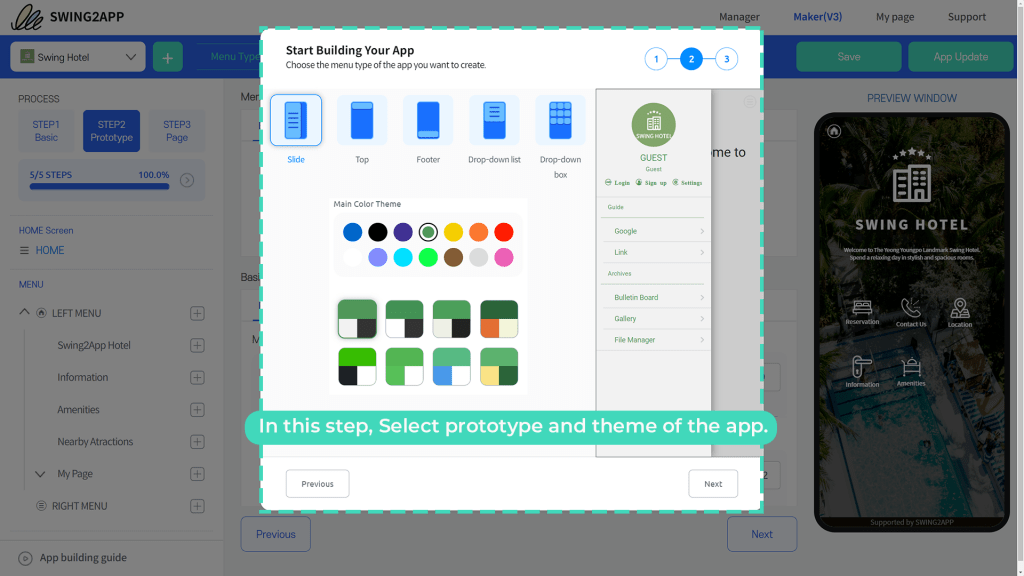
Here you need to choose a Swing2App prototype that is, the menu type that you want for your application.
You can also choose a theme color from the pre-set list or create your own custom theme color.
However, you can change this later, so no need to worry about it.
The next step is to assign a unique name to your app in the “App name” and upload “App Icon” as well as “App splash screen”. Then click finish.
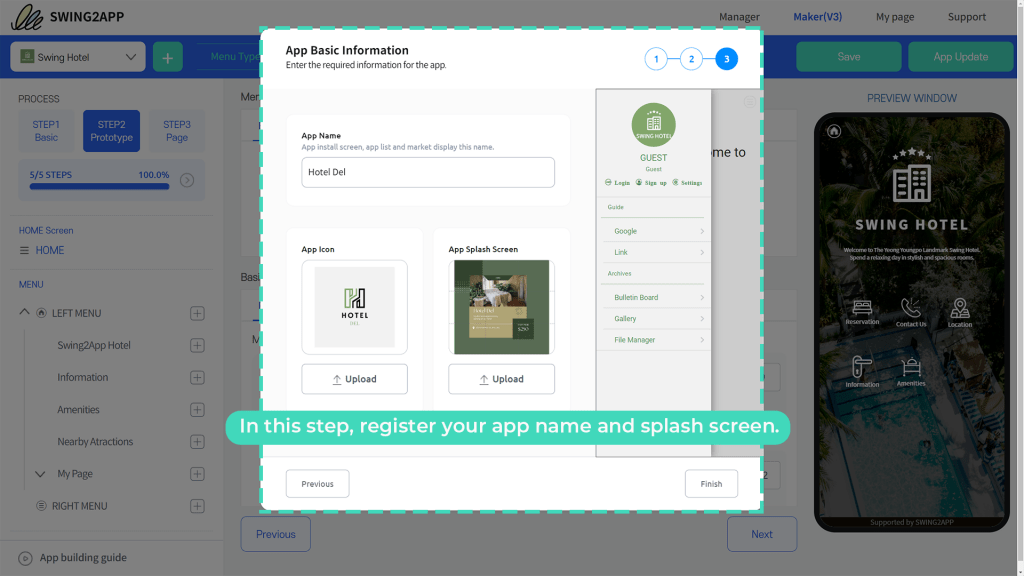
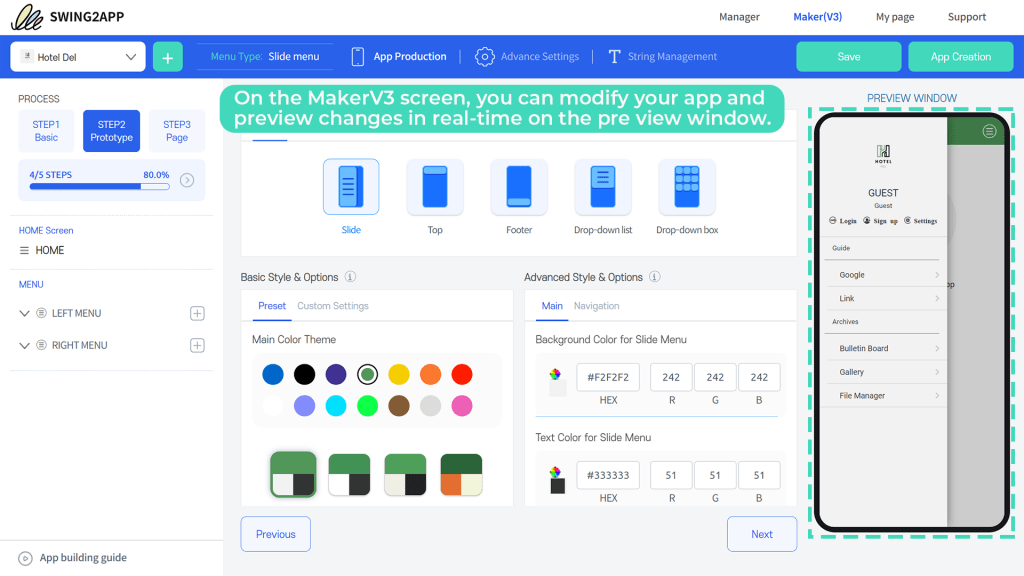
Then you will be direct to the new Maker V3 screen where you can see further options, settings, and features. Here you also get a “Preview Window” where all your changes are displayed in real-time which means you can see how your customization affects your app while editing it.
To complete Step 1 finally, you need to enter a unique “App ID” alphanumeric character, with this the Step 1 BACIS is completed.

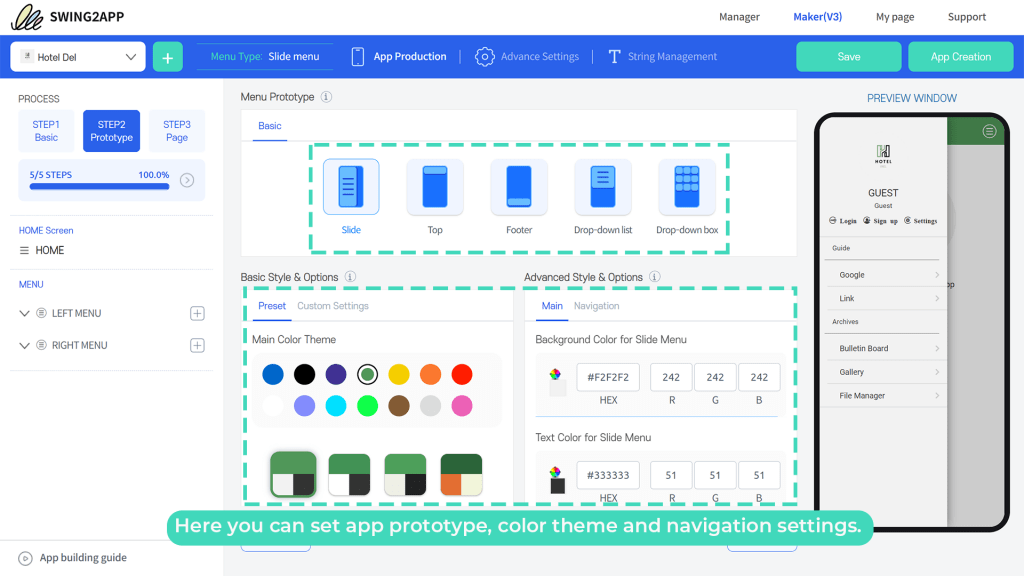
STEP 2 PROTOTYPE:
Here you may change the Prototype if you want or simply continue with what you selected earlier. You can also change the “Main Color theme”.
In Advanced Style & Options: Here you can edit Background Color, Text Color, Main Design Style and navigation settings too.
STEP 3 PAGE:
HOME SCREEN: Here you can edit the menu name and page design.
The various page designs provided are:
- UI Kit
- E-store
- Basic features
- Page templates
- Image Page
- HTML Editor
- Weblink
- Upload file
- Upload image
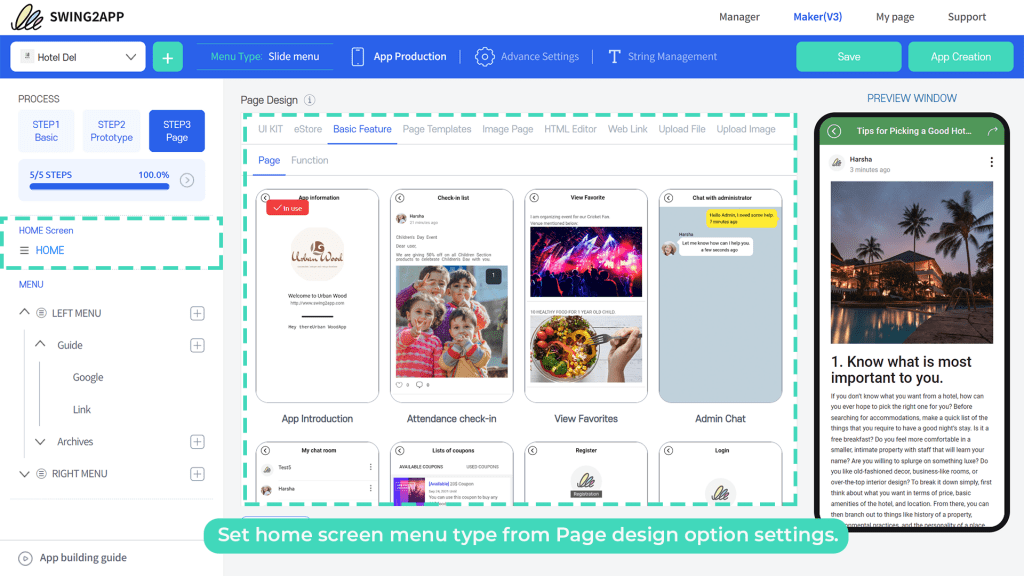
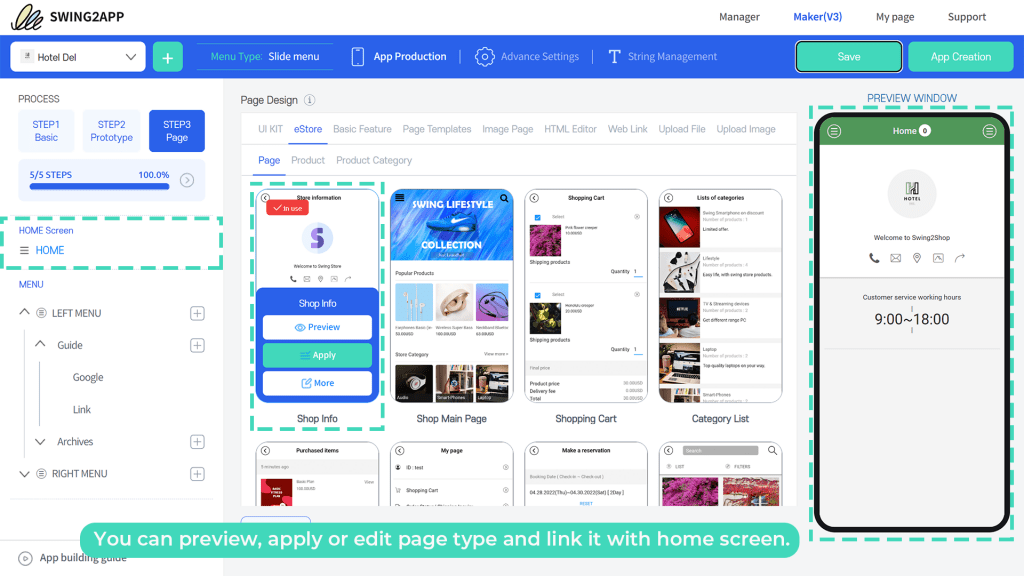
For example, if you choose “eStore” you can preview and apply a page to your Home screen in a single click.
MENU:
In menu, you will get the 2-default left and right sliding menu bars of the Slide Prototype.
Within this, there are several sub-menus which can be edited or even deleted. For that, you simply have to click on the menu name you want to edit or delete and then continue with the process.
You can change menu names, and active and inactive menu icons, and even choose who all can see that particular menu. In basic settings you can completely hide that particular menu from all your app users, this is quite great when you are testing a certain feature and not yet ready to publish it to all.
In the Permission settings, you can set the permission of viewing that menu for a particular group; you may choose from: Full Disclosure, Permission Group Disclosure or Private.
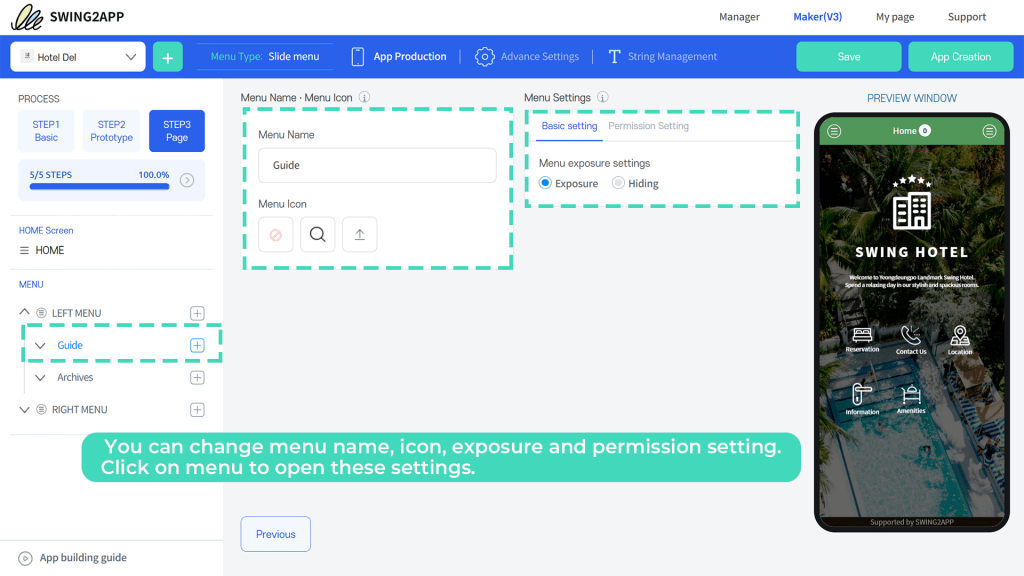
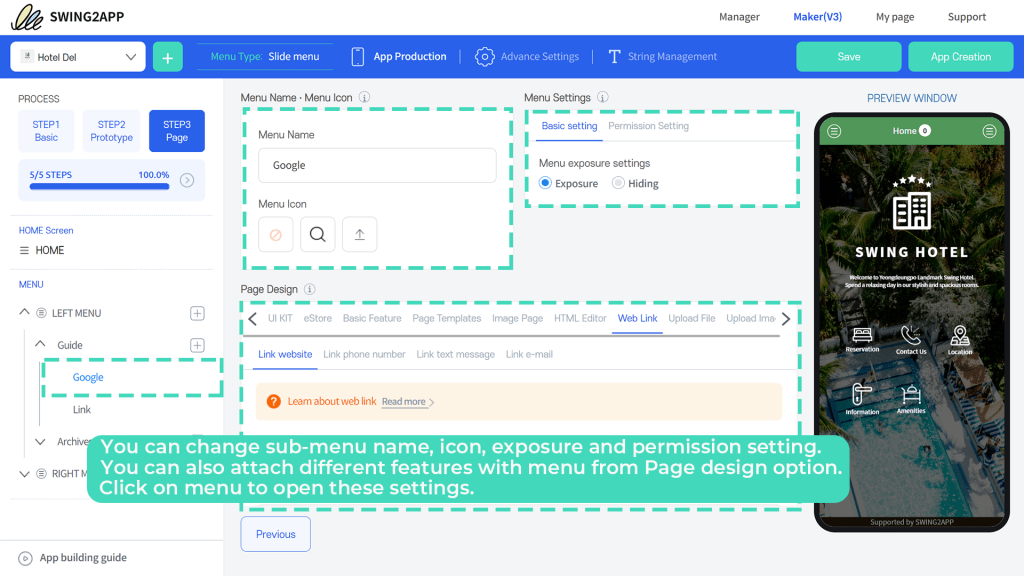
For assigning a function to a clickable menu, you have to click on the submenu. (As shown in image under the menu Guide-> Google and Link are default submenus. You can rename them as per what you want to display in that menu option.
By clicking a sub menu, you can edit menu name and page design.
The various page designs provided are similar to the ones provided in the home screen page.
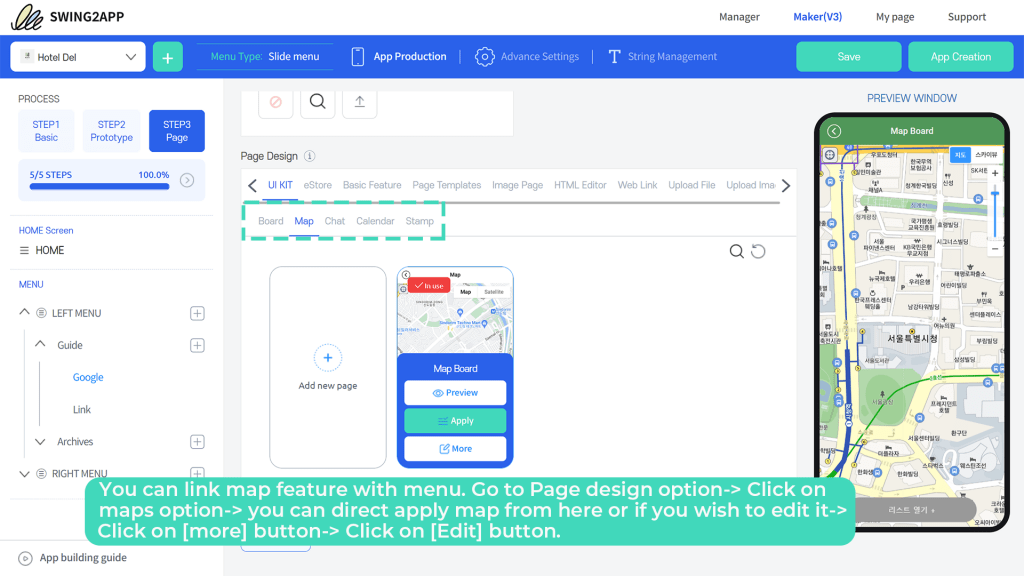
Let’s see an example of using UI Kit. It provides 5 main types of features that are prebuilt and only the content needs to be edited. These are: Board, Map, Chat, Calendar, and Stamp.
If you want to assign Google maps to the sub menu Google, simply choose maps in the UI Kit, there is a default map page which you can preview in Preview Window, apply it, or edit it by clicking on more.
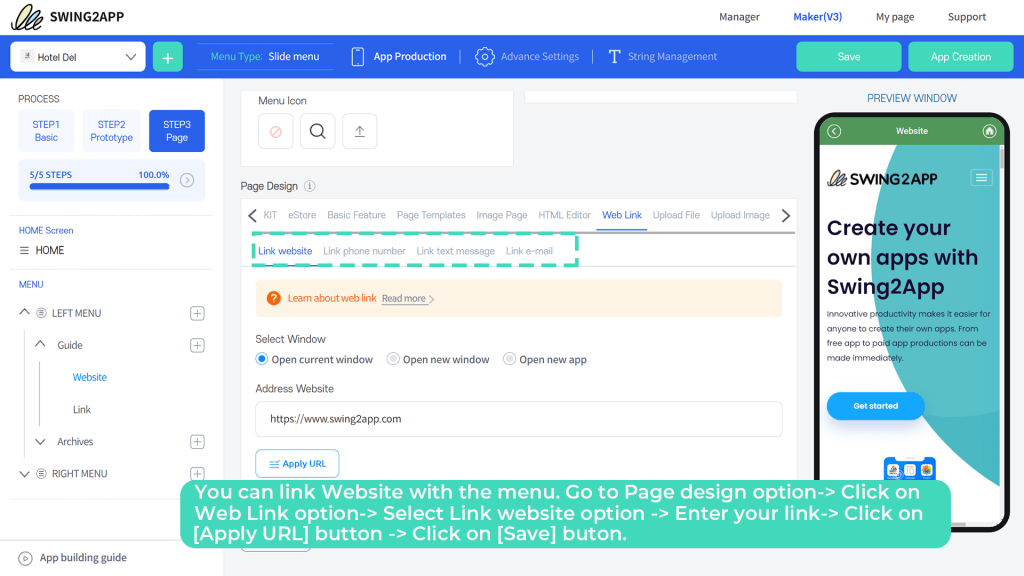
However, if you wish to edit the same menu and instead of Google Maps you want to assign a link to your company website, you can do that quite easily.
Simply slide up and change the menu name from Google -> Company site.
Then in the page design select Web link and enter your website and “Apply” it.
Ensure to save your work by clicking on “Save”.
Once you are done with assigning features to all the menus, the last step is app creation.
Click on “App Creation” and your app is ready you can view it online or even on your android device.
Within 5-10 minutes you will review app apk on your registered email, from where you can download your app and view it on your android device.
Why should you choose Swing2App no-code App Builder?
1. Real-time update on preview screen
Real-Time allows you to monitor activity as it happens on Swing2App website. You can simultaneously edit as well as see the changes in the preview window. This ensures that you are going in the right direction and that what you are imagining in your mind is really coming out to be same in the reality.
It helps to catch an error early and modify app as per the visual appearance and not by waiting to write the entire code just to look at how the basic prototype will look
2. Can change feature as well as menu anytime
As shown in above steps you can easily edit, remove or assign a new feature to a menu option with Swing2App quite easily. Unlike traditional coding where you have to rewrite the entire code again which is quite tiring and repetitive task.
3. Pre-built template
Swing2App is an app creation platform offering no-code app making with stable and amazing templates, all ready to roll into your app. The platform has 30+ templates catering to many business domains.
These are the pre-designed prototype frames used in app development instead of creating one from scratch, which is really time-consuming. Since no-code app development advocates faster time-to-market and rapid app development, templates are a great tool to achieve this goal.
4. Default UI kit
This is one of the new features of new Maker V3. It provides 5 main types of features that are prebuilt and only the content needs to be edited.
You get UI Kits for: Board, Map, Chat, Calendar and Stamp. You can choose from these default UI Kits, edit them or create from scratch on your own too.
5. Permission setting
This is also a new feature of the latest V3 Maker. These new menu settings enable app developers to set permissions for the particular menu. The menu will be visible only to the one for whom it’s enabled for.
You get 3 options: Full disclosure, Permission Group Disclosure and Private.
You can also hide a menu from all app users by simply setting the menu exposure to Hiding.
After knowing about the amazing Swing2App prototypes, Mobile UI Kits and easy edit features provided by Swing2app, we believe we have established a deep understanding how to utilise Swing2App no-code app-maker to take your business to the next level.
Isn’t this an amazing deal for businesses and especially startups with the dynamic and catalytic idea but limited capital?
So, if you are willing to create a professional-looking app all by yourself just go to: