Would you like to create an app for your business after you have created your website?
You’ve come to the right place!
You might have an idea of how time-consuming or expensive it might be to outsource or code a website yourself after creating one.
In addition, if you want to make an app as well, you may be wondering how much your budget should be.
You don’t need to worry, Swing2App is a no-code Web to app converter that will save you time and money.
Why should you use Swing2App Web to app converter? What is the process to convert a website into an app? Is no-code website to app tools efficient?
Let’s explore these and other questions. You’ll learn about all this and why Swing2App website to app maker might be right for you.
Web to app: Why should you convert website to an app?
It is now essential to convert website to an app if you want to have an edge over your competitors.
There’s an app for everything these days. Websites are embracing apps at an increasing rate. The reason you’re reading this is that you’re thinking to convert your website into a mobile app.
Consumers today expect fast loading and browsing experiences. Users will lose interest if the loading process takes too long. As you can see from the Progressive Web Apps (PWA) statistics:
The Starbucks Progressive Web App (PWA) resulted in 2x daily active users.
AliExpress sales conversions increased by 84% on iOS.
Telegram, an instant messaging app, was launched in 2013. With the company’s Progressive Web App (PWA), the number of users’ sessions has increased by 50%, as well as the retention rates.
Another reason why you should go web to app is simple your users are there.
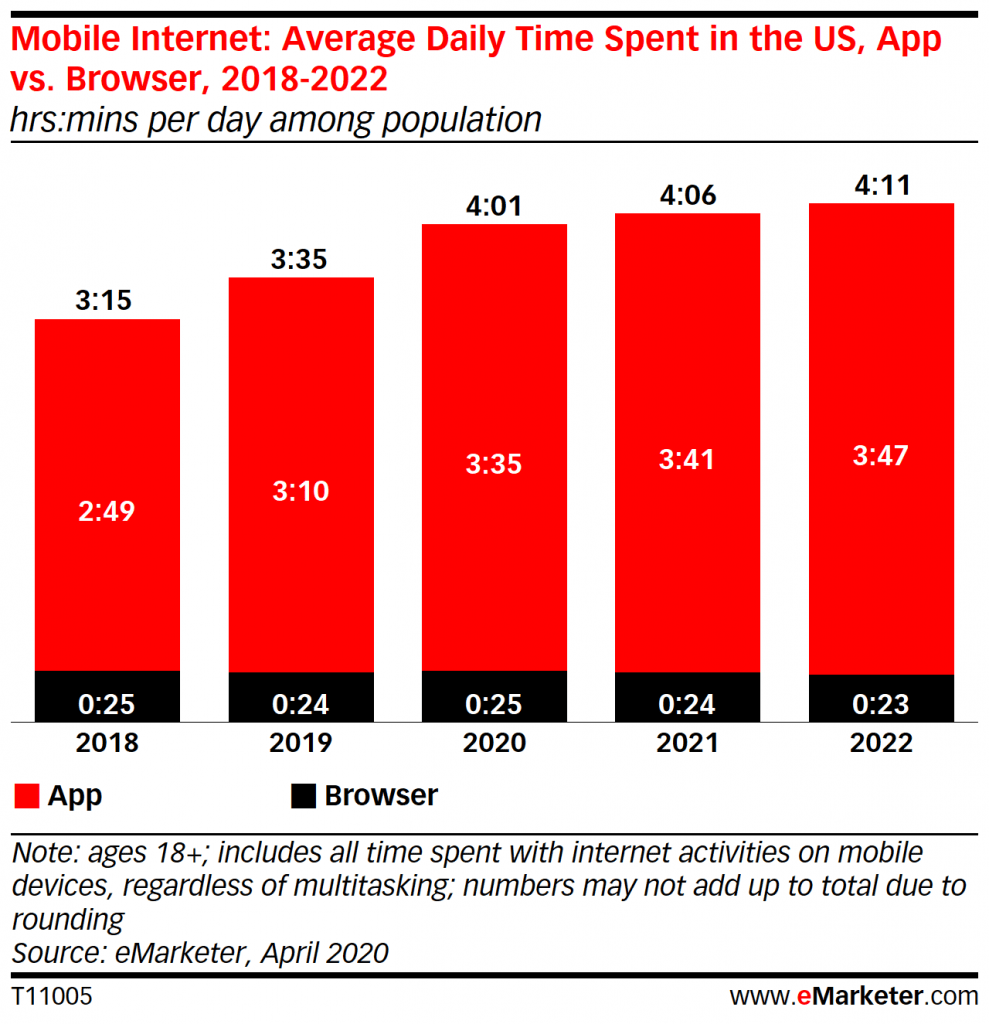
From the above data, it is pretty clear that apps are way beyond the browsers in terms of users. There is no doubt that an app gives you access to a wider audience. It’s obvious that a larger audience means higher conversions, which will translate into higher revenue.
What is Swing2App website to app converter?
Swing2App is a no-code app developing platform where you can create no-code apps from scratch or simply convert your website into an app.
We aim to help all the non-tech entrepreneurs out there to develop no-code apps that don’t need coding at all.
Further, read “Why Swing2app Website to App Converter Is A Game Changer For U?”
Now you must be thinking about how you can create an app without a single line of code!
Here’s how you can convert your website into an app.
Convert website to iOS app or Android app or both?
Both operating systems are functionally similar, and you may host your software on any platform if you like. The biggest difference between the two systems, aside from the number of users, is the coding format. APK files are used by Android, while .ipa files are used by iOS.
You may make your app available on both Android and iOS, but you will have to develop two unique applications – even if they have the same functionality. Creating one app alone is such a challenging task imagine creating two!
However, if you convert your website to an app with Swing2App no-code web to app builder then you don’t need to worry about that. Swing2App creates apps suitable for both iOS and Android devices at the same time, no additional work is needed to create them separately. Furthermore, the entire process is codeless and hence quite easy.
Now let’ ‘s delve into the process of web to app conversion with Swing2App no-code website to app converter.
How to convert website to an app with Swing2App
The process of converting website to an app with Swing2App no –code web to app builder was easy and has now been made even easier with the new V3 MAKER.
We have added new functionalities and changed the UI to help our users to create the best quality apps by converting website to an app without any coding.
Follow the steps to create and publish your app in less than a week!
Step-wise guide to convert website to an app in Swing2App:
Step1 BASIC:
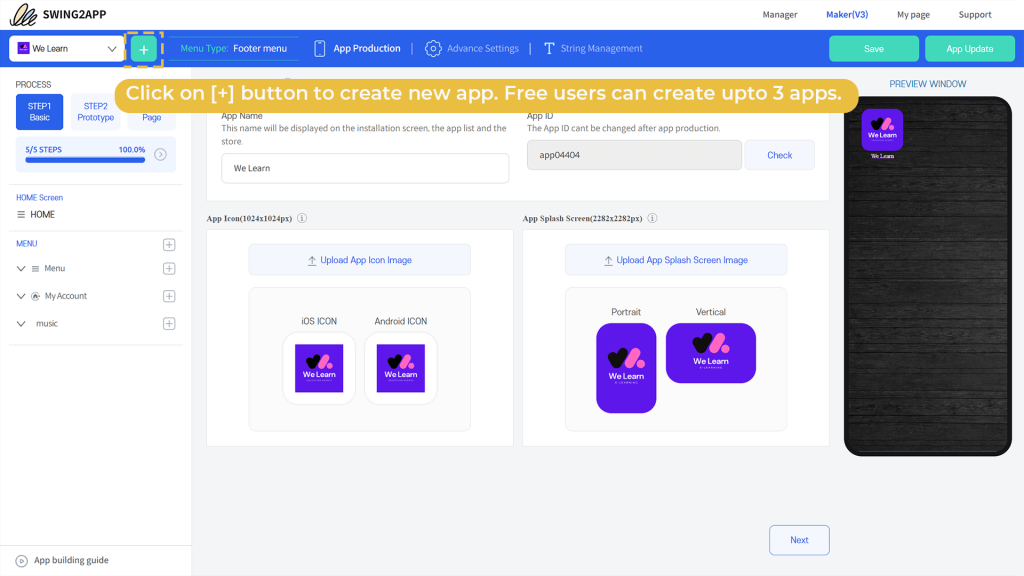
Click on the “+” icon to create a new application.
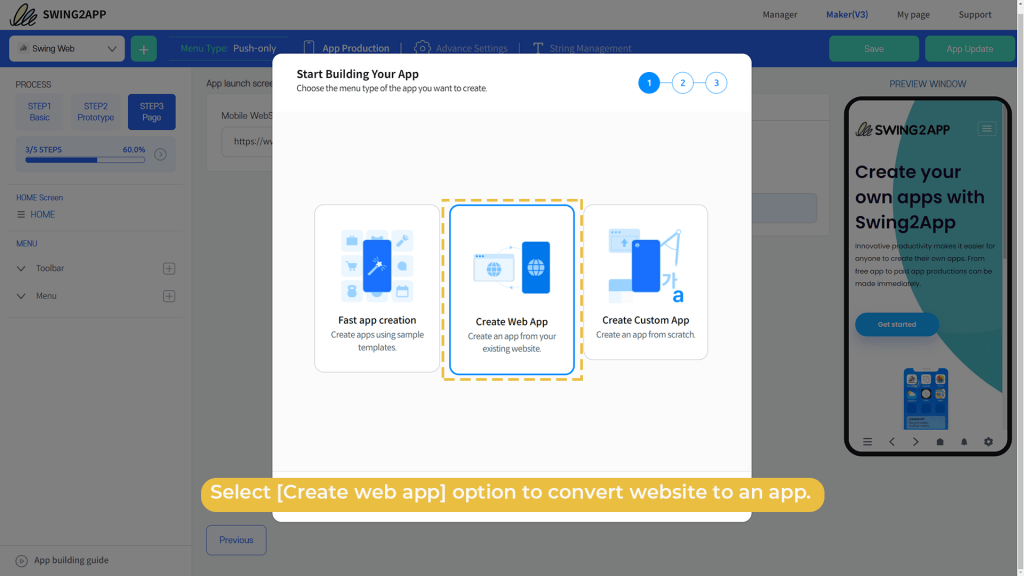
A dialogue box will pop up where you need to select “create web app” as you want to convert website to an app. Then click on next.
Here enter your URL of your website to convert website to an app.
Then you have to choose whether you want to enable push notifications or not.
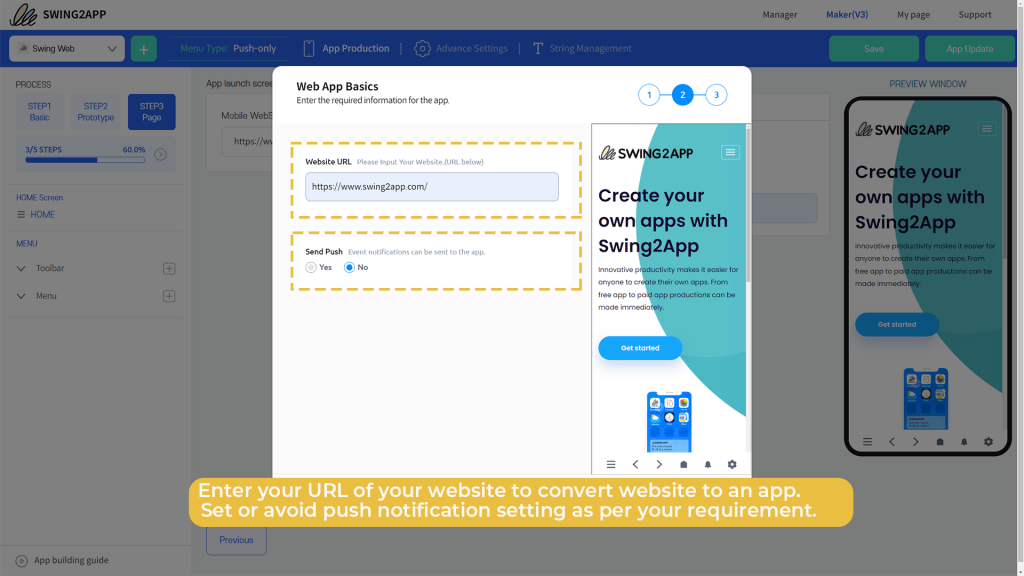
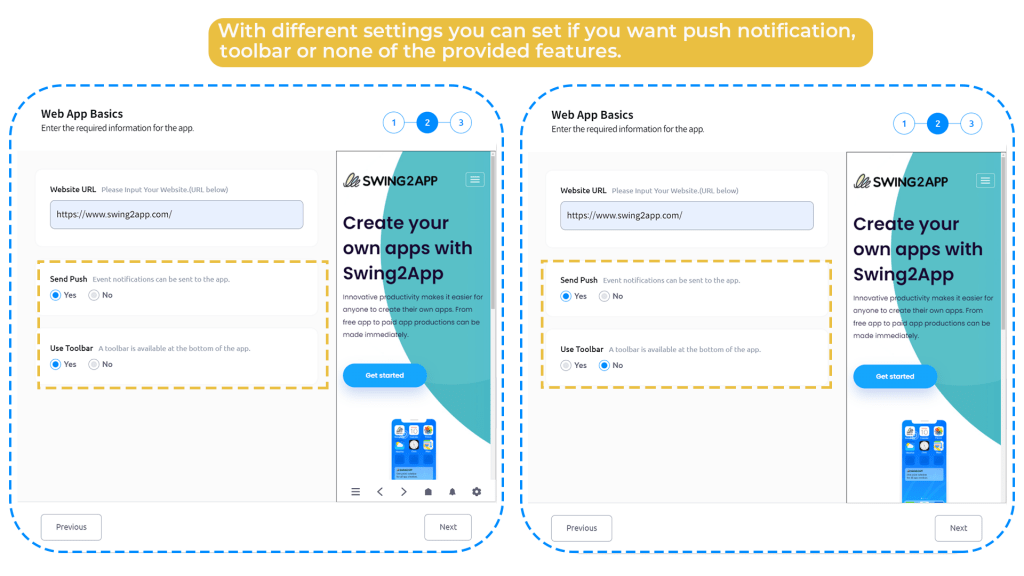
If you choose “yes” that you want to enable push notifications, then means you can send push notifications to your app users about any information or new events. Here you can also choose whether you want a toolbar at the bottom of your app or not.
The next step is to assign a unique name to your app in the “App name” and upload “App Icon” as well as “App splash screen”.
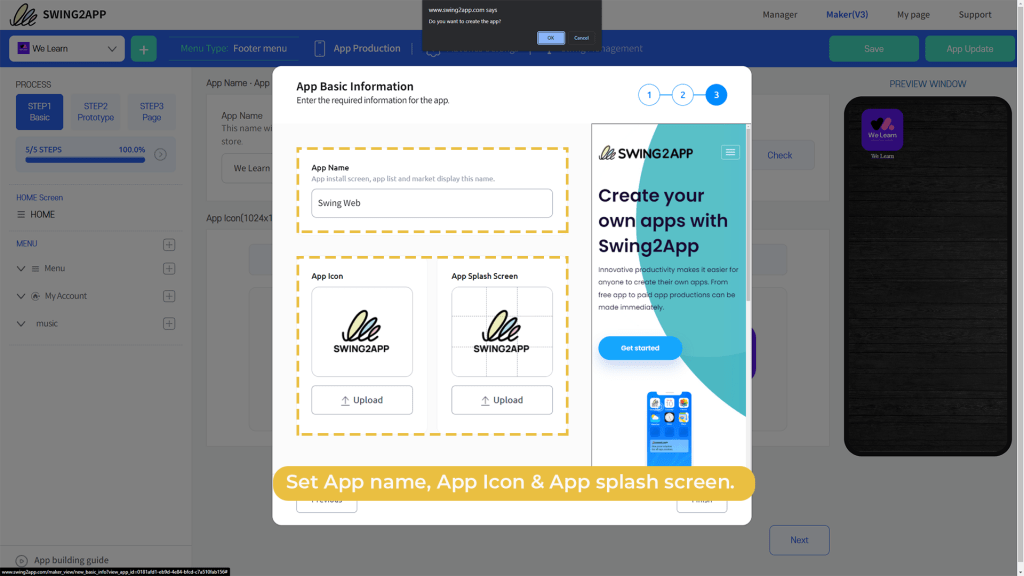
Having done all this you have already created 80% of the BASIC Step1.
Then Swing2App will show you the further steps that you need to follow, you can view these steps again anytime you want by simply clicking on “App Building Guide”
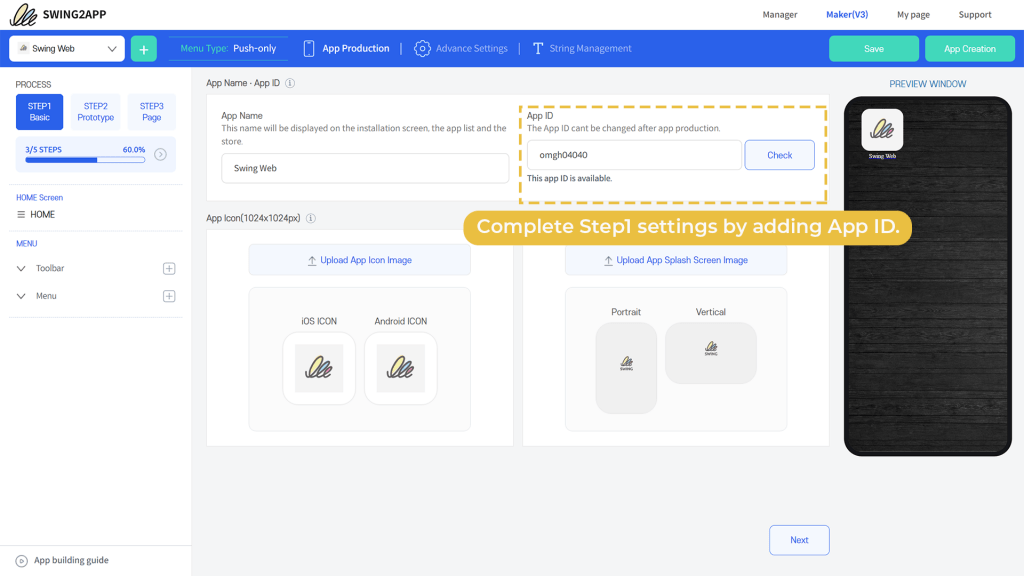
Finally, you need to enter a unique “App ID” alphanumeric character, with this the Step 1 BACIS is completed.
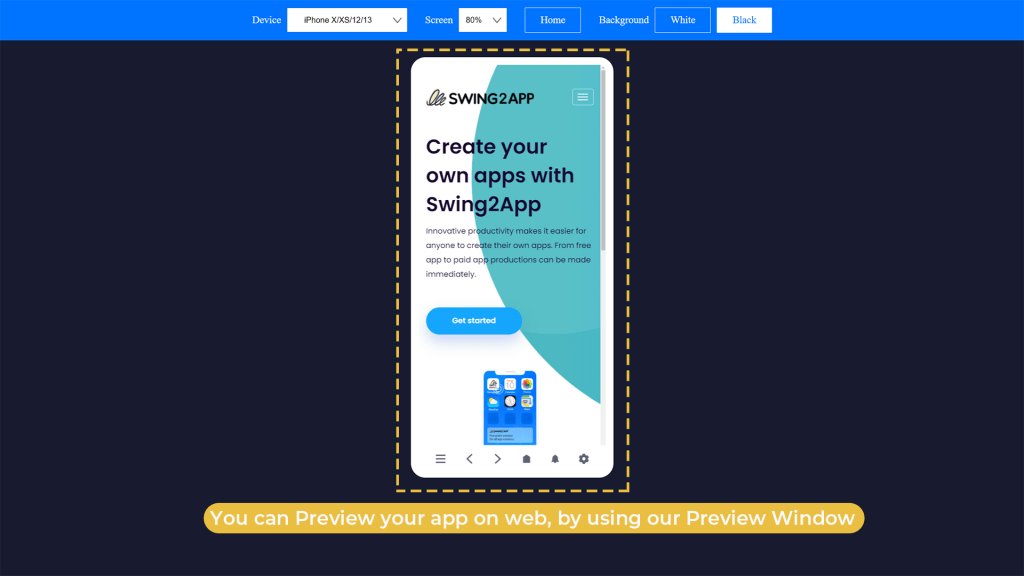
What is Preview Window?
Preview Window is your constant companion while creating your app. It is like a virtual screen where you can visually see all the changes that you make in your app in real-time.
Real-time means that you can see the changes that you make in your app simultaneously as you make them. Whether you change the theme colour or edit a menu every change is monitored in real-time.
This enables you to create your app visually er than just selecting options and waiting to see the results in the end. Anytime you feel that your app design is not looking good you can change it at the same instance, this saves a lot of time.
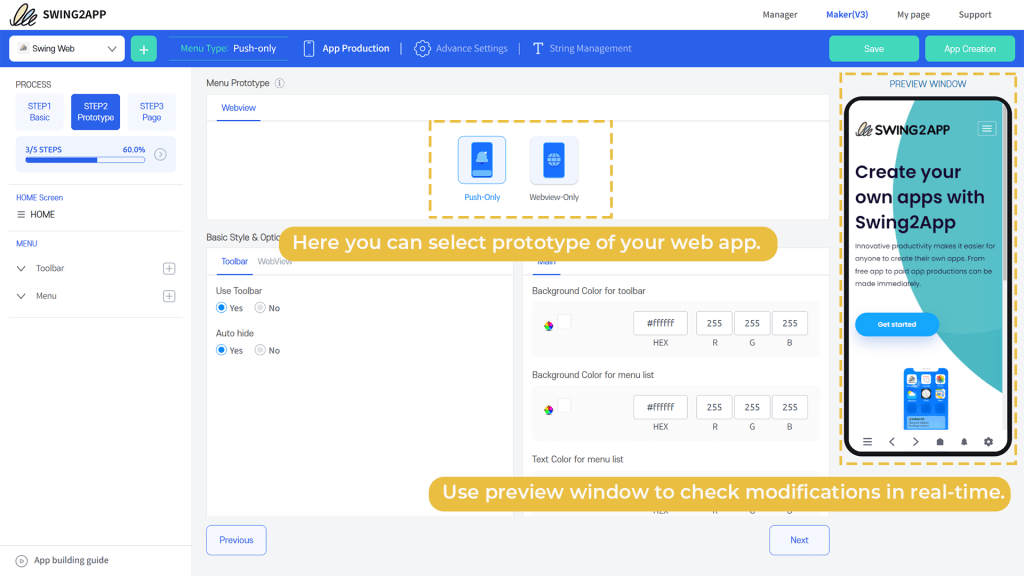
Step 2 PROTOTYPE:
For converting your website into an application, Swing2App provides 2 types of prototypes. You have to choose either of them depending upon your target and needs.
1. Push only: this is a web app that is created by linking a website as it is with an app.
Push styles are styles that move your mobile website to an app. The push-only prototype design gives you the freedom to send push, and the bottom of the screen category menu makes it easy to move around the app.
If you enter the website (homepage) URL without any other production function, it will be linked to the app and produced, and a push toolbar will be created at the bottom of the app.
Additionally, the push app can send push messages to users who have installed the app. Unlimited pushes are also sent.
2. WebView: The web view is also a method of moving a website to an app in the same way as Push. The main difference is that the app does not create a separate menu or icon and does not send push. Web app users can also send a push notification the only difference is that push only can send push notifications within swing2app no 3rd party app/site is required, but for webview users, they need to use One Signal to send push notifications.
If you have a mobile-only site, you can create a mobile-optimized app.
Here we will show you the further steps for the “Push Only” prototype.
Once you select Push Only prototype you can scroll down and further choose:
BASIC STYLE AND OPTIONS: You can select if you want to display a toolbar or not and auto-hide it too.
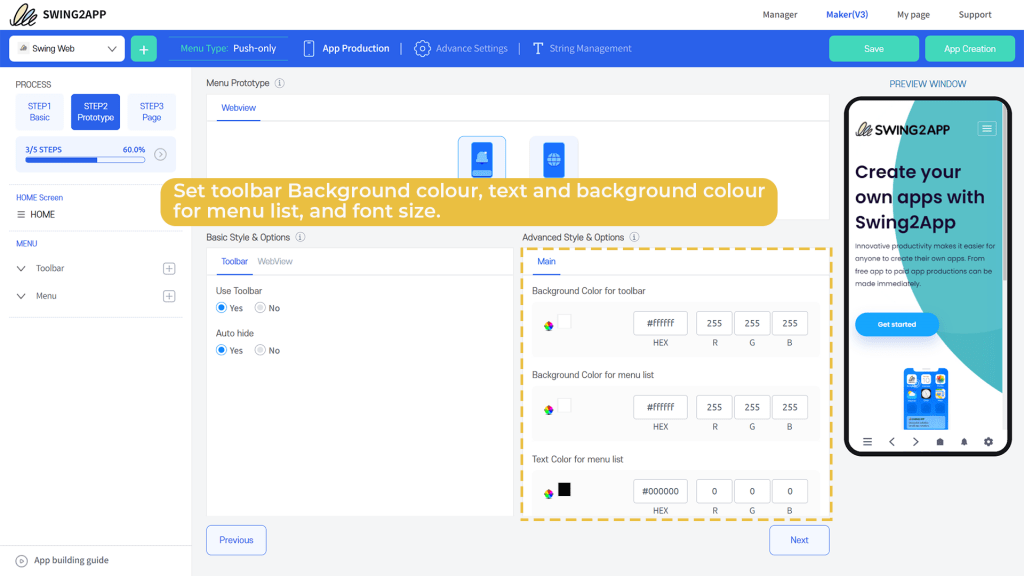
ADVANCED STYLE & OPTIONS: You can set the toolbar Background colour, text and background colour for the menu list, and font size.

STEP 3 PAGE:
In the 3rd step, you get settings for home and menu.
HOME: In ADVANCED URL SETTINGS besides the website, you linked to the app and apply a separate webpage which is displayed at the beginning of app loading.
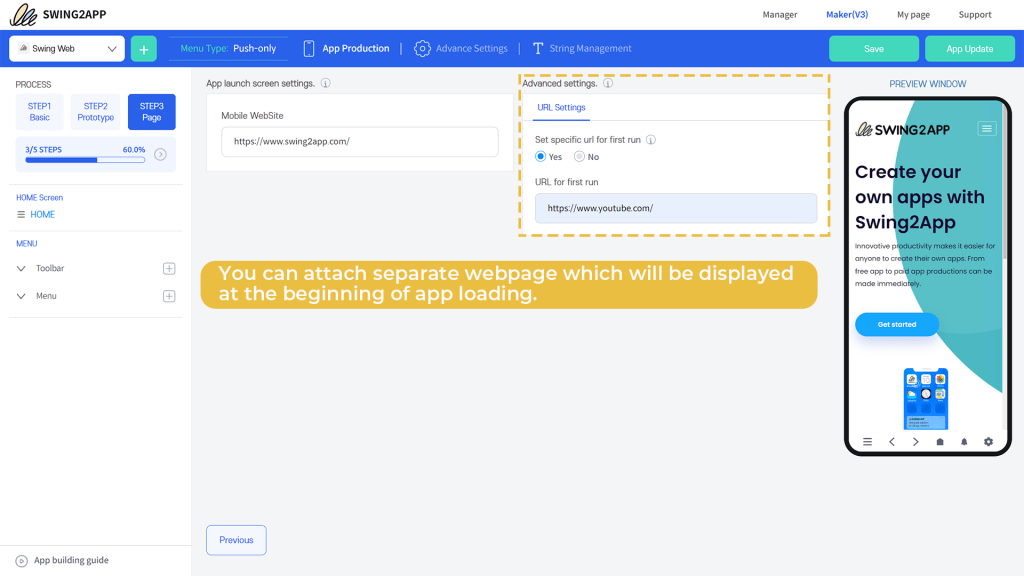
MENU: It has a further 2 categories toolbar and menu.
TOOLBAR: On your main screen you can set icons with respect to features that you want to your users to access.
It has 2 settings:
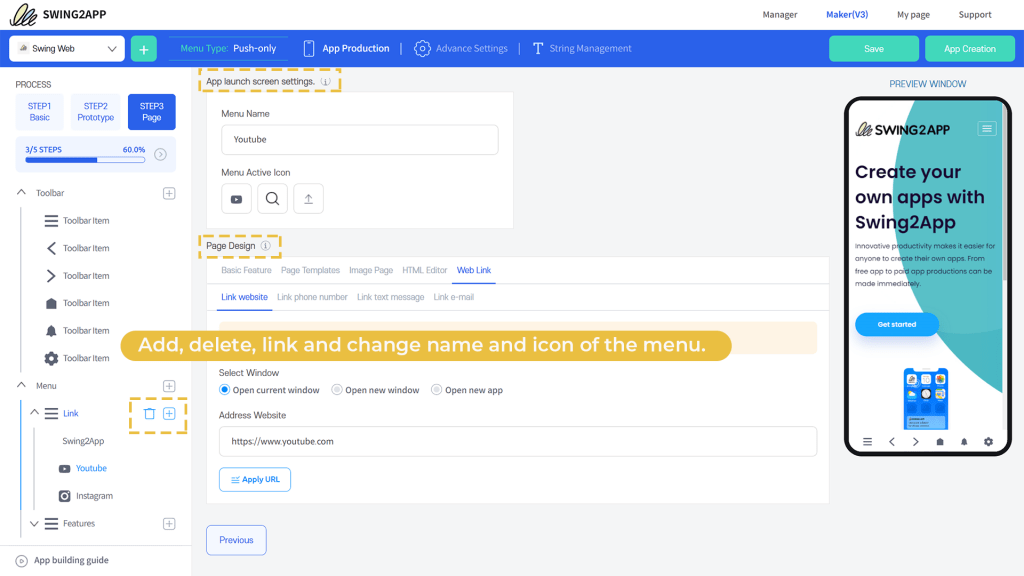
APP LAUNCH SCREEN [Toolbar and menu SETTINGS]: Here you can upload active and inactive menu icons (both must be different) and attach features with them to enable the user to understand on a page which options are active or inactive.
In this New Maker V3, we have also provided the option to customize the toolbar and the menus within it. You can delete any menu, change the icons, and assign different functions or even pages to a particular menu.
This can be done at any time without affecting the overall app UI or functionality and additionally, it is quite easy to use as everything happens right before your eyes in the Preview Window.
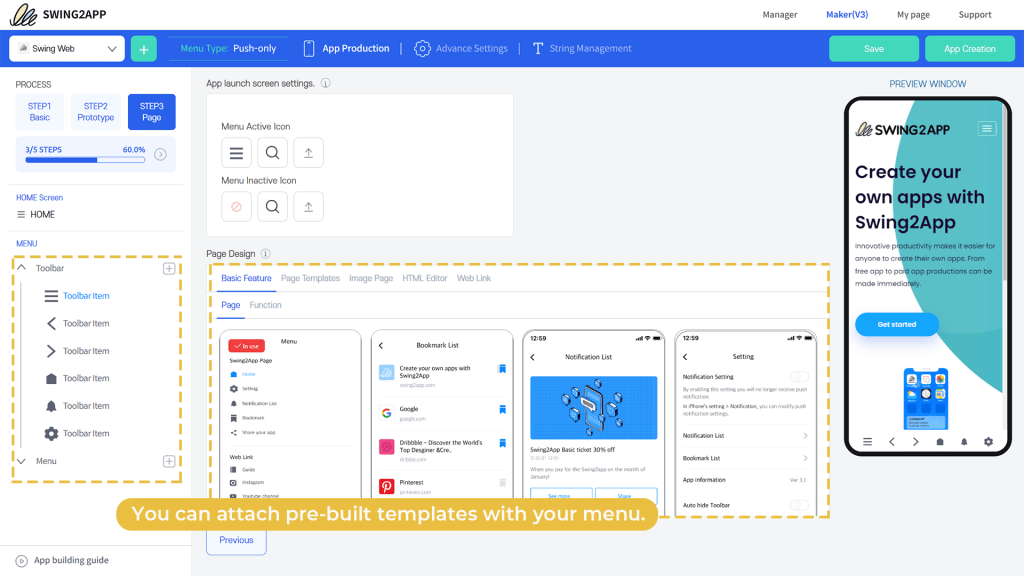
PAGE DESIGN: Here you can select the type of page you want to build for a particular menu within the toolbar. A menu can be assigned different designs such as:
1)Basic feature:
You can link a pre-built template to a menu option.
The one selected by default will show “in-use” inside the red box as in the image below.

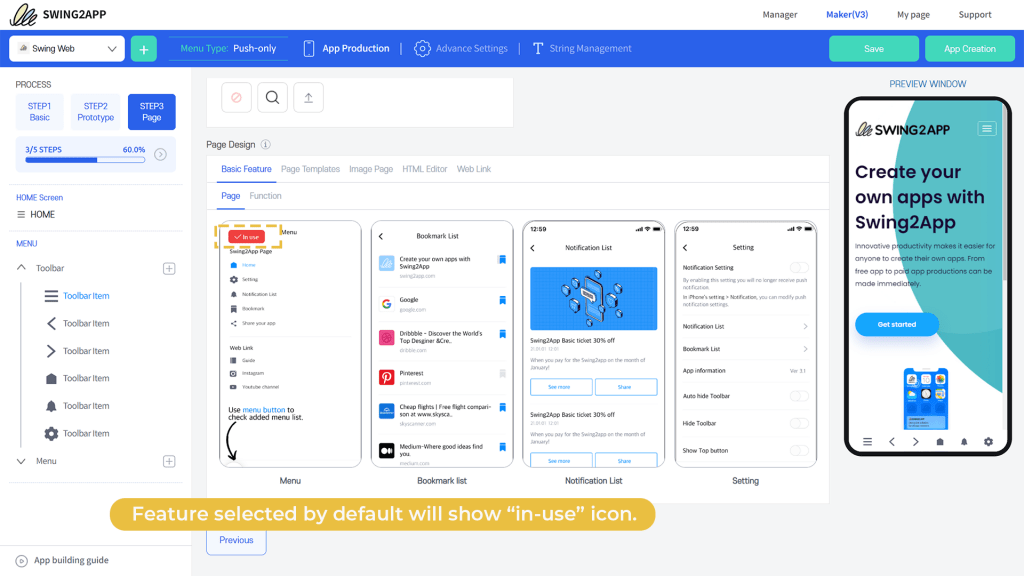
However, you can select or preview various templates available on Swing2App.
There are 4 basic options: Bookmark list, Menu, Notification list, and settings.
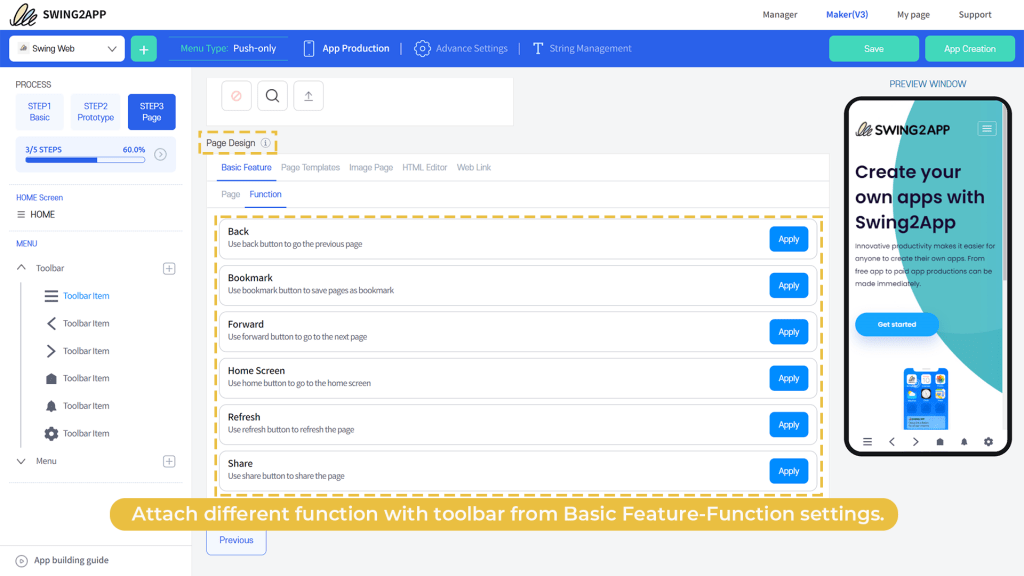
You can also assign any function to a menu from the list available by simply clicking Apply. (One menu= one function.) Functions available are: Back, Forward, Bookmark, Home screen, Refresh, and Share.
Finally, instead of adding pages or functions, you can simply add a “Web Link” that will take your users directly to the website you linked, or phone number, text SMS, or even email.

MENU: Here you can add, delete, and edit names and icons of the menus.
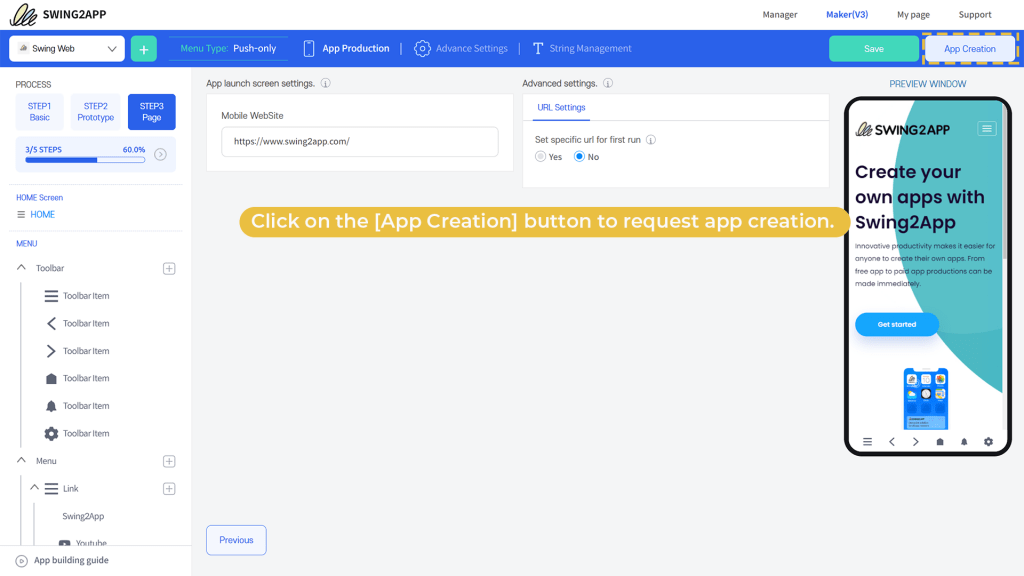
Once you have edited the menus or added the new menus, click on “save” to save your work.
The date and time of saving the app creation will be displayed. Then click on “App Creation” to convert website into an app. With this the 3rd and final step is complete.
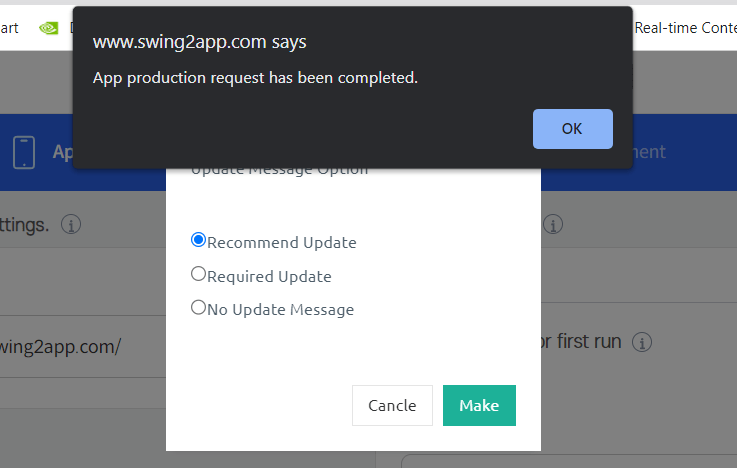
A pop-up will display: Recommend Update and click on Make. Your app production request has been completed message will pop up.

And you will be automatically taken to the Production history page. Here you can preview your app online by clicking on “App Preview”.
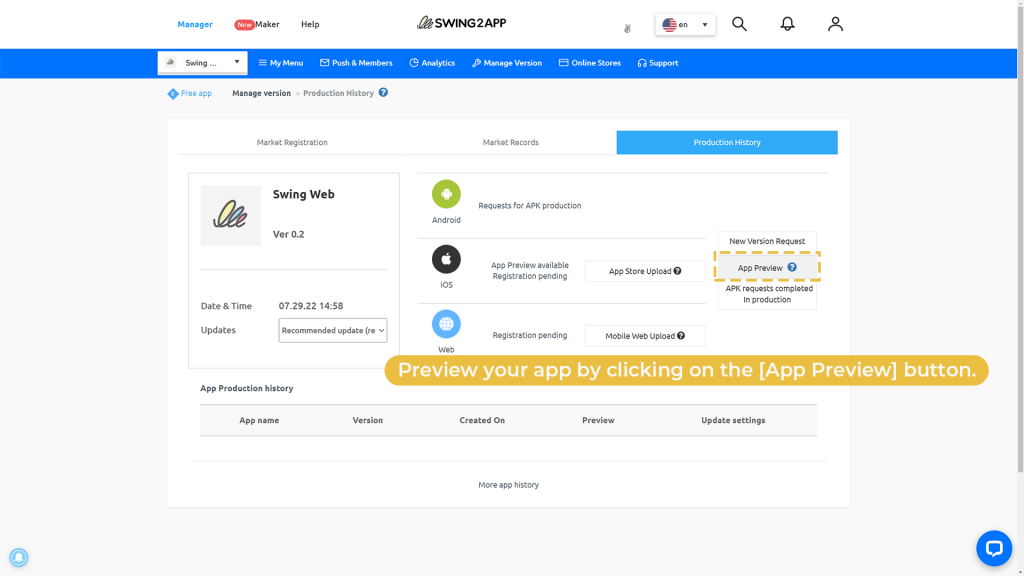
The app preview window will open in a new tab, here you can select the device and check how your app will appear on that particular device.
However, the app can be downloaded and checked directly ONLY on Android devices but not on iOS devices.
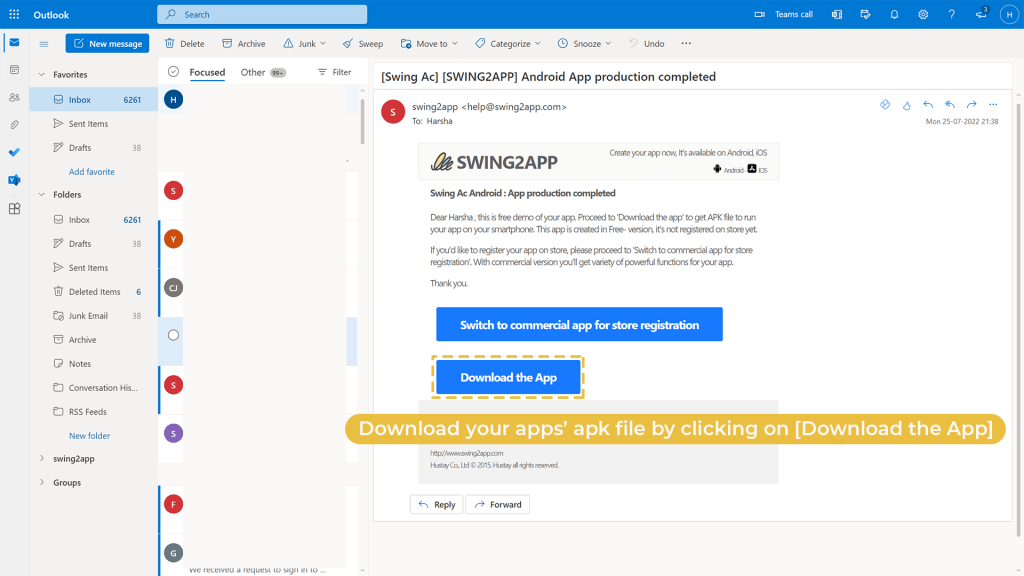
As soon as your app production is completed you will receive an email on your registered mailing address, where you can simply click on “Download the App” and preview it on your Android device.
Why Swing2App is best to convert website into an app?
Since you now know the entire process for converting website into app with Swing2App no-code web to app converter, it is quite clear that the entire process is quite easy.
You get so many options with Swing2App which if you code yourself will take several months. However, Swing2App no-code website to app converter makes everything looks like a piece of cake.
With the toolbar feature alone, you get so many options and settings which make the task of app creation quite simple.
Moreover, the entire concept of converting website to app seems like climbing a mountain however with Swing2App no-code web to app converter the time to create an app gets reduced to a week rather than several months.
By using Swing2App, you have the ease and joy of creating an app on your own while maintaining your creativity.
How to publish your app on APPSTORE OR GOOGLE PLAY STORE?
Swing2App no-code web to app builder is not just limited to converting your website into an app but beyond that. It also includes app publishing on both Appstore and Google Play store.
Though the entire process of converting website into an app is totally free, however, you need to pay when you are ready to publish your app.
Swing2App web to app converter is not only time efficient but also cost efficient too. We charge only one-time payment that lasts a lifetime, that is there is no subscription policy where if you skip your payment your app will get disabled on the stores.
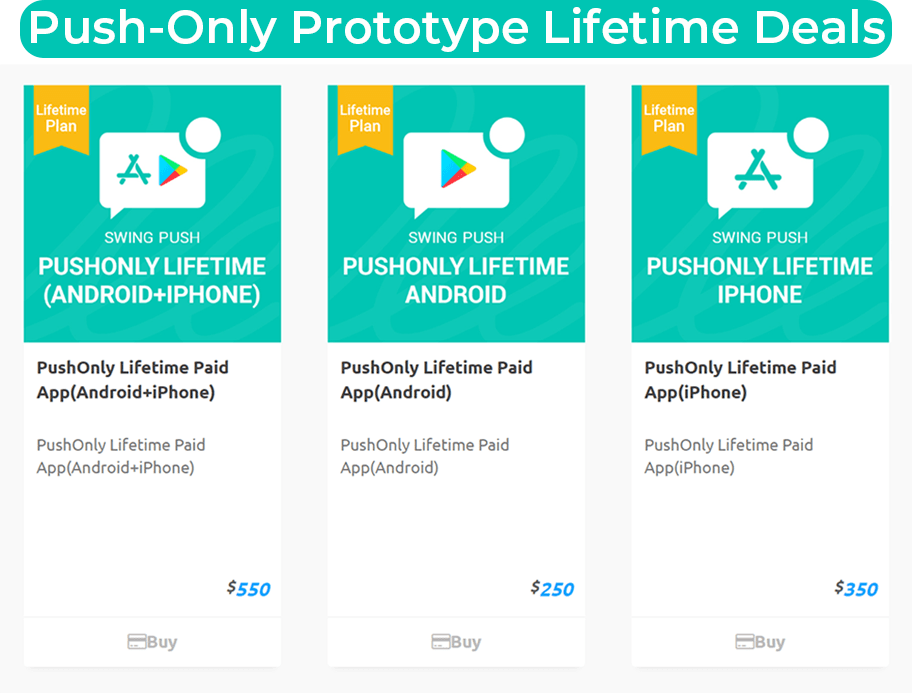
Checkout our Push only plans:
| Lifetime plan | Store upload ticket | Total | |
| Both iOS & Android | $550 | $30($20+$10) | $580 one time |
| IOS only | $350 | $20 | $370 one time |
| Android only | $250 | $10 | $260 one time |
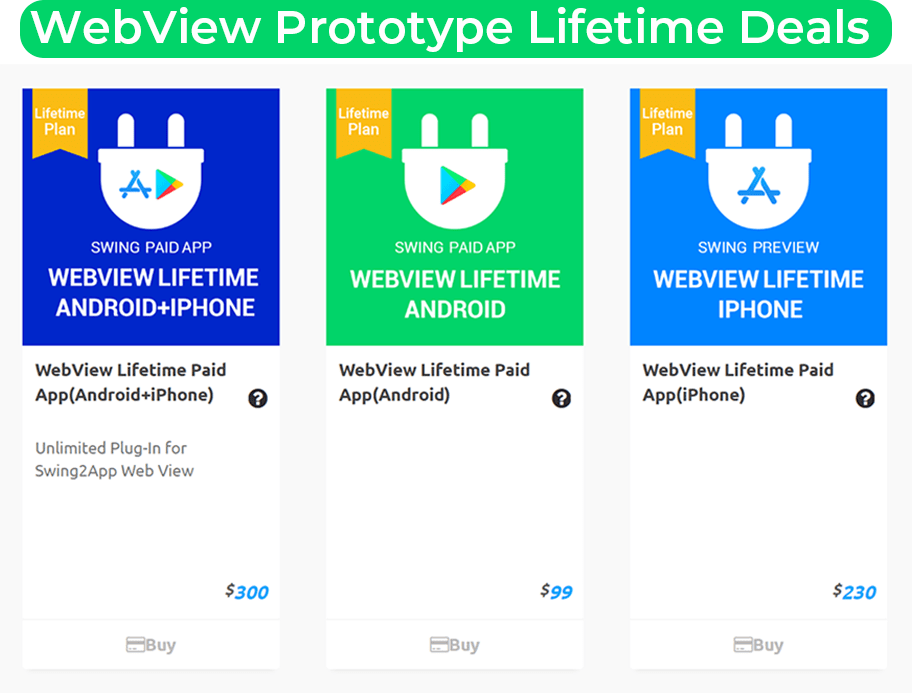
Checkout our Webview plans:
| Lifetime plan | Store upload ticket | Total | |
| Both iOS & Android | $300 | $30($20+$10) | $330 one time |
| IOS only | $230 | $20 | $250 one time |
| Android only | $99 | $10 | $109 one time |