With no-code mobile app builders, creating an app for your own business has become a walk in the park. With so much amazing features to incorporate and tools that make the process whole lot easier, startups are more leaning toward the rapid app development than the traditional way.
One of the crucial or rather practical features is the in-app calendar. If you are creating an enterprise price to streamline your communication between employees and processes, then it goes without saying you will need a calendar with reservation feature to log every meeting and all things related.
Swing2App is a trusted app builder platform offering a myriad of features for users to add to the app and in-app calendar/reservation feature is one. Not just this, but you can also set schedules and add announcements, to name a few.
If you are interested and curious about knowing how you can add this remarkable feature to your then please keep on reading the article.
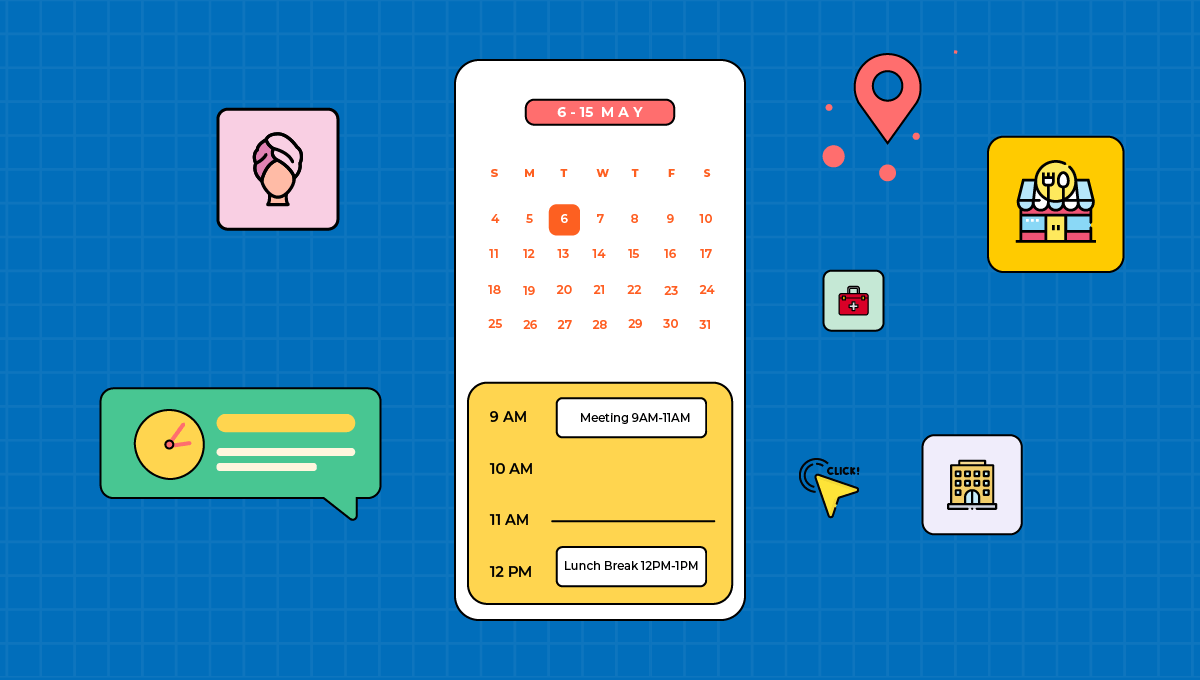
Moreover, this feature can be added to multiple types of app besides an enterprise app such as salon app, gym app, to name a few.
To paint you a clearer picture we will show you the steps to integrate calendar feature in your app with the help of use cases.
App Type: Salon App
Use case:
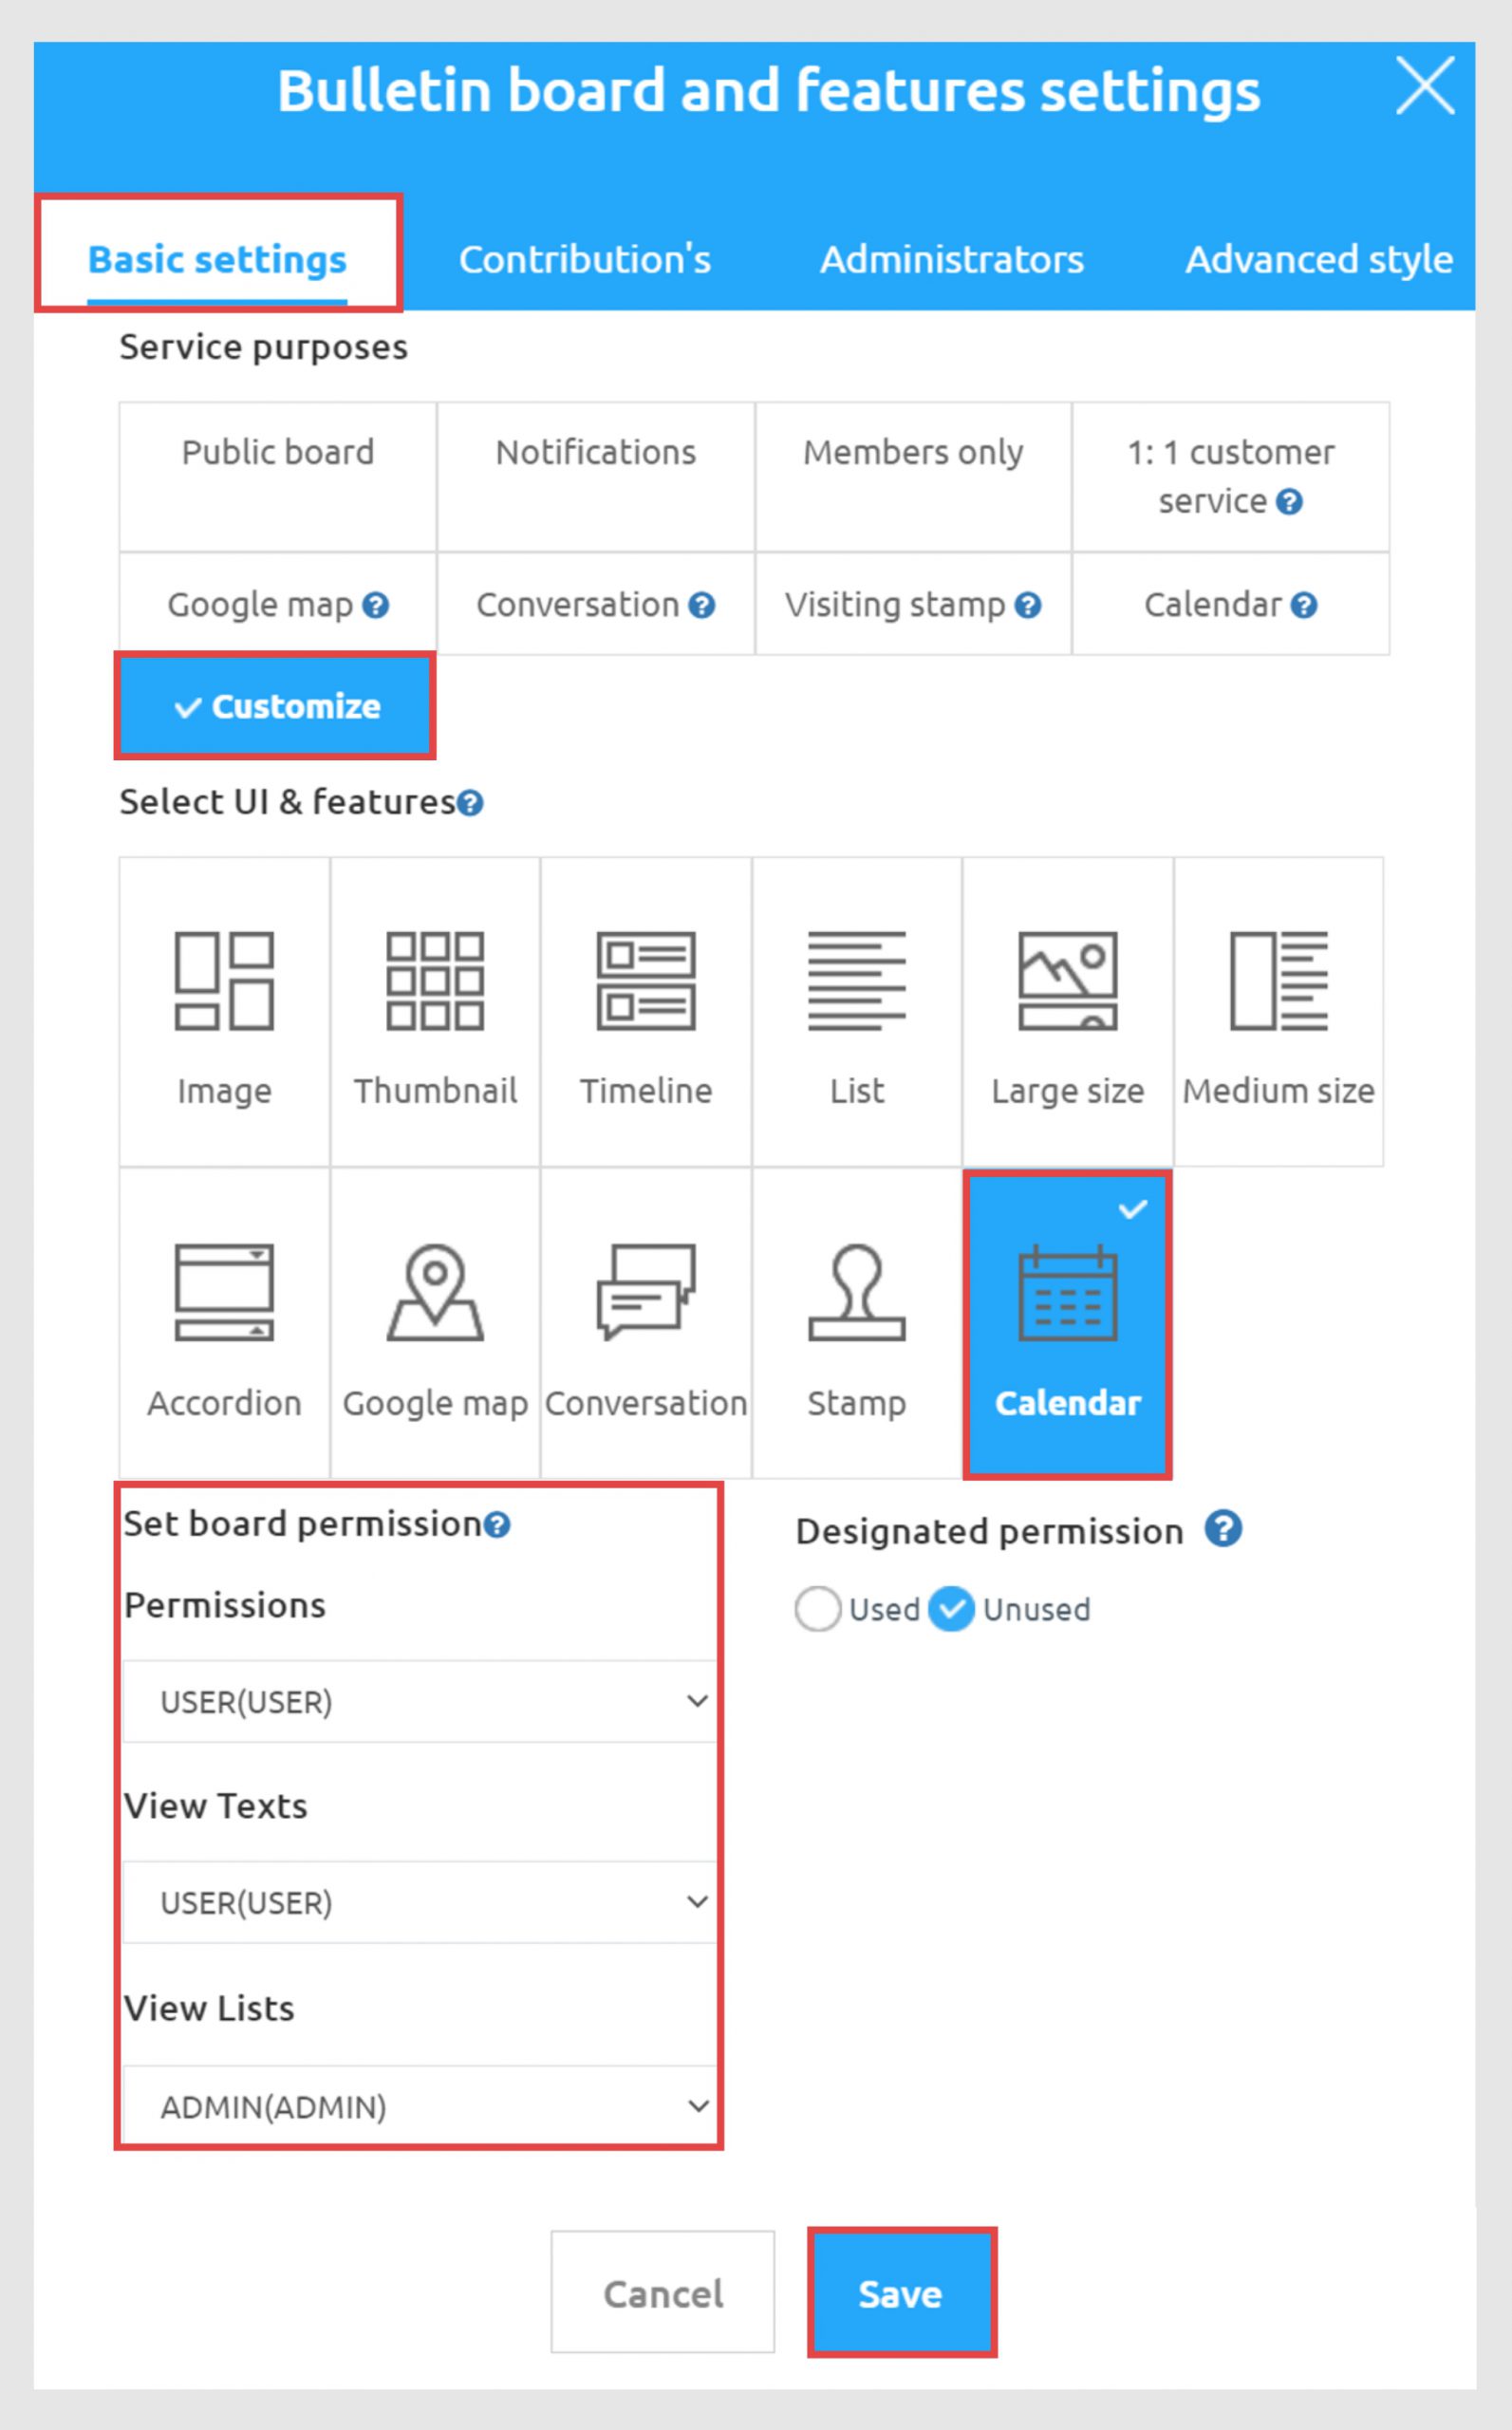
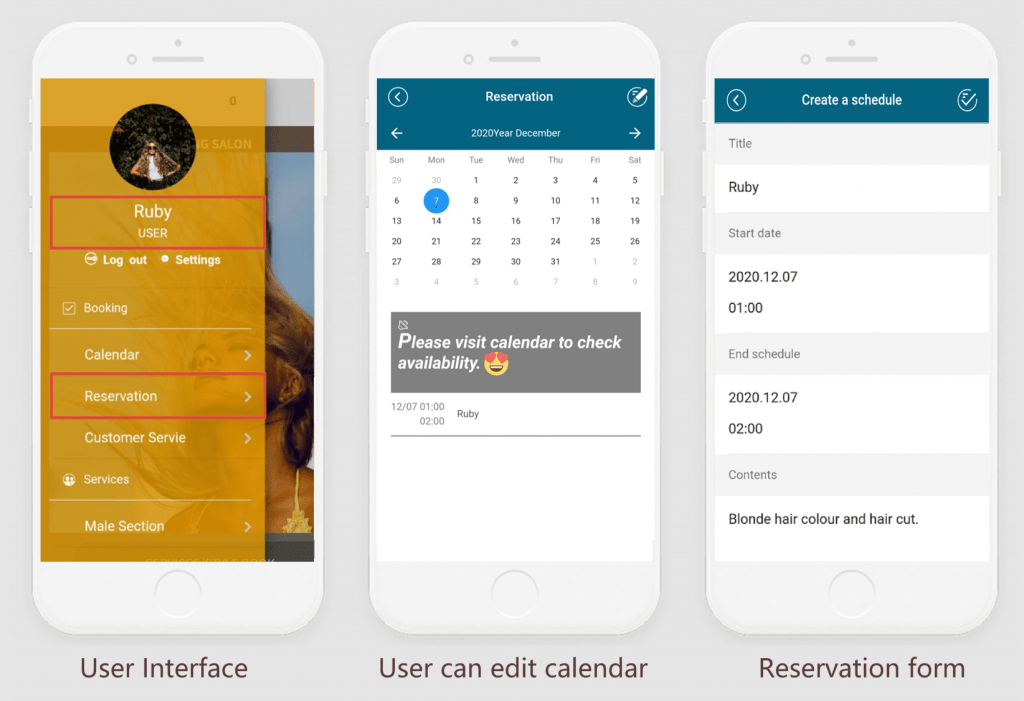
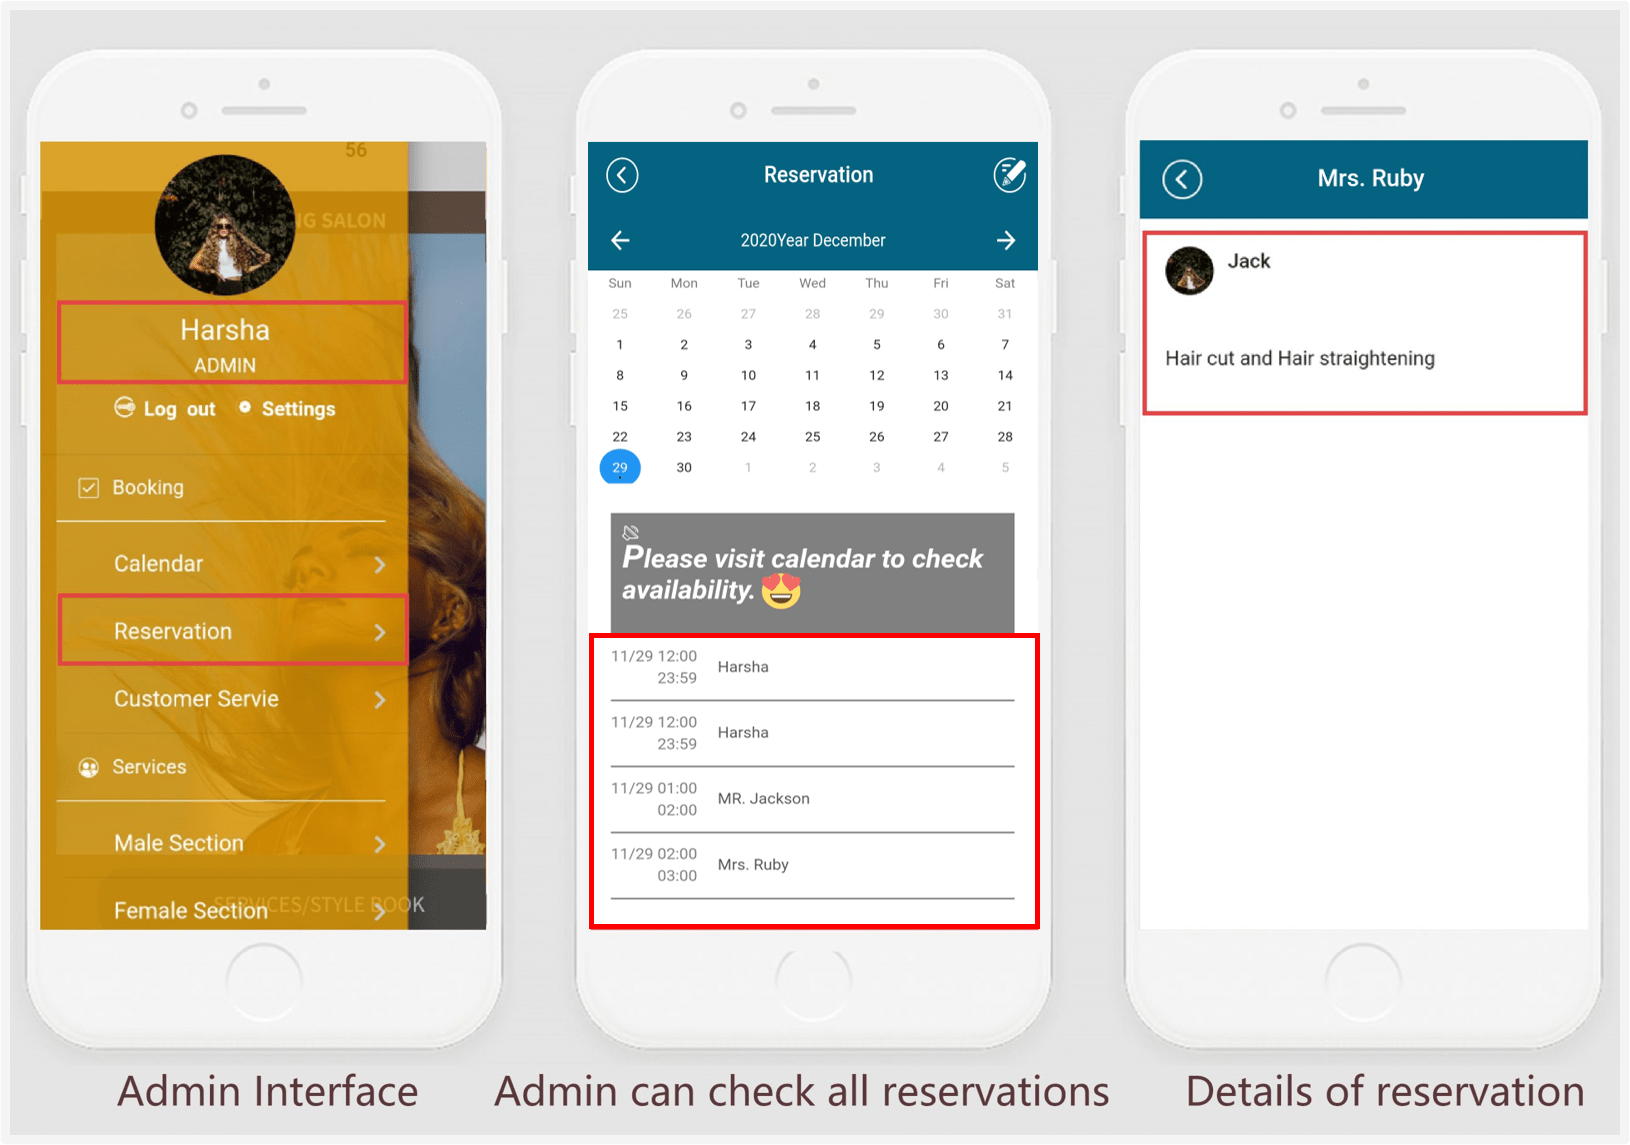
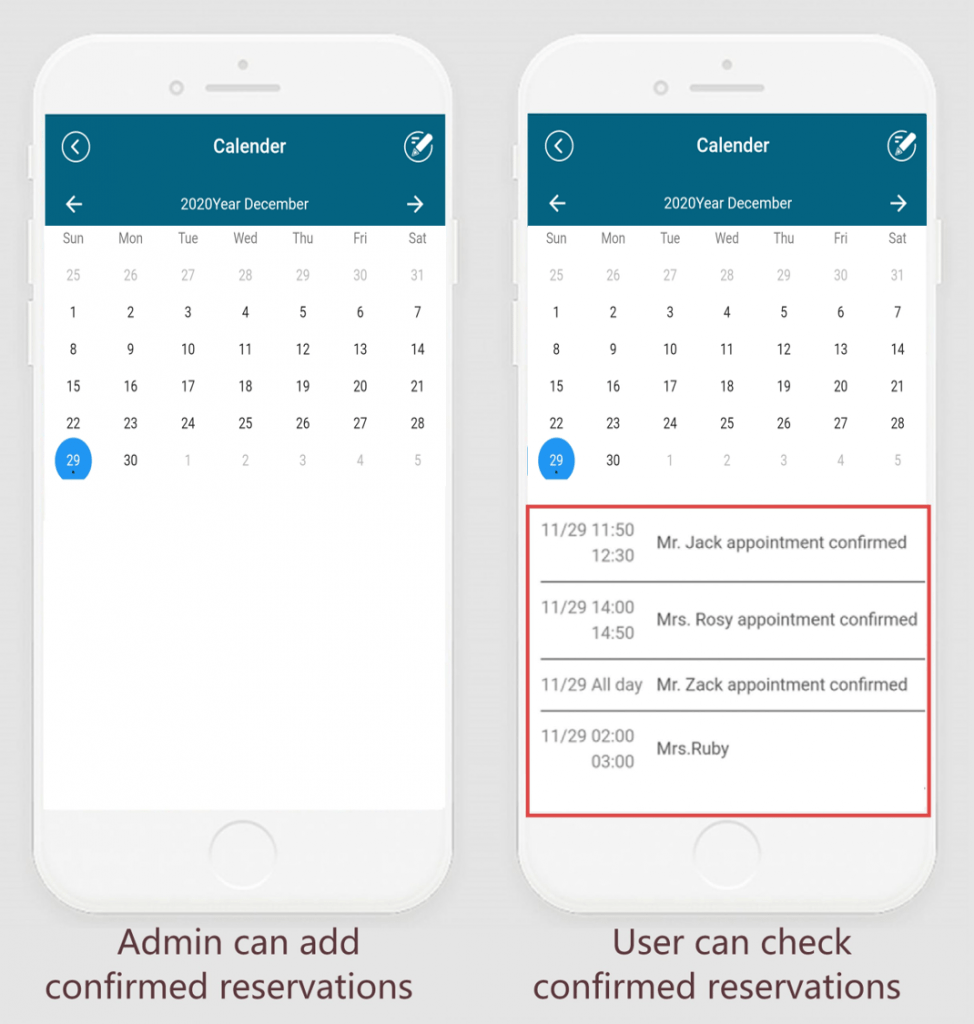
Use calendar as reservation feature. Admin can create 2 calendars, make first calendar as reservation board by giving users access to edit calendar and set reservation. Later, admin can check these reservations and upload final reservation schedule on second calendar (which can be edited by admin only, users can only view it.)
To create calendar reservation feature:
Now integrate created calendar with app
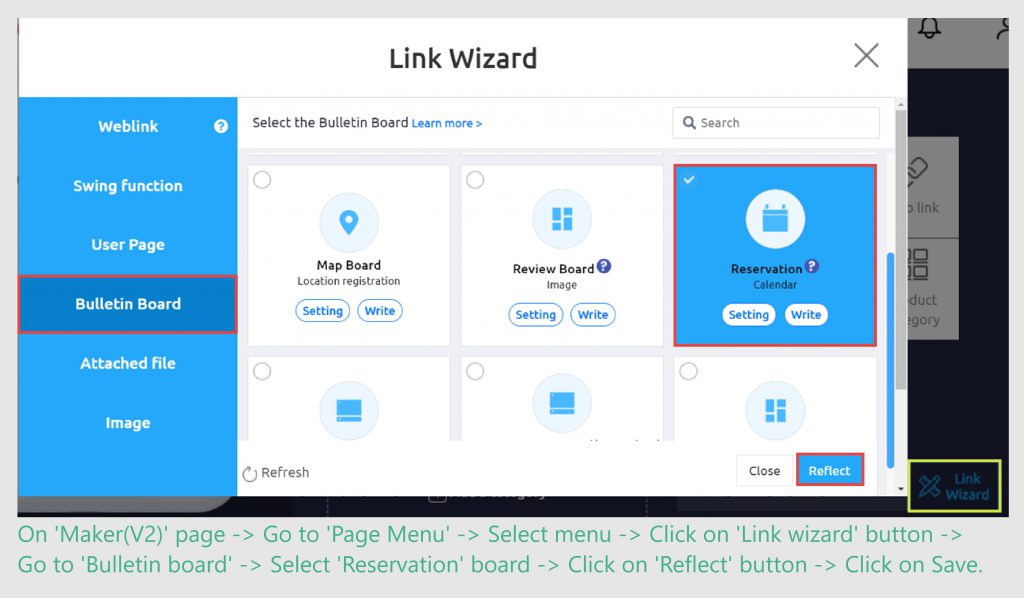
Now you’ve attached reservation calendar feature with your app.
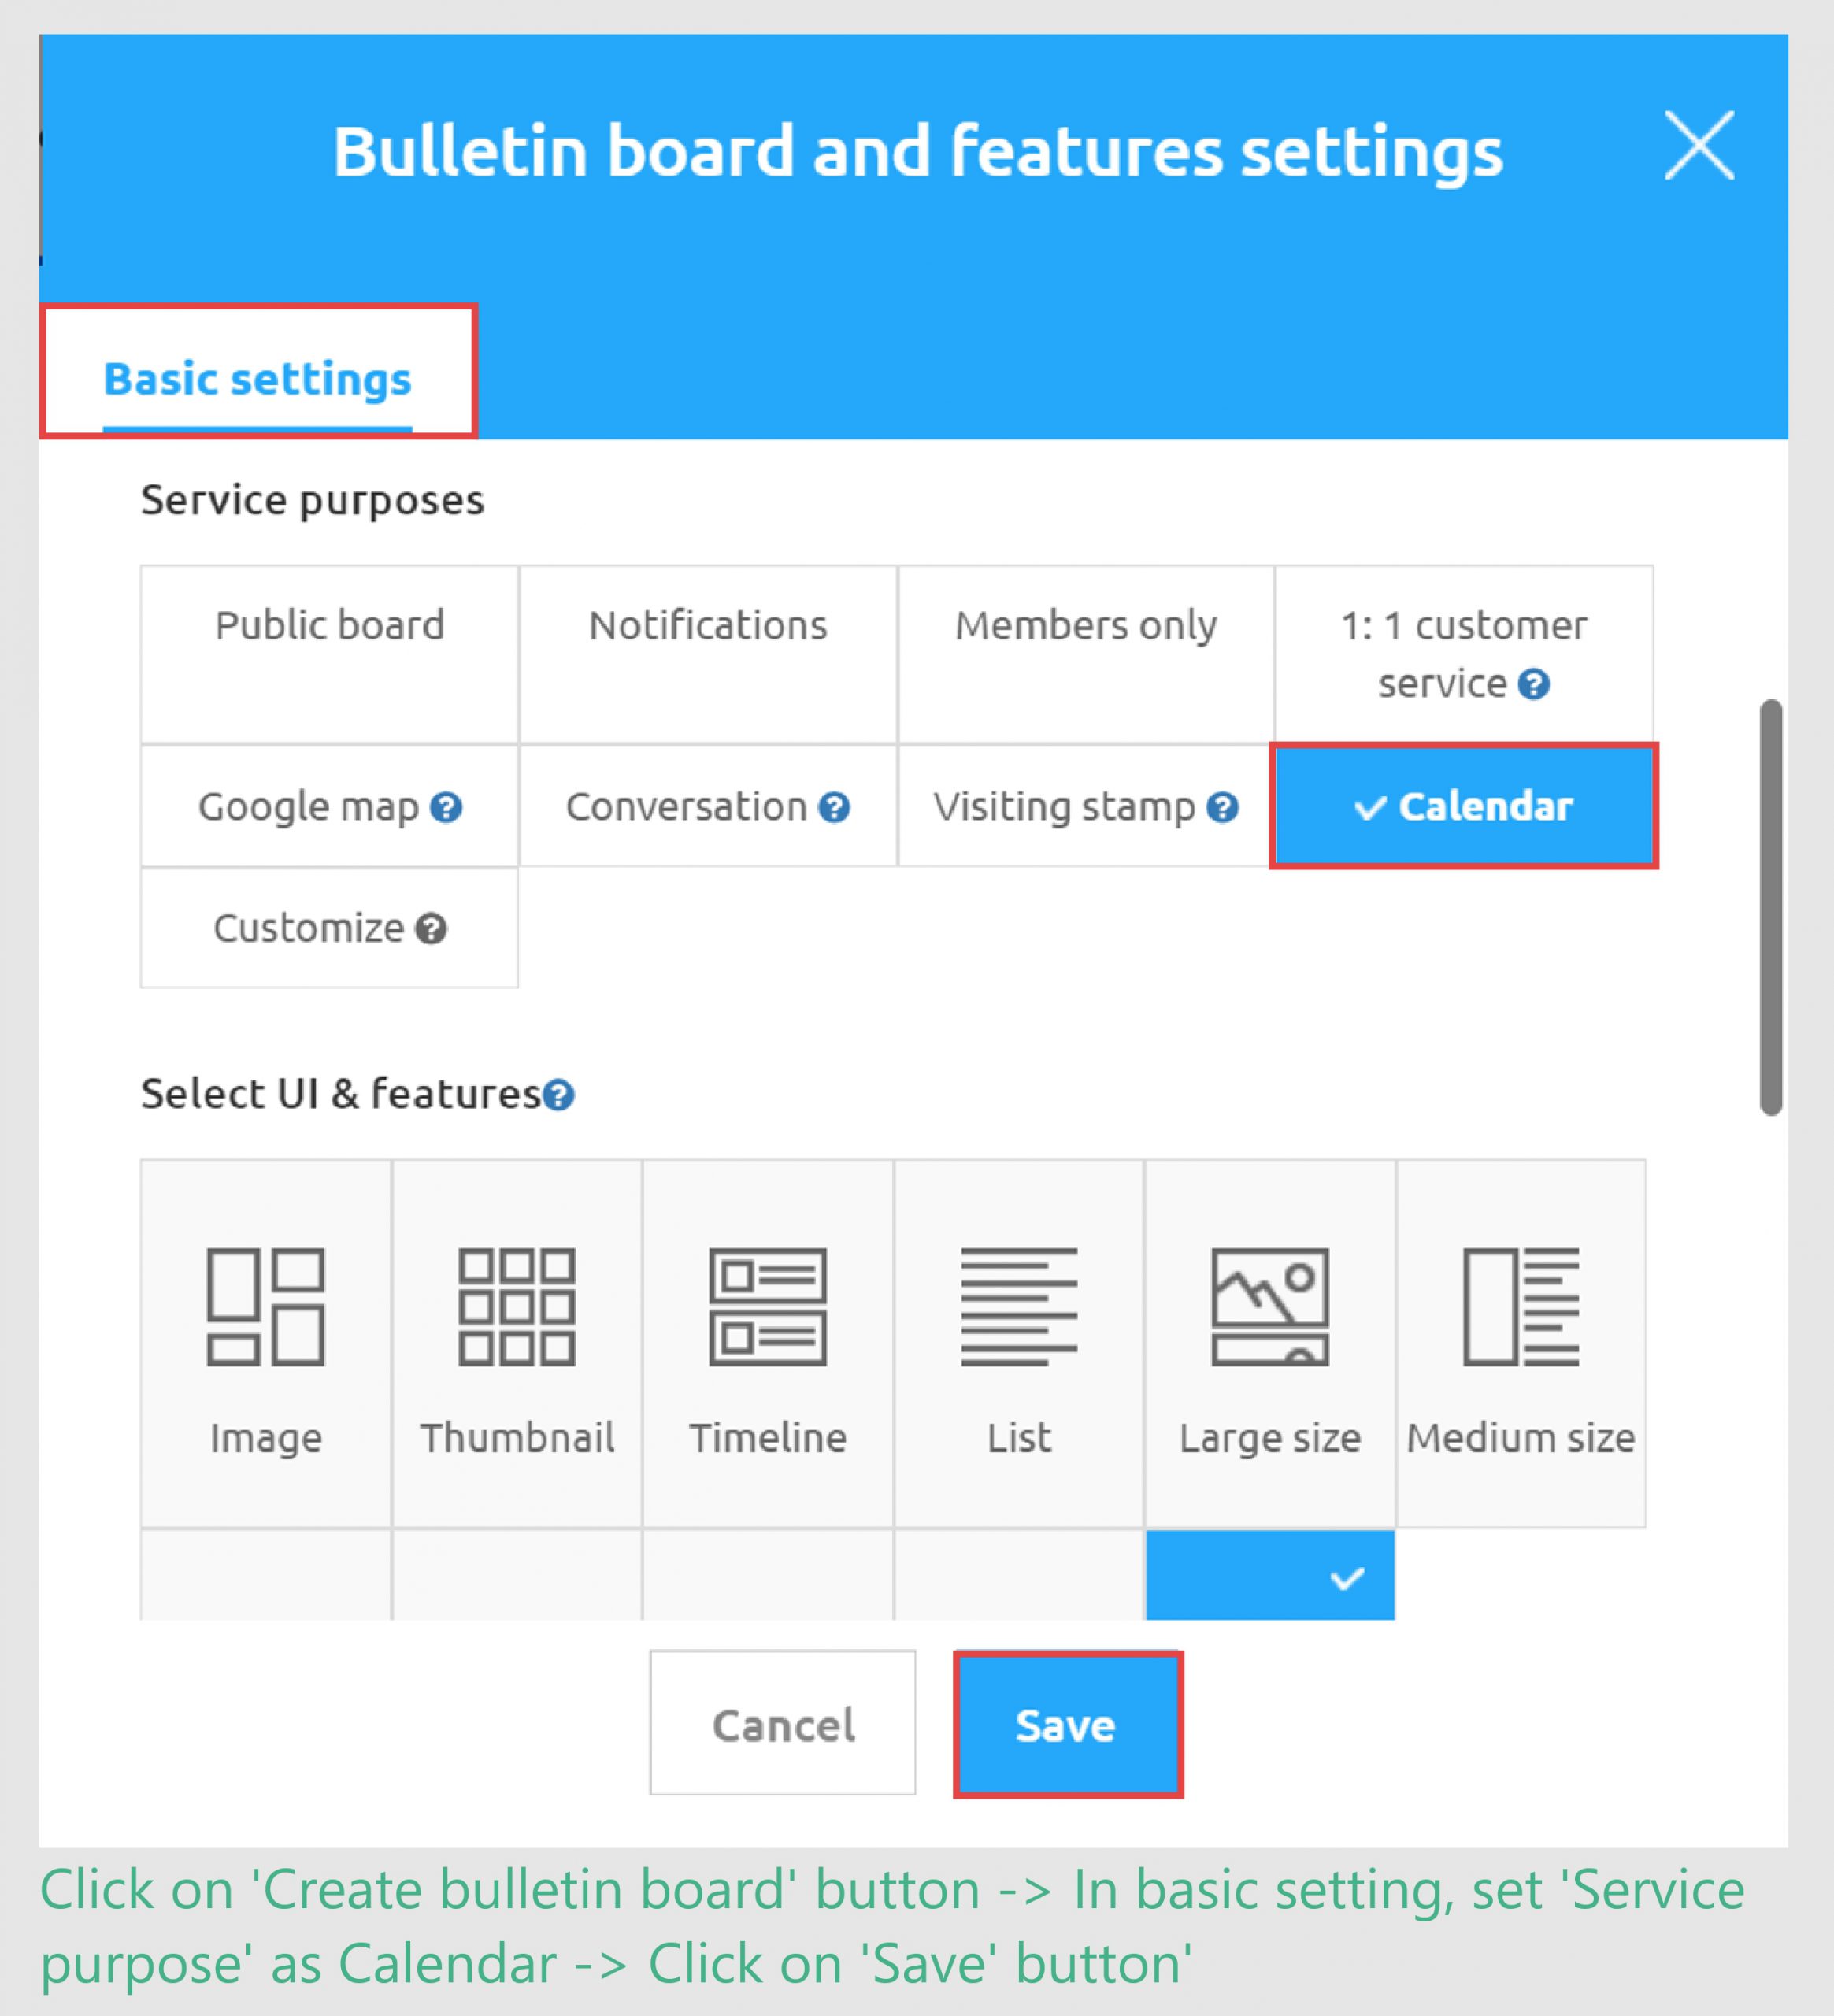
For second Calendar, process is almost same. While creating calendar, keep ‘Service purpose’ settings as ‘Calendar’ and save your second calendar.
Now also integrate this calendar with your app.
*Note:
1. For this use case, you need to create two different calendars, first is for reservation feature and second for calendar feature. 2. Reservation calendar is for users to set reservation; it acts like 1:1 reservation where only admin and user can see set reservation. 3. Second Calendar is for admin to set final daily/weekly reservation after checking Reservation calendar. Only admin can modify this calendar, users can only view it. By checking this, users get information if their reservation got accepted or rejected.
To learn how to create calendar and integrate it your app visit this detailed manual: https://support.swing2app.com/documentation/appmanage/board/calendar/
Lets see how reservation feature will work on user interface (1st reservation calendar)
Lets see how reservation feature works on admin interface (1st reservation calendar)
Lets see how calendar feature works on admin & user interface
App Type: Gym App
Use Case:
- Put weekly or monthly schedule for your customers.
- If admin wants to share some important information with customer, they can set announcement via notification form.
- Now in case gym owner has 2 types of member, VIP and regular members in that case, admin can make separate calendar and with help of permission settings, they can give access permission to VIP members only. By this admin can create 2 different calendars as per its customer requirements.
- Admin can also give special powers to gym trainers by which they can edit calendar to set schedule for their classes.
Let’s start with first use case and learn to create and edit calendar
Use case 1
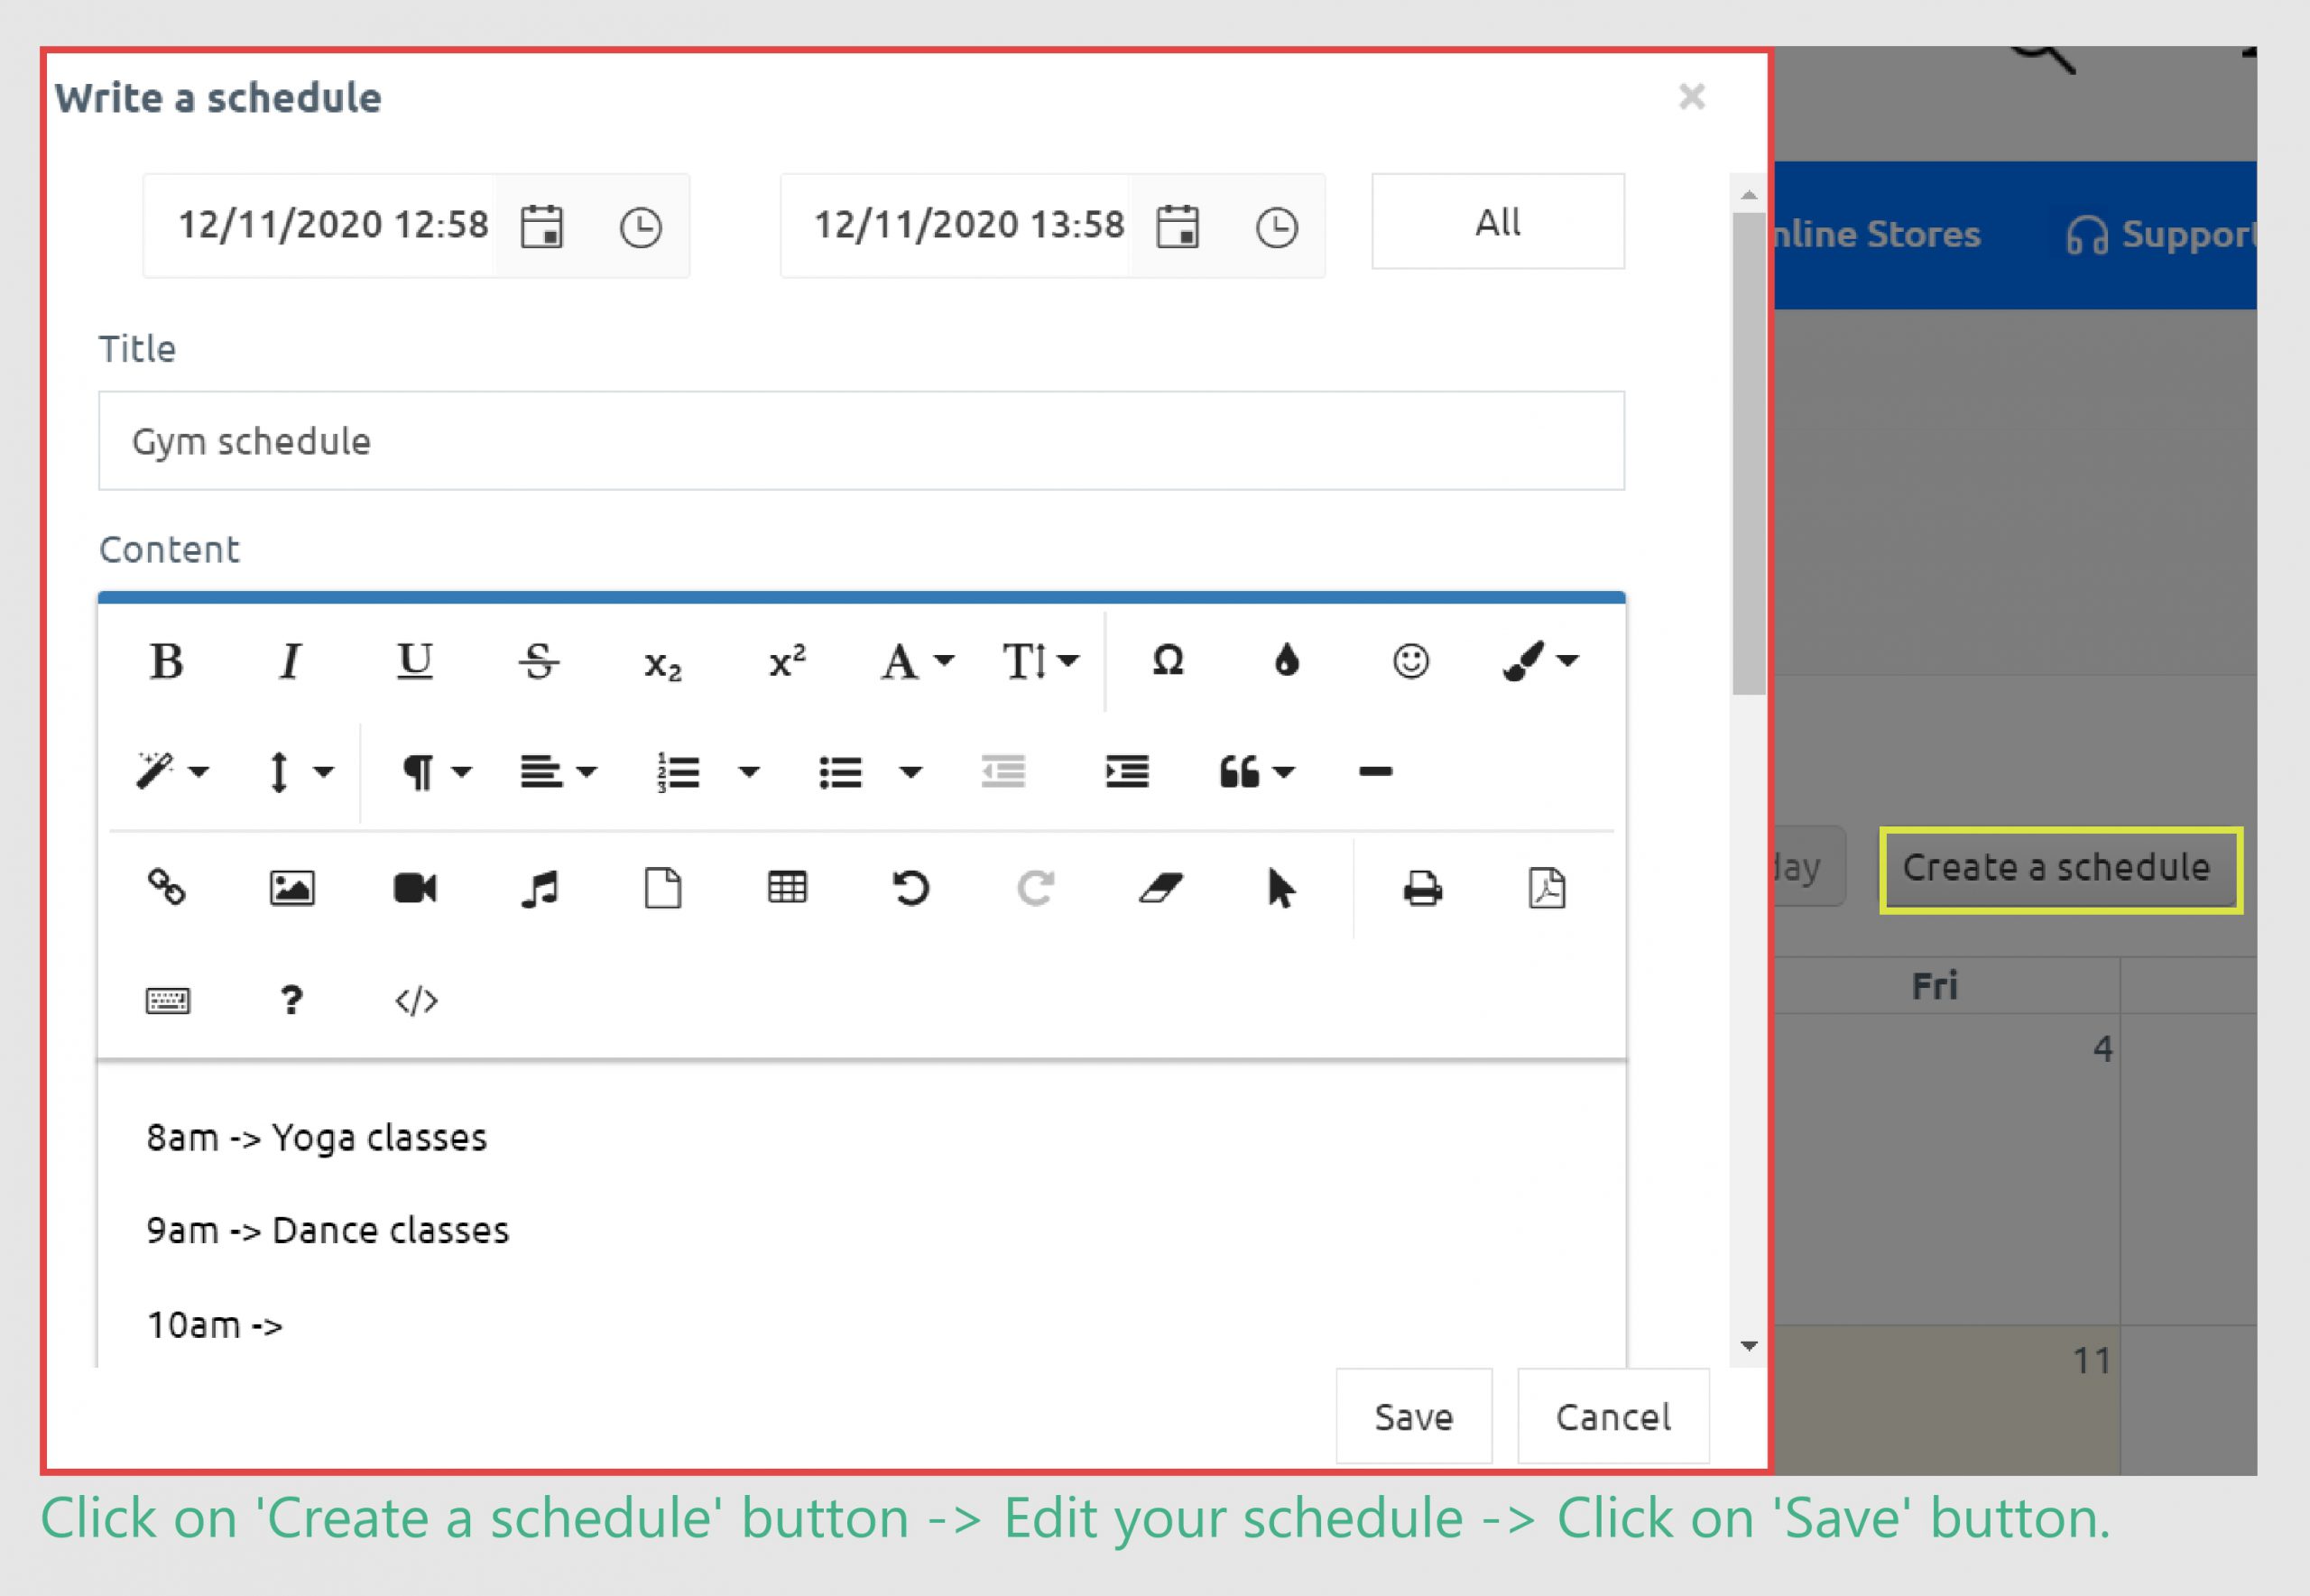
Lets edit our newly created Calendar
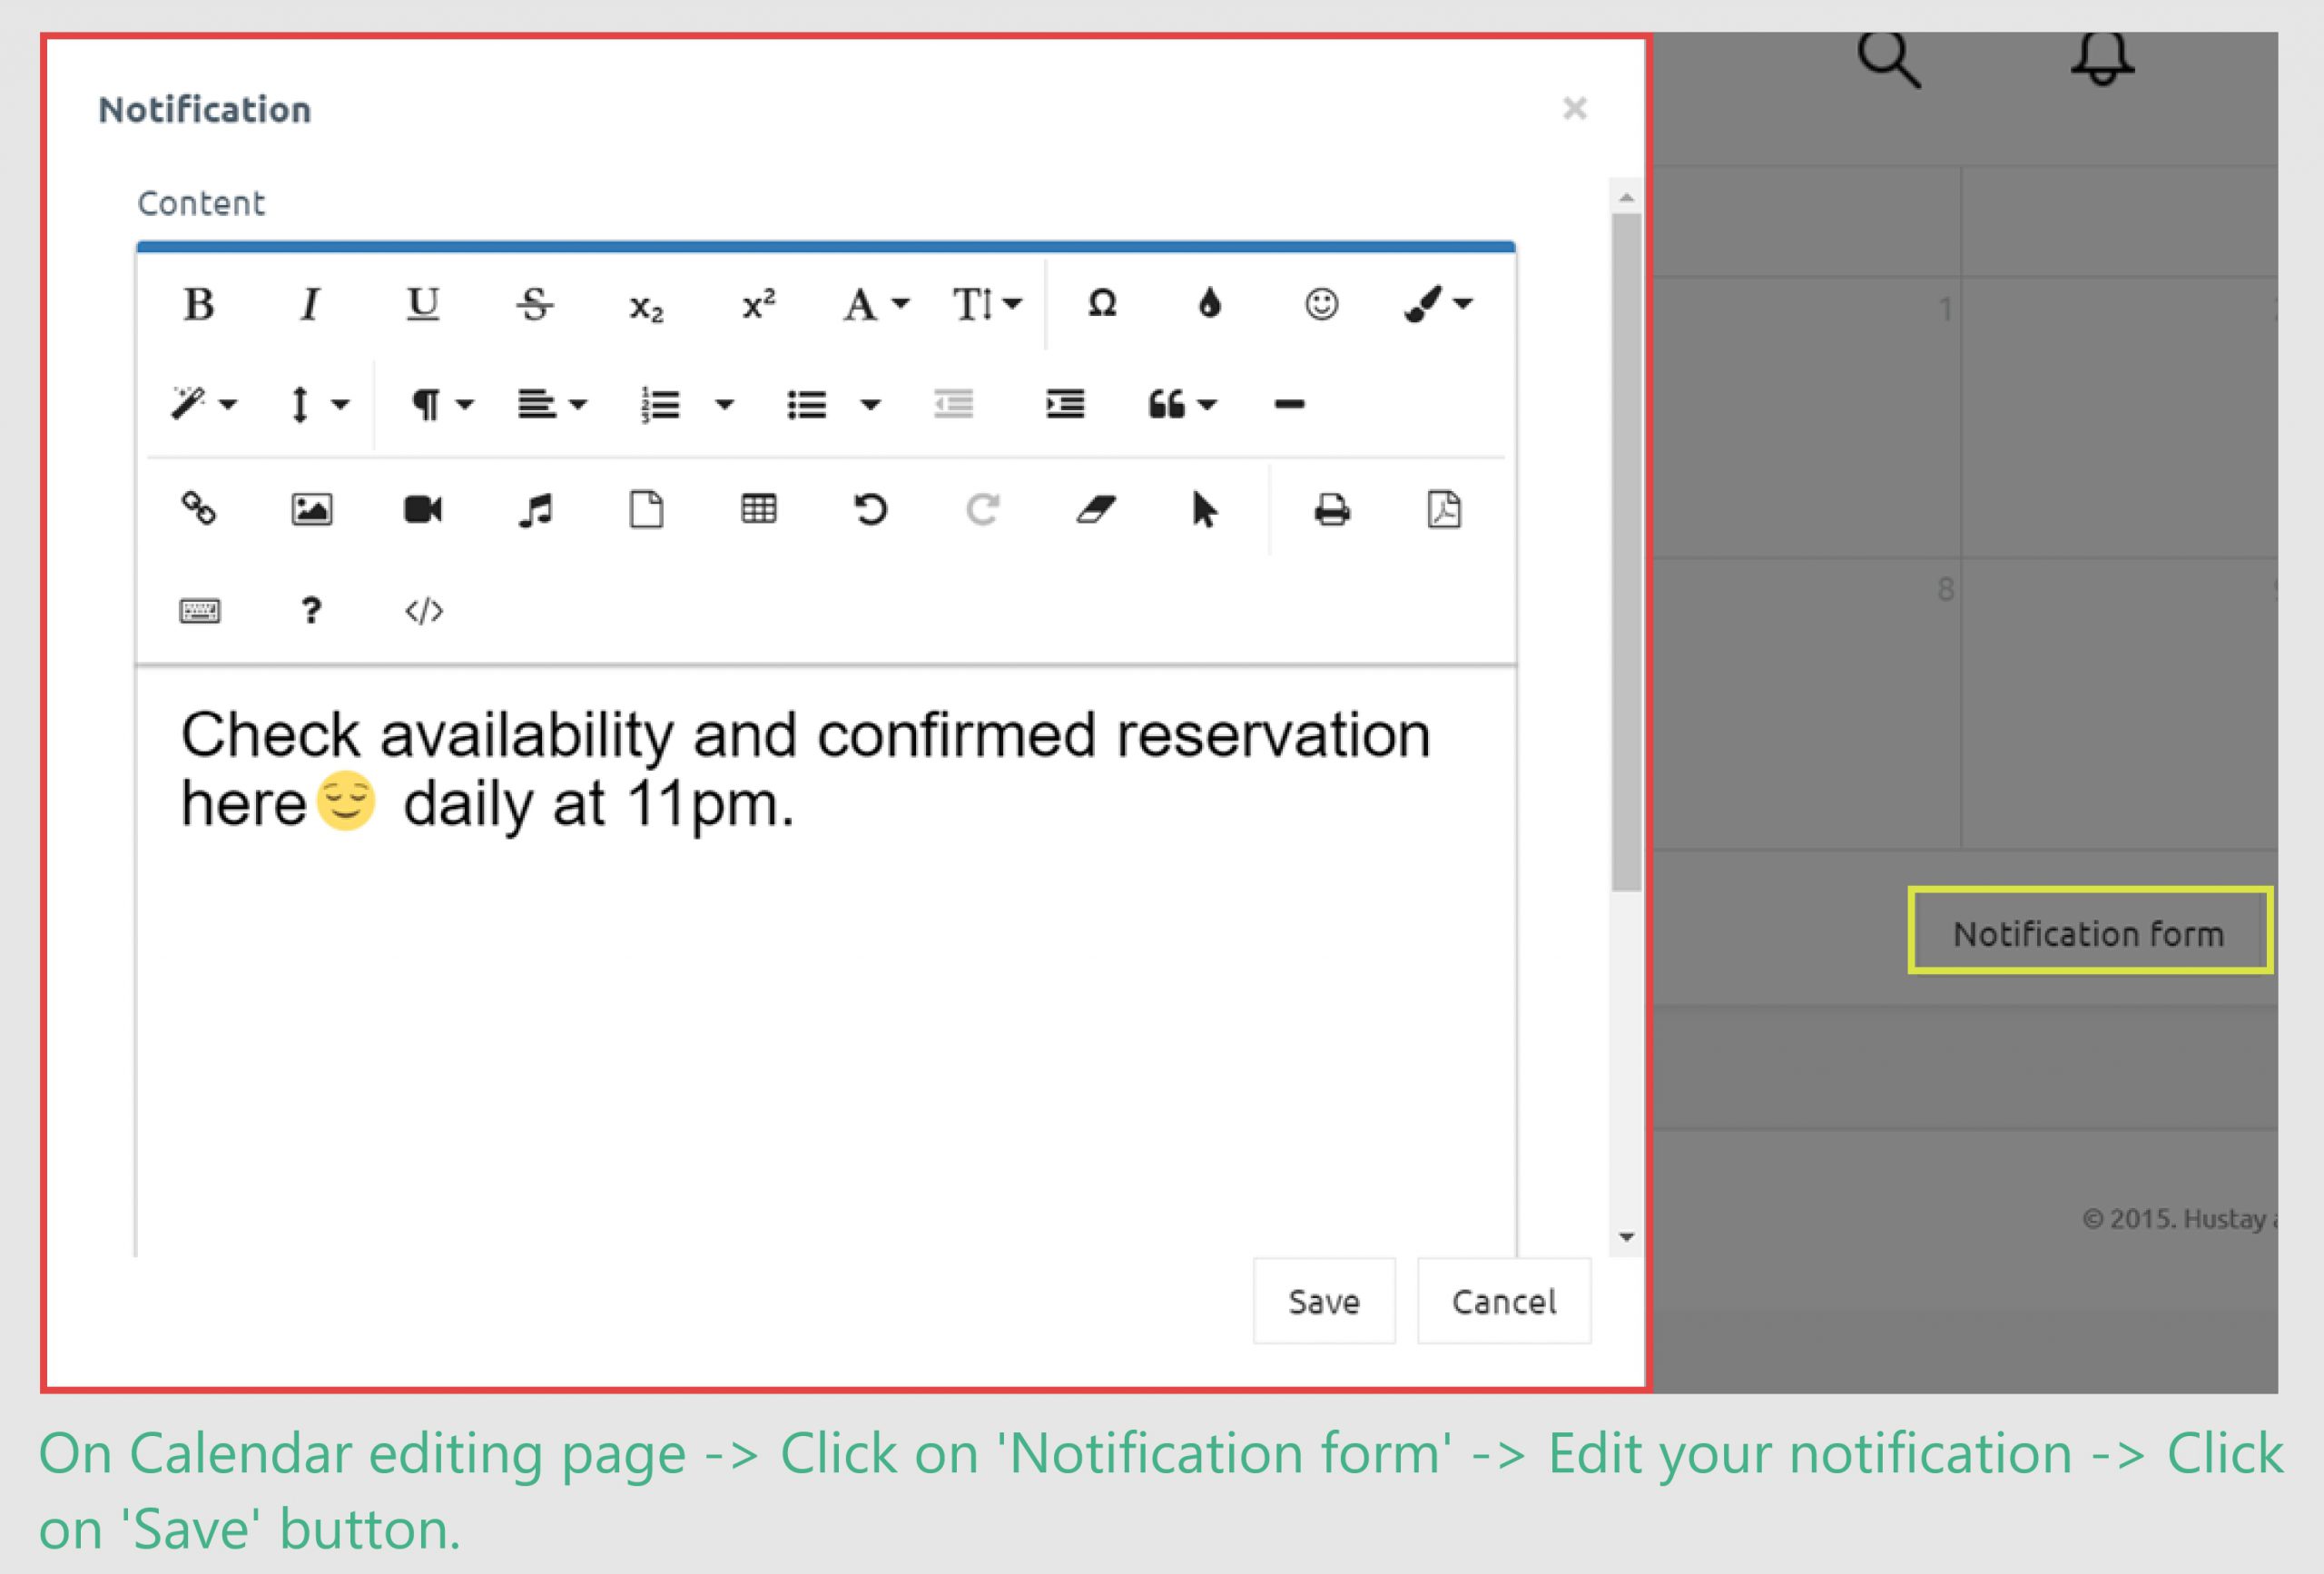
Let’s learn how to create notification message on calendar.
Use case 2
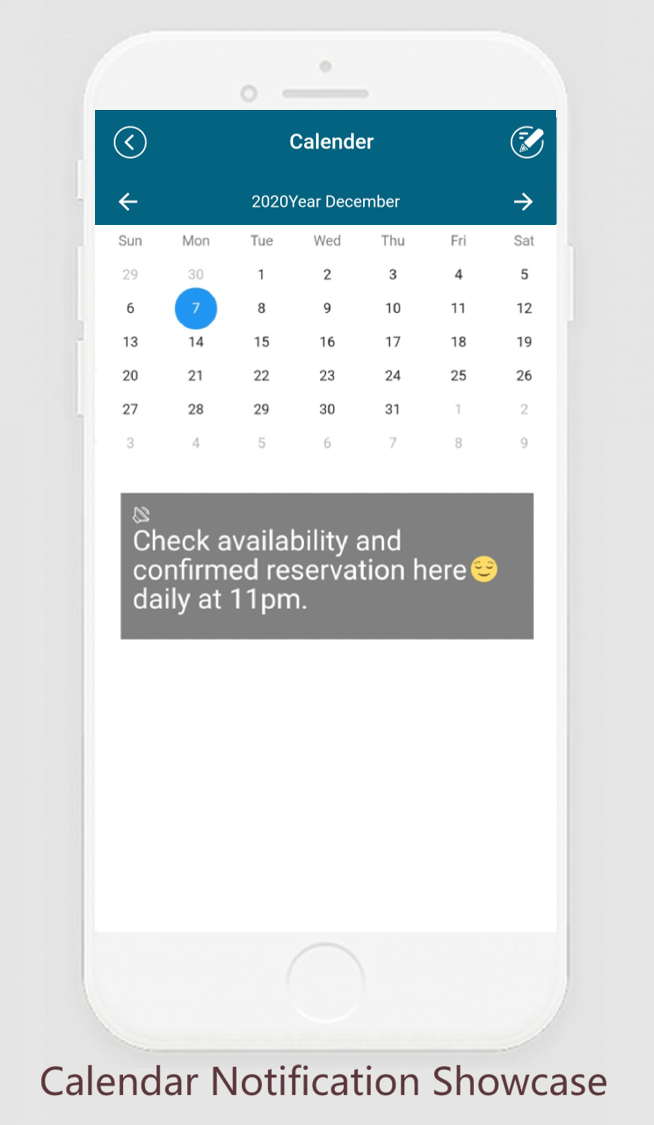
Lets see how it’ll look on app
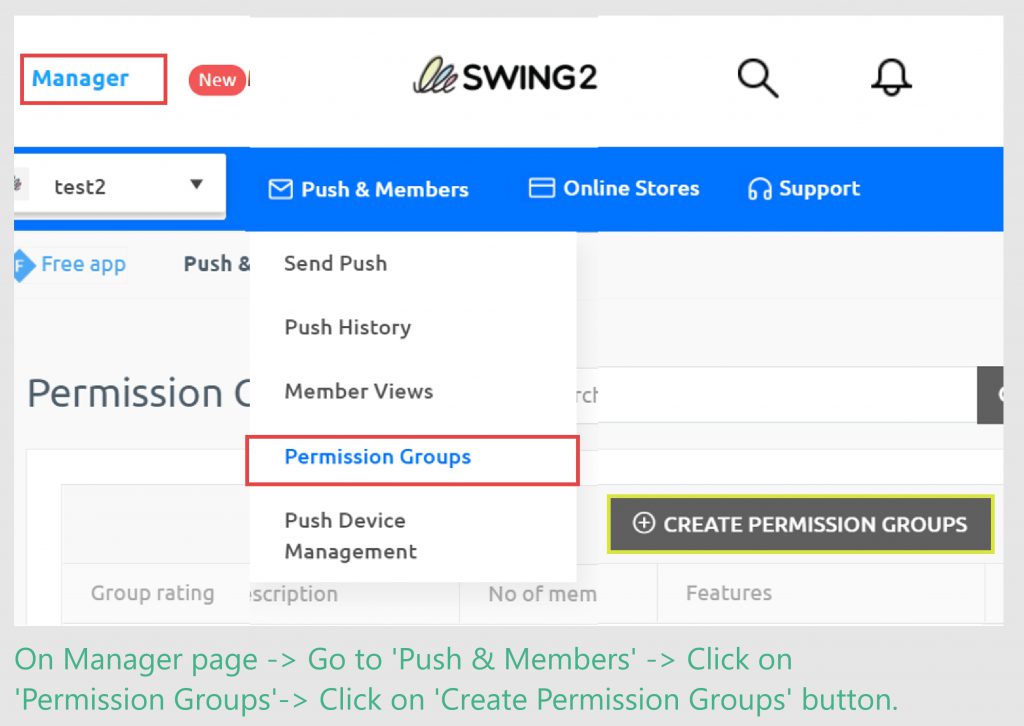
Learn how to create new permission group and allot permission to users.
Use case 3
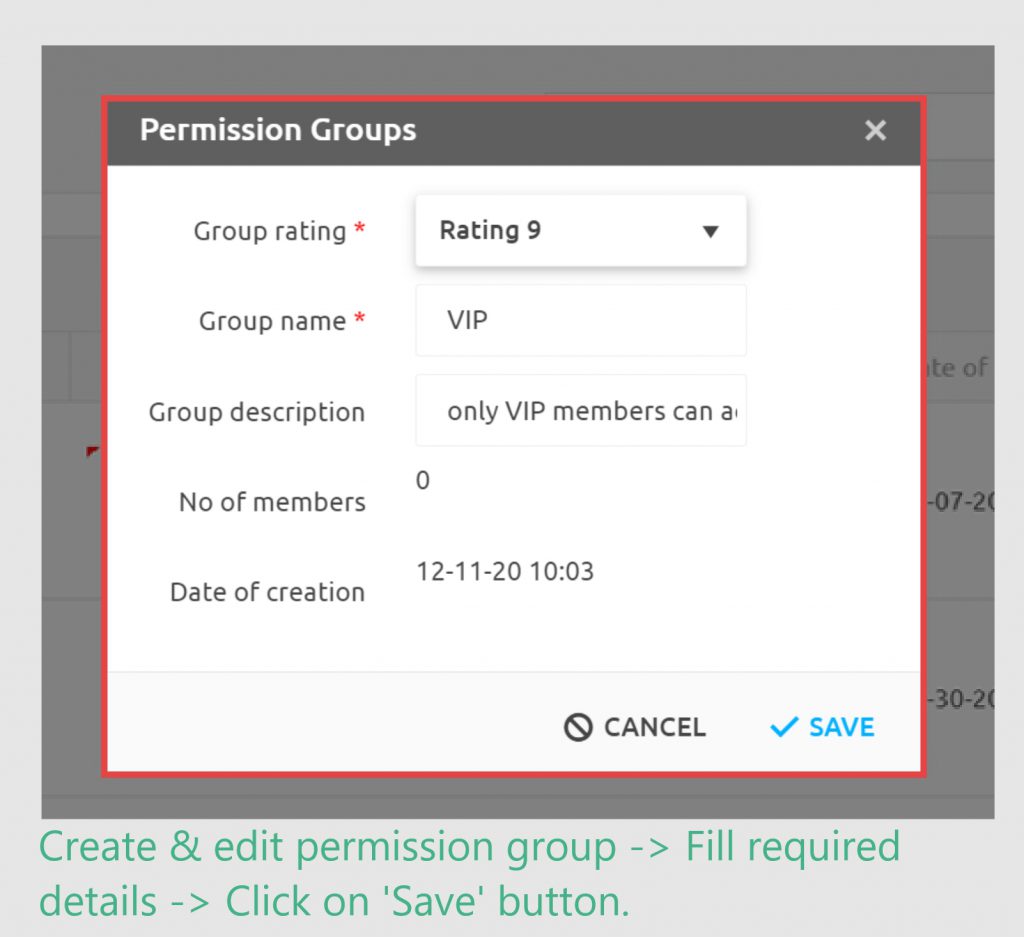
First we need to create VIP group, for that follow below mentioned steps.
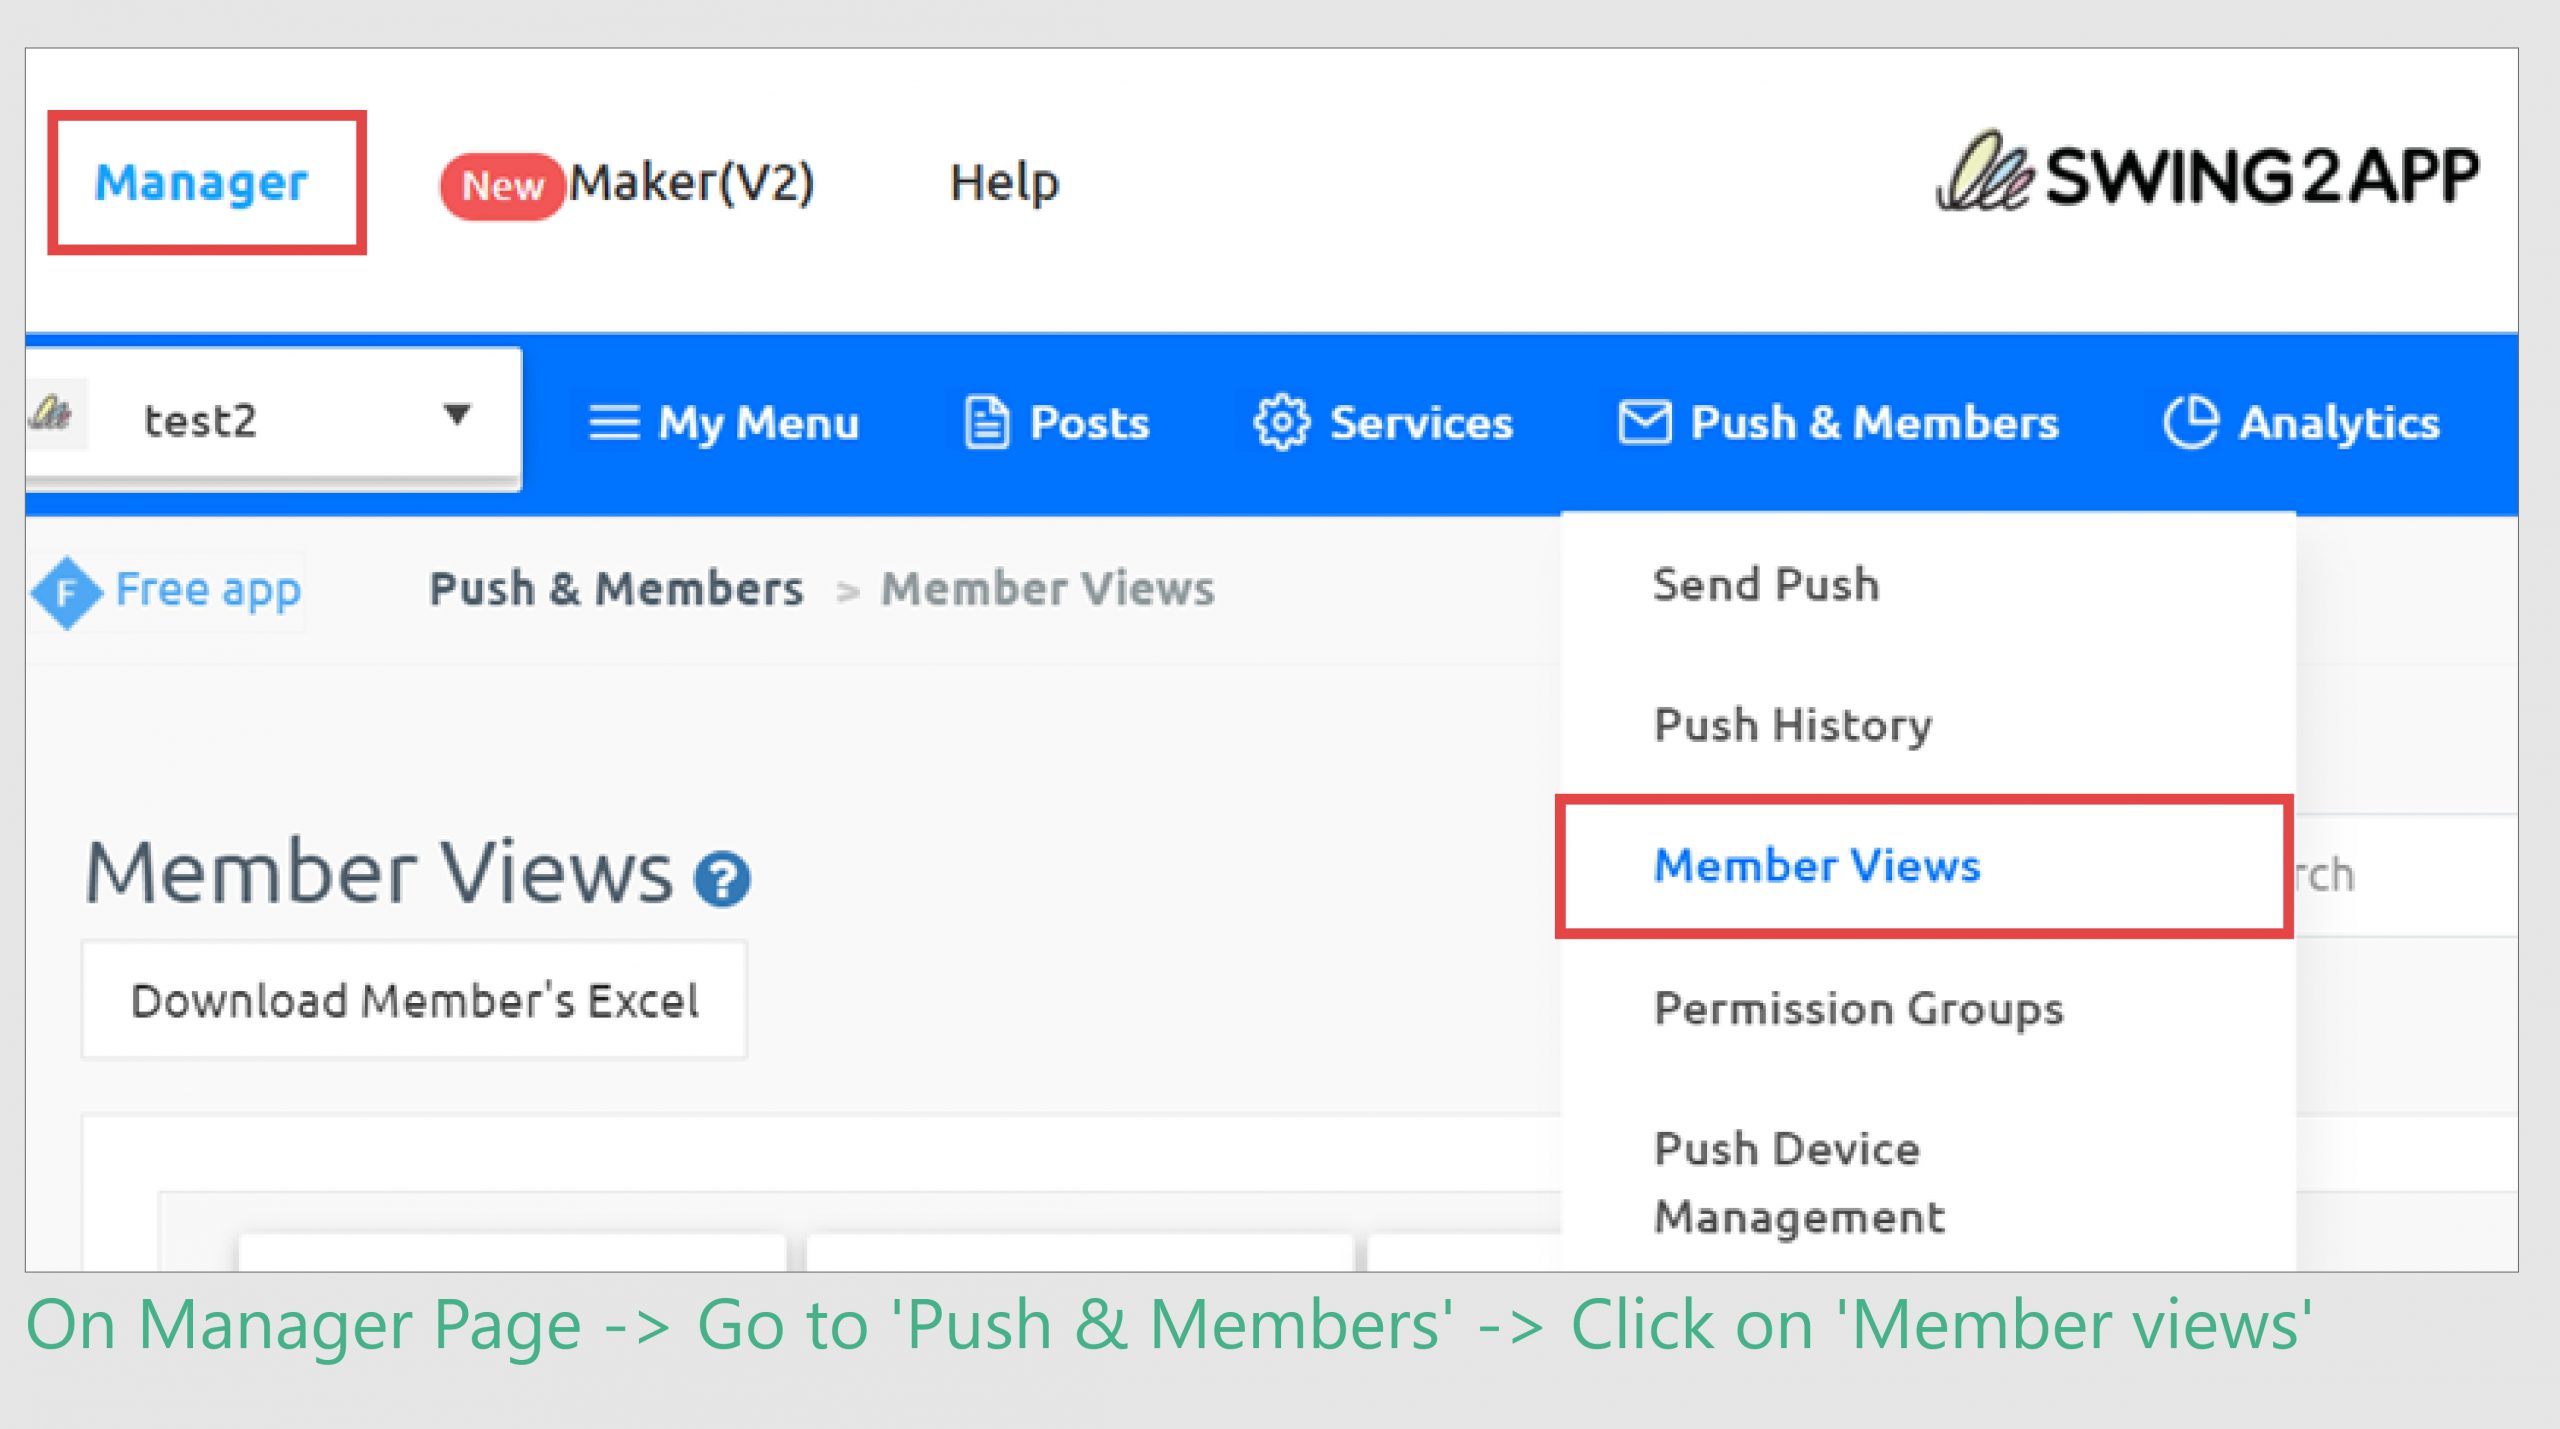
Now creation of VIP member group is completed, lets learn how to allot VIP members group to VIP users.
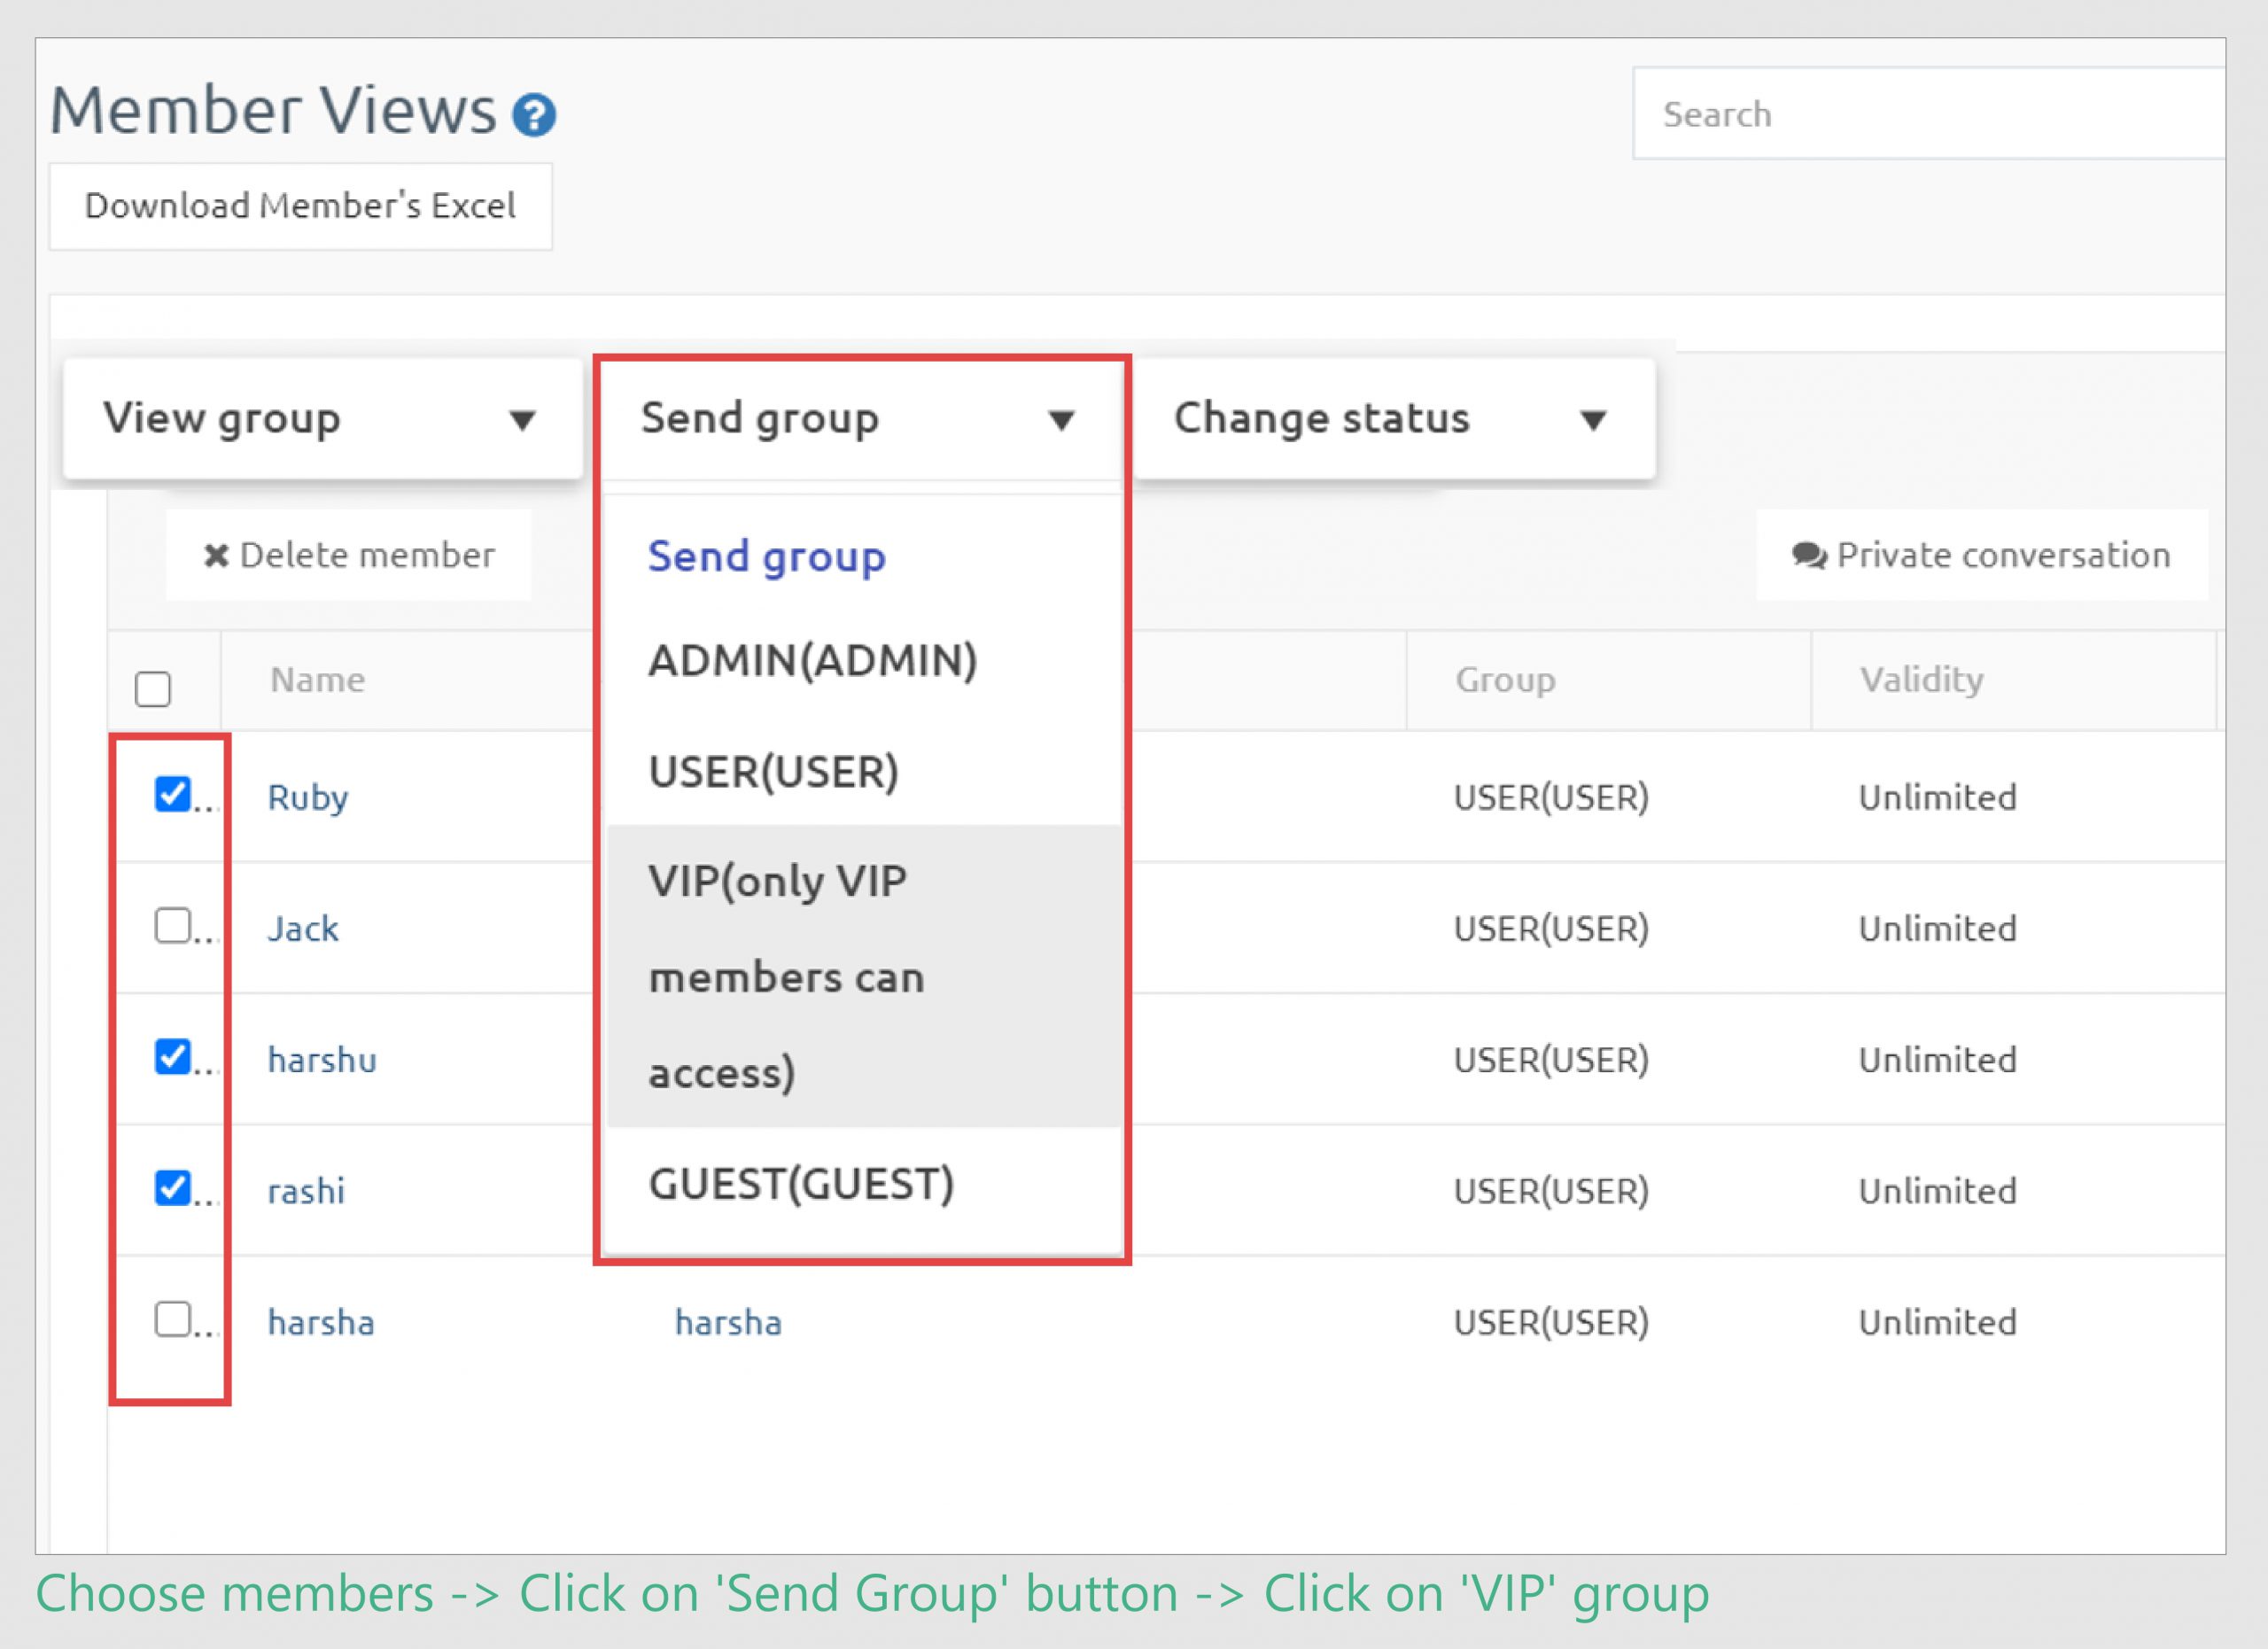
By this process you can allot or take back user access anytime.
After allotting VIP members their permission, now create calendar for VIP members.
Now as you’re done creating VIP group and allotting it to VIP members, its time to create calendar for VIP members, for this process is slightly different.
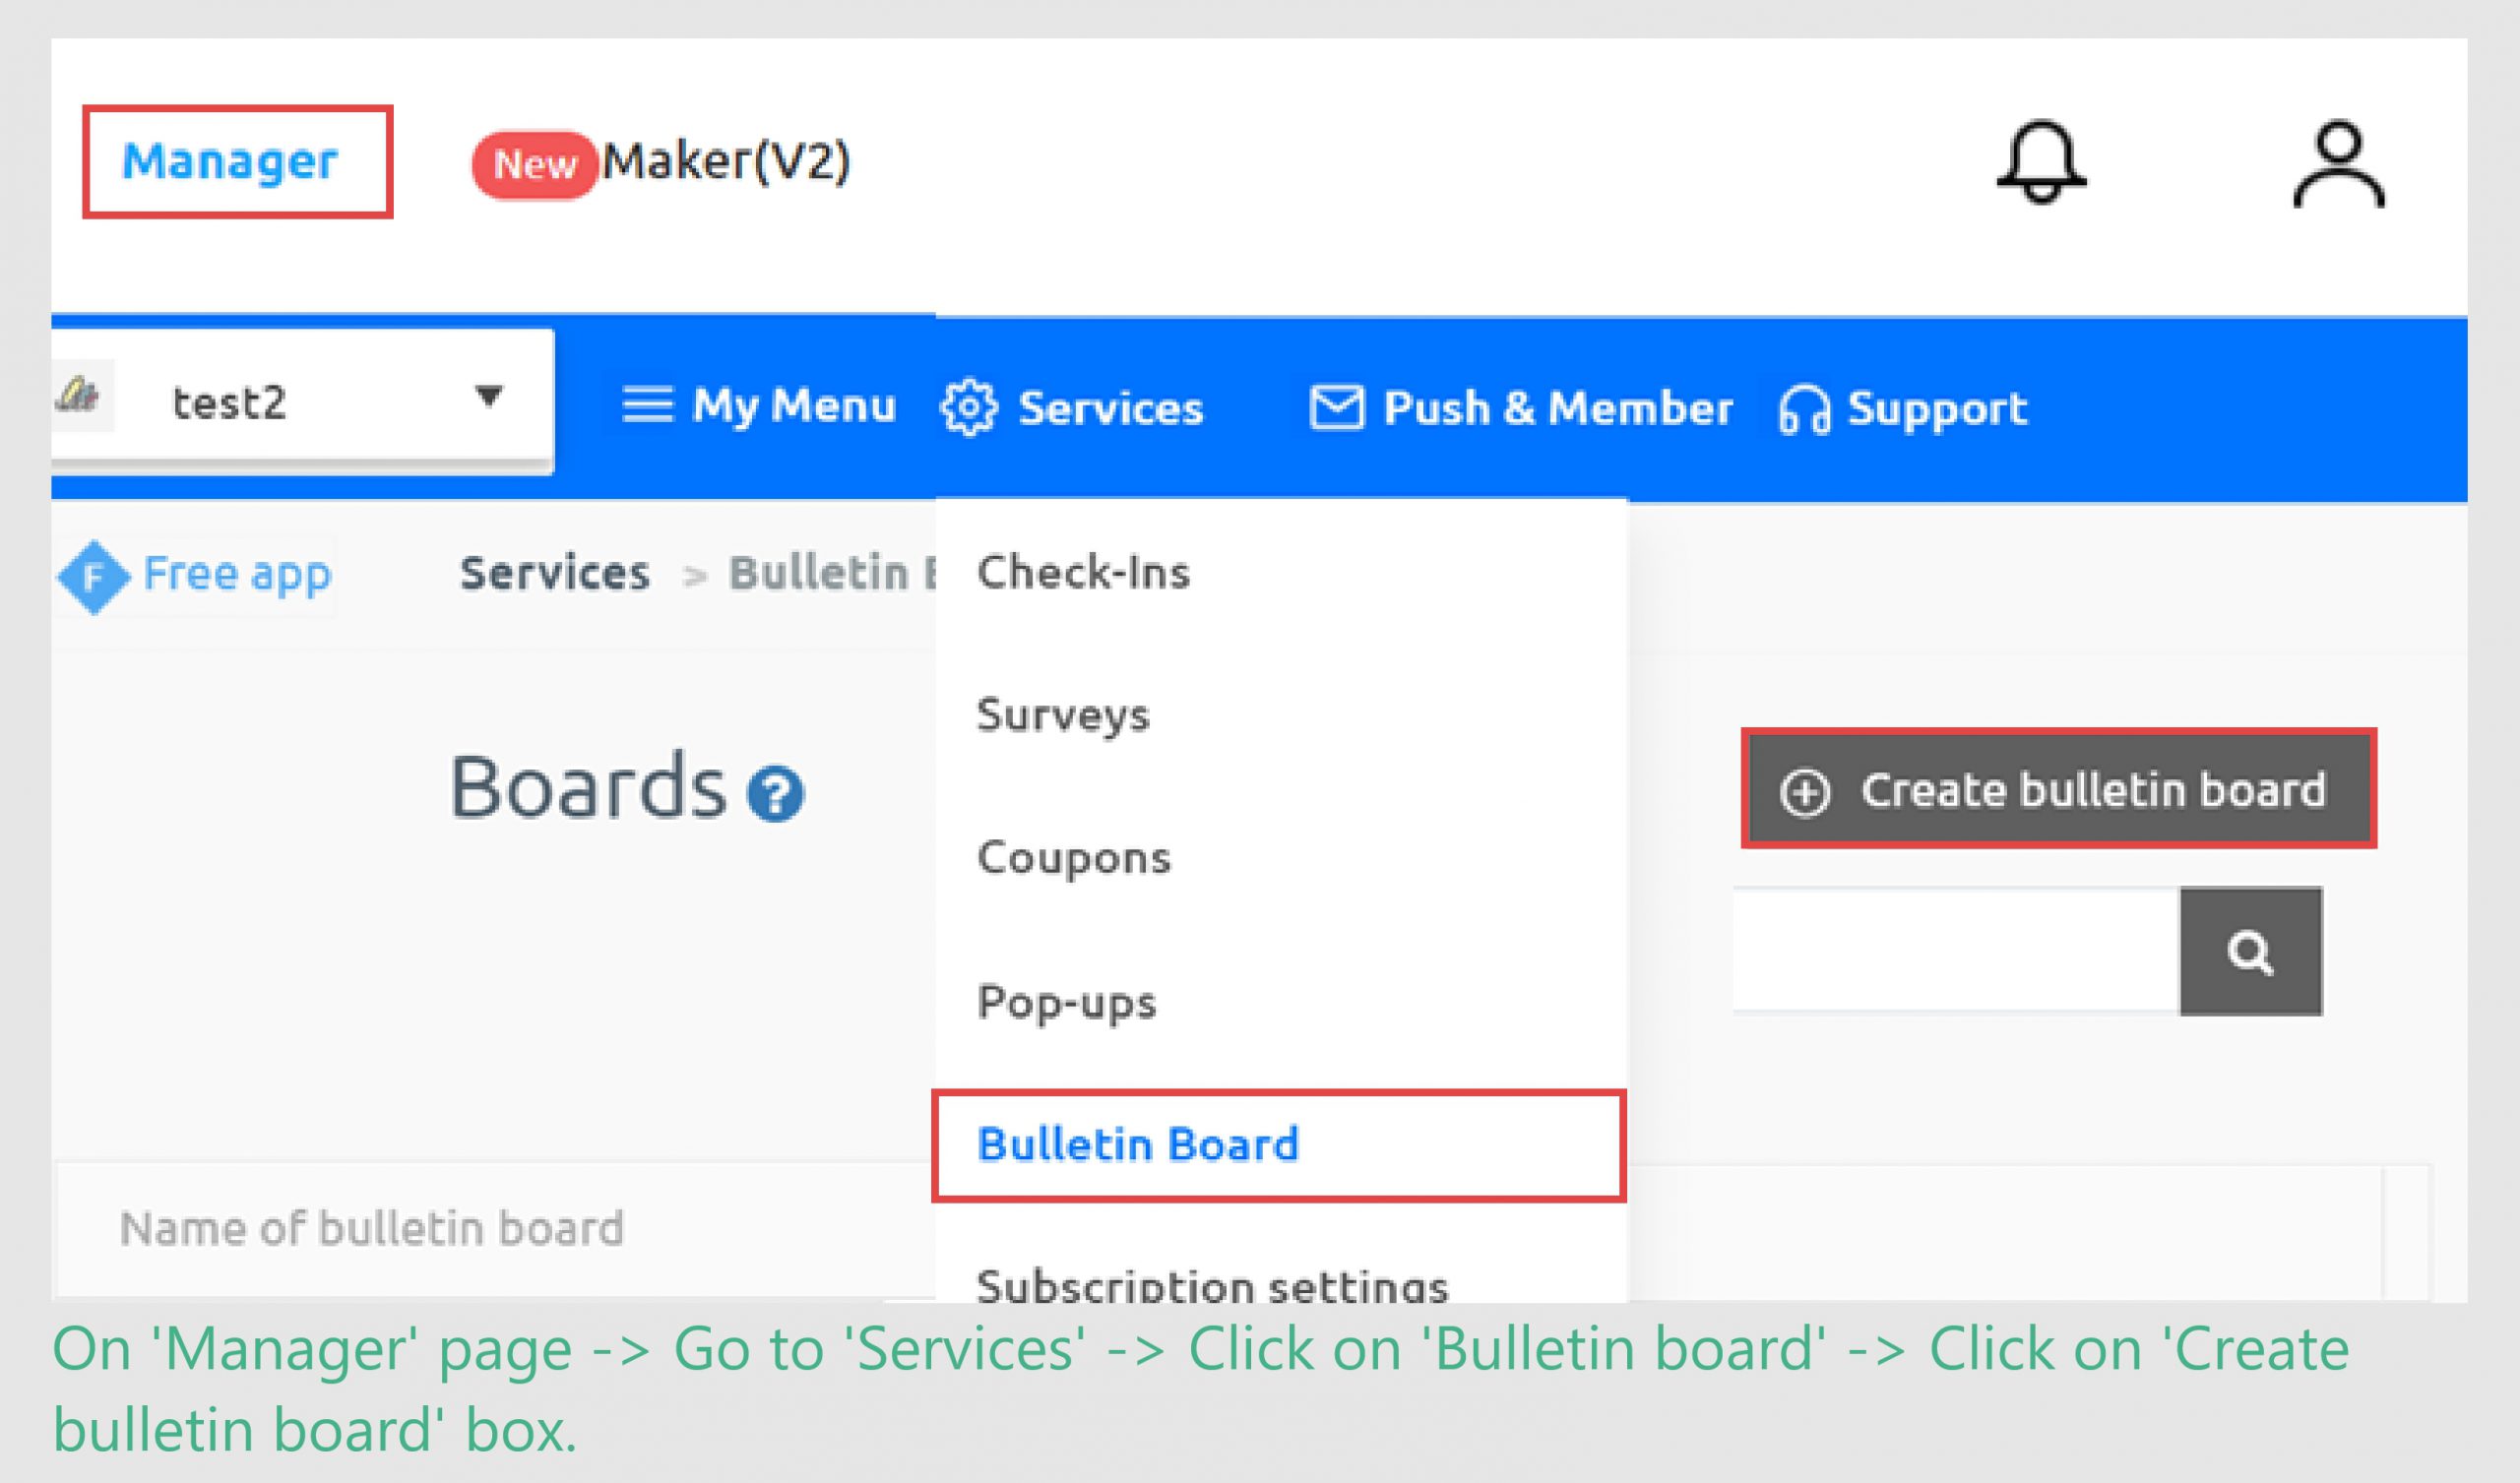
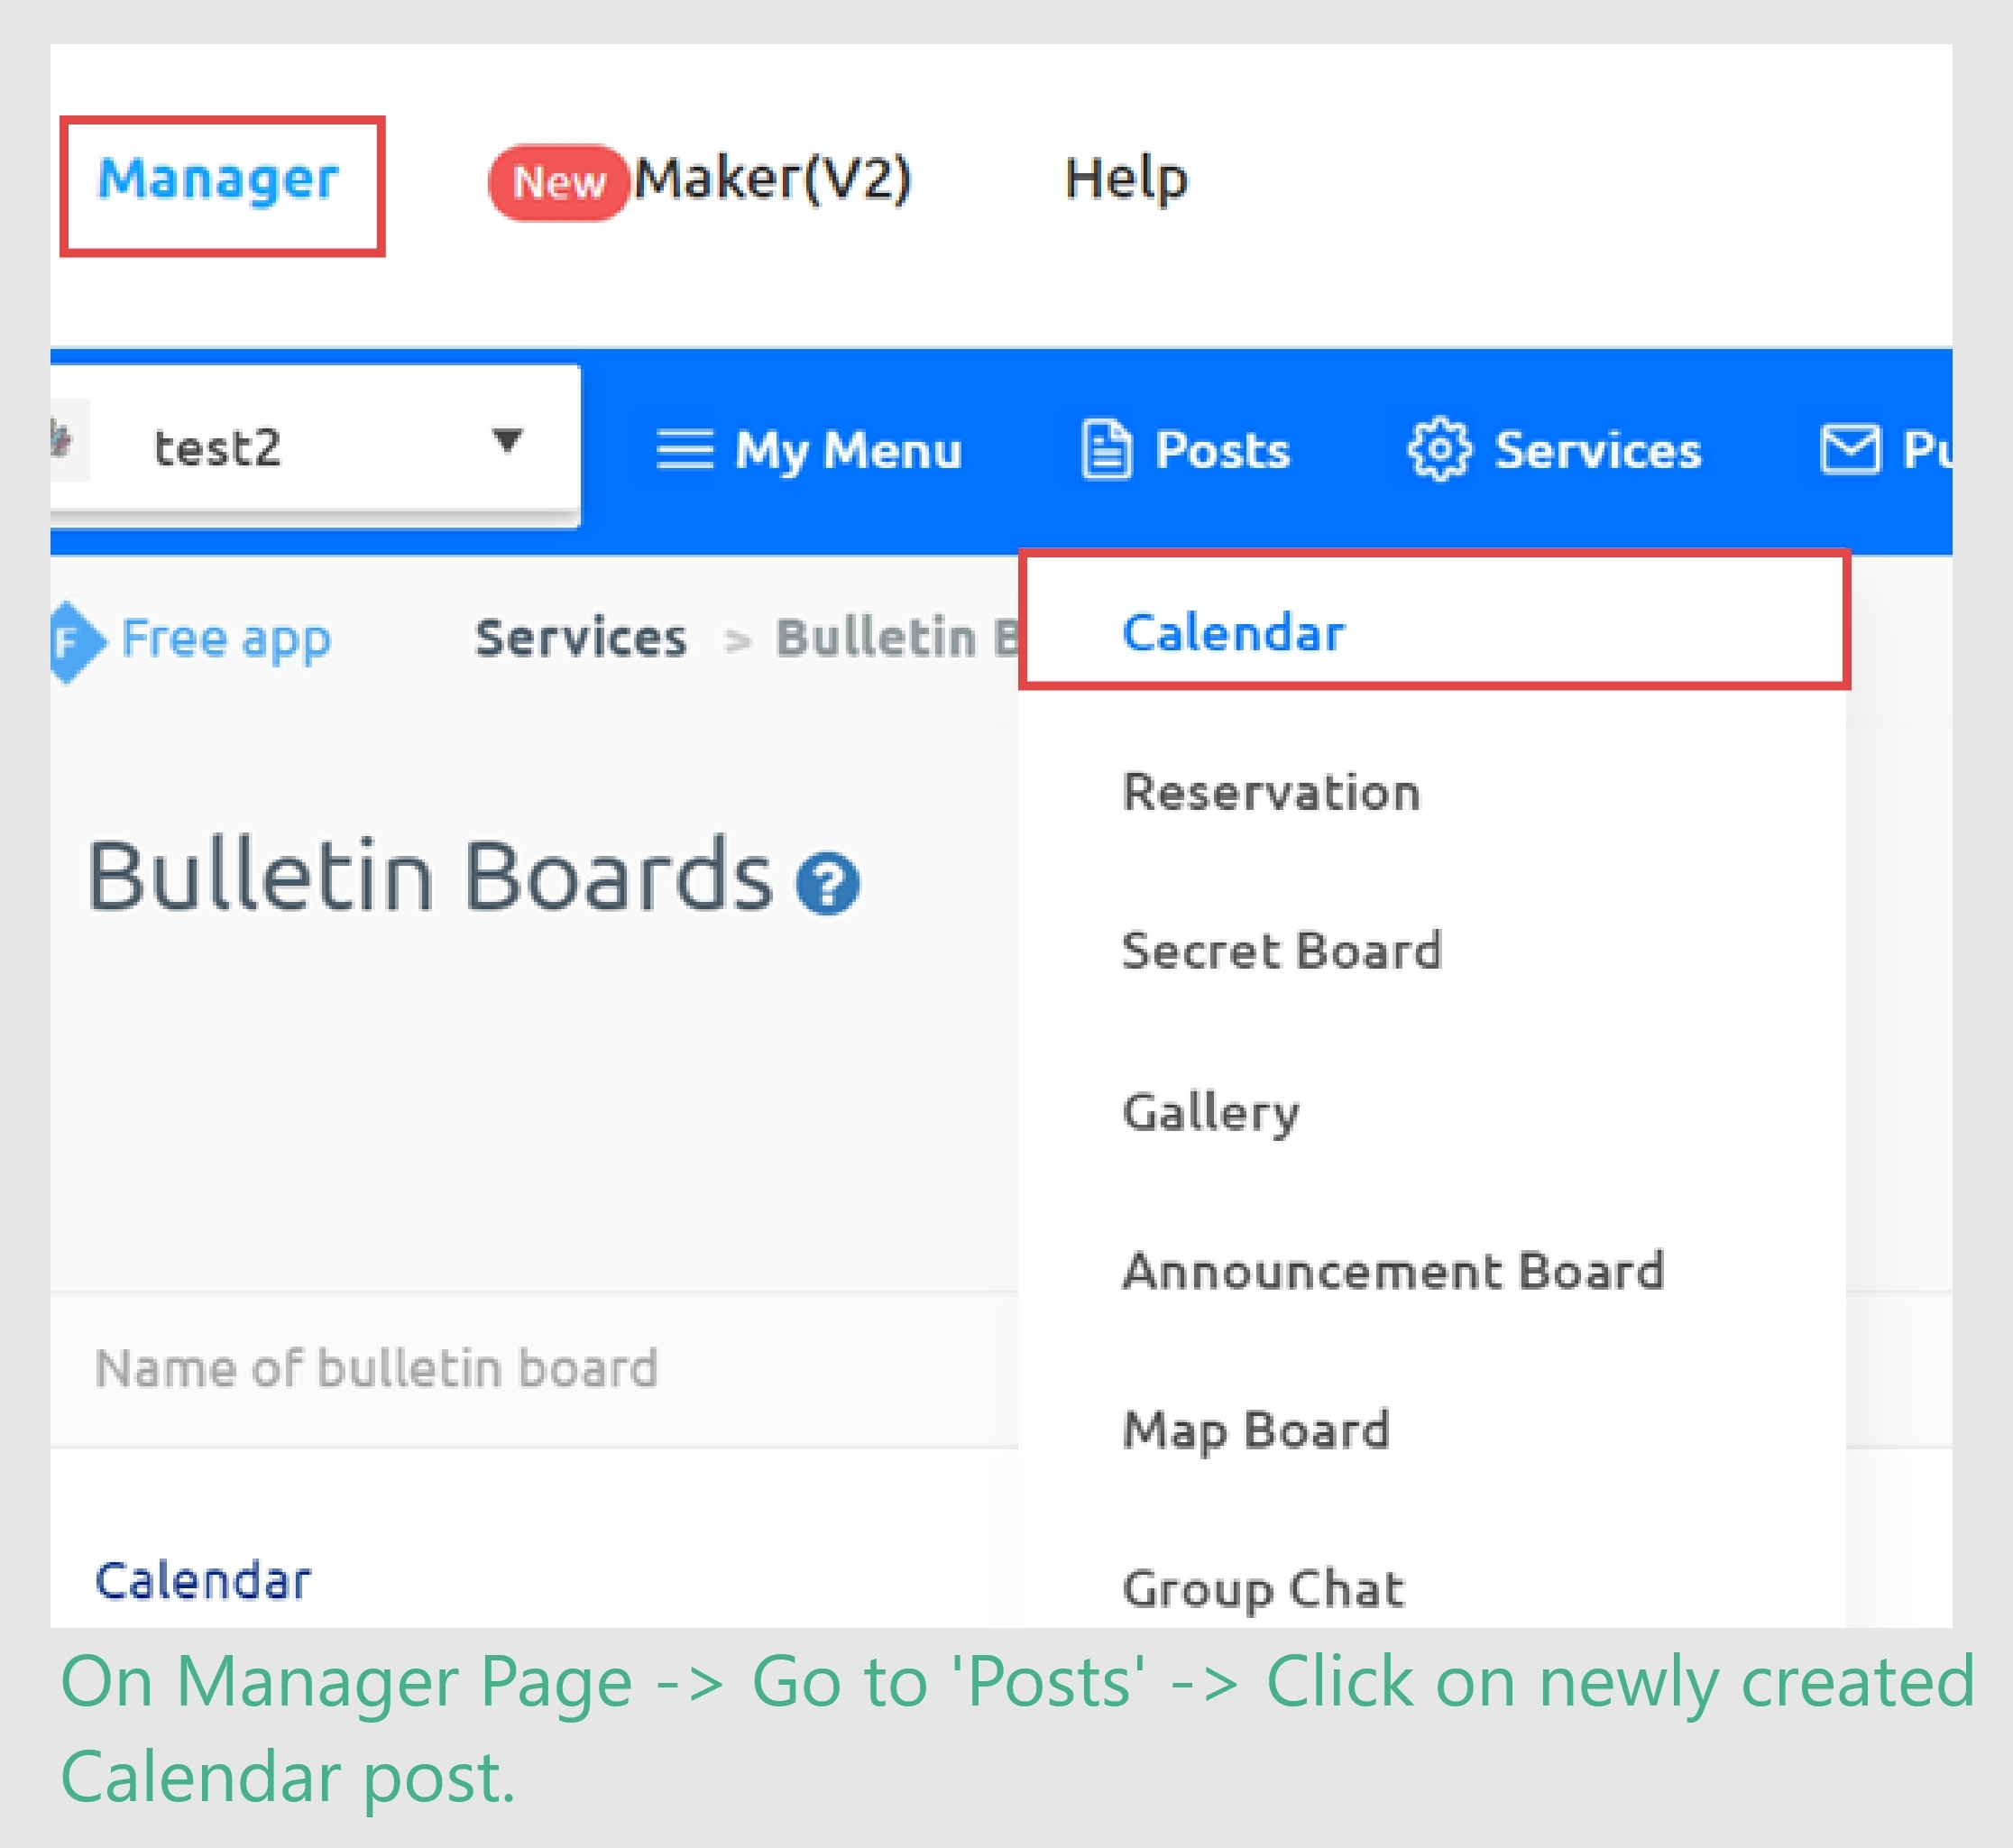
On Manager page-> Go to Services -> Click on bulletin board
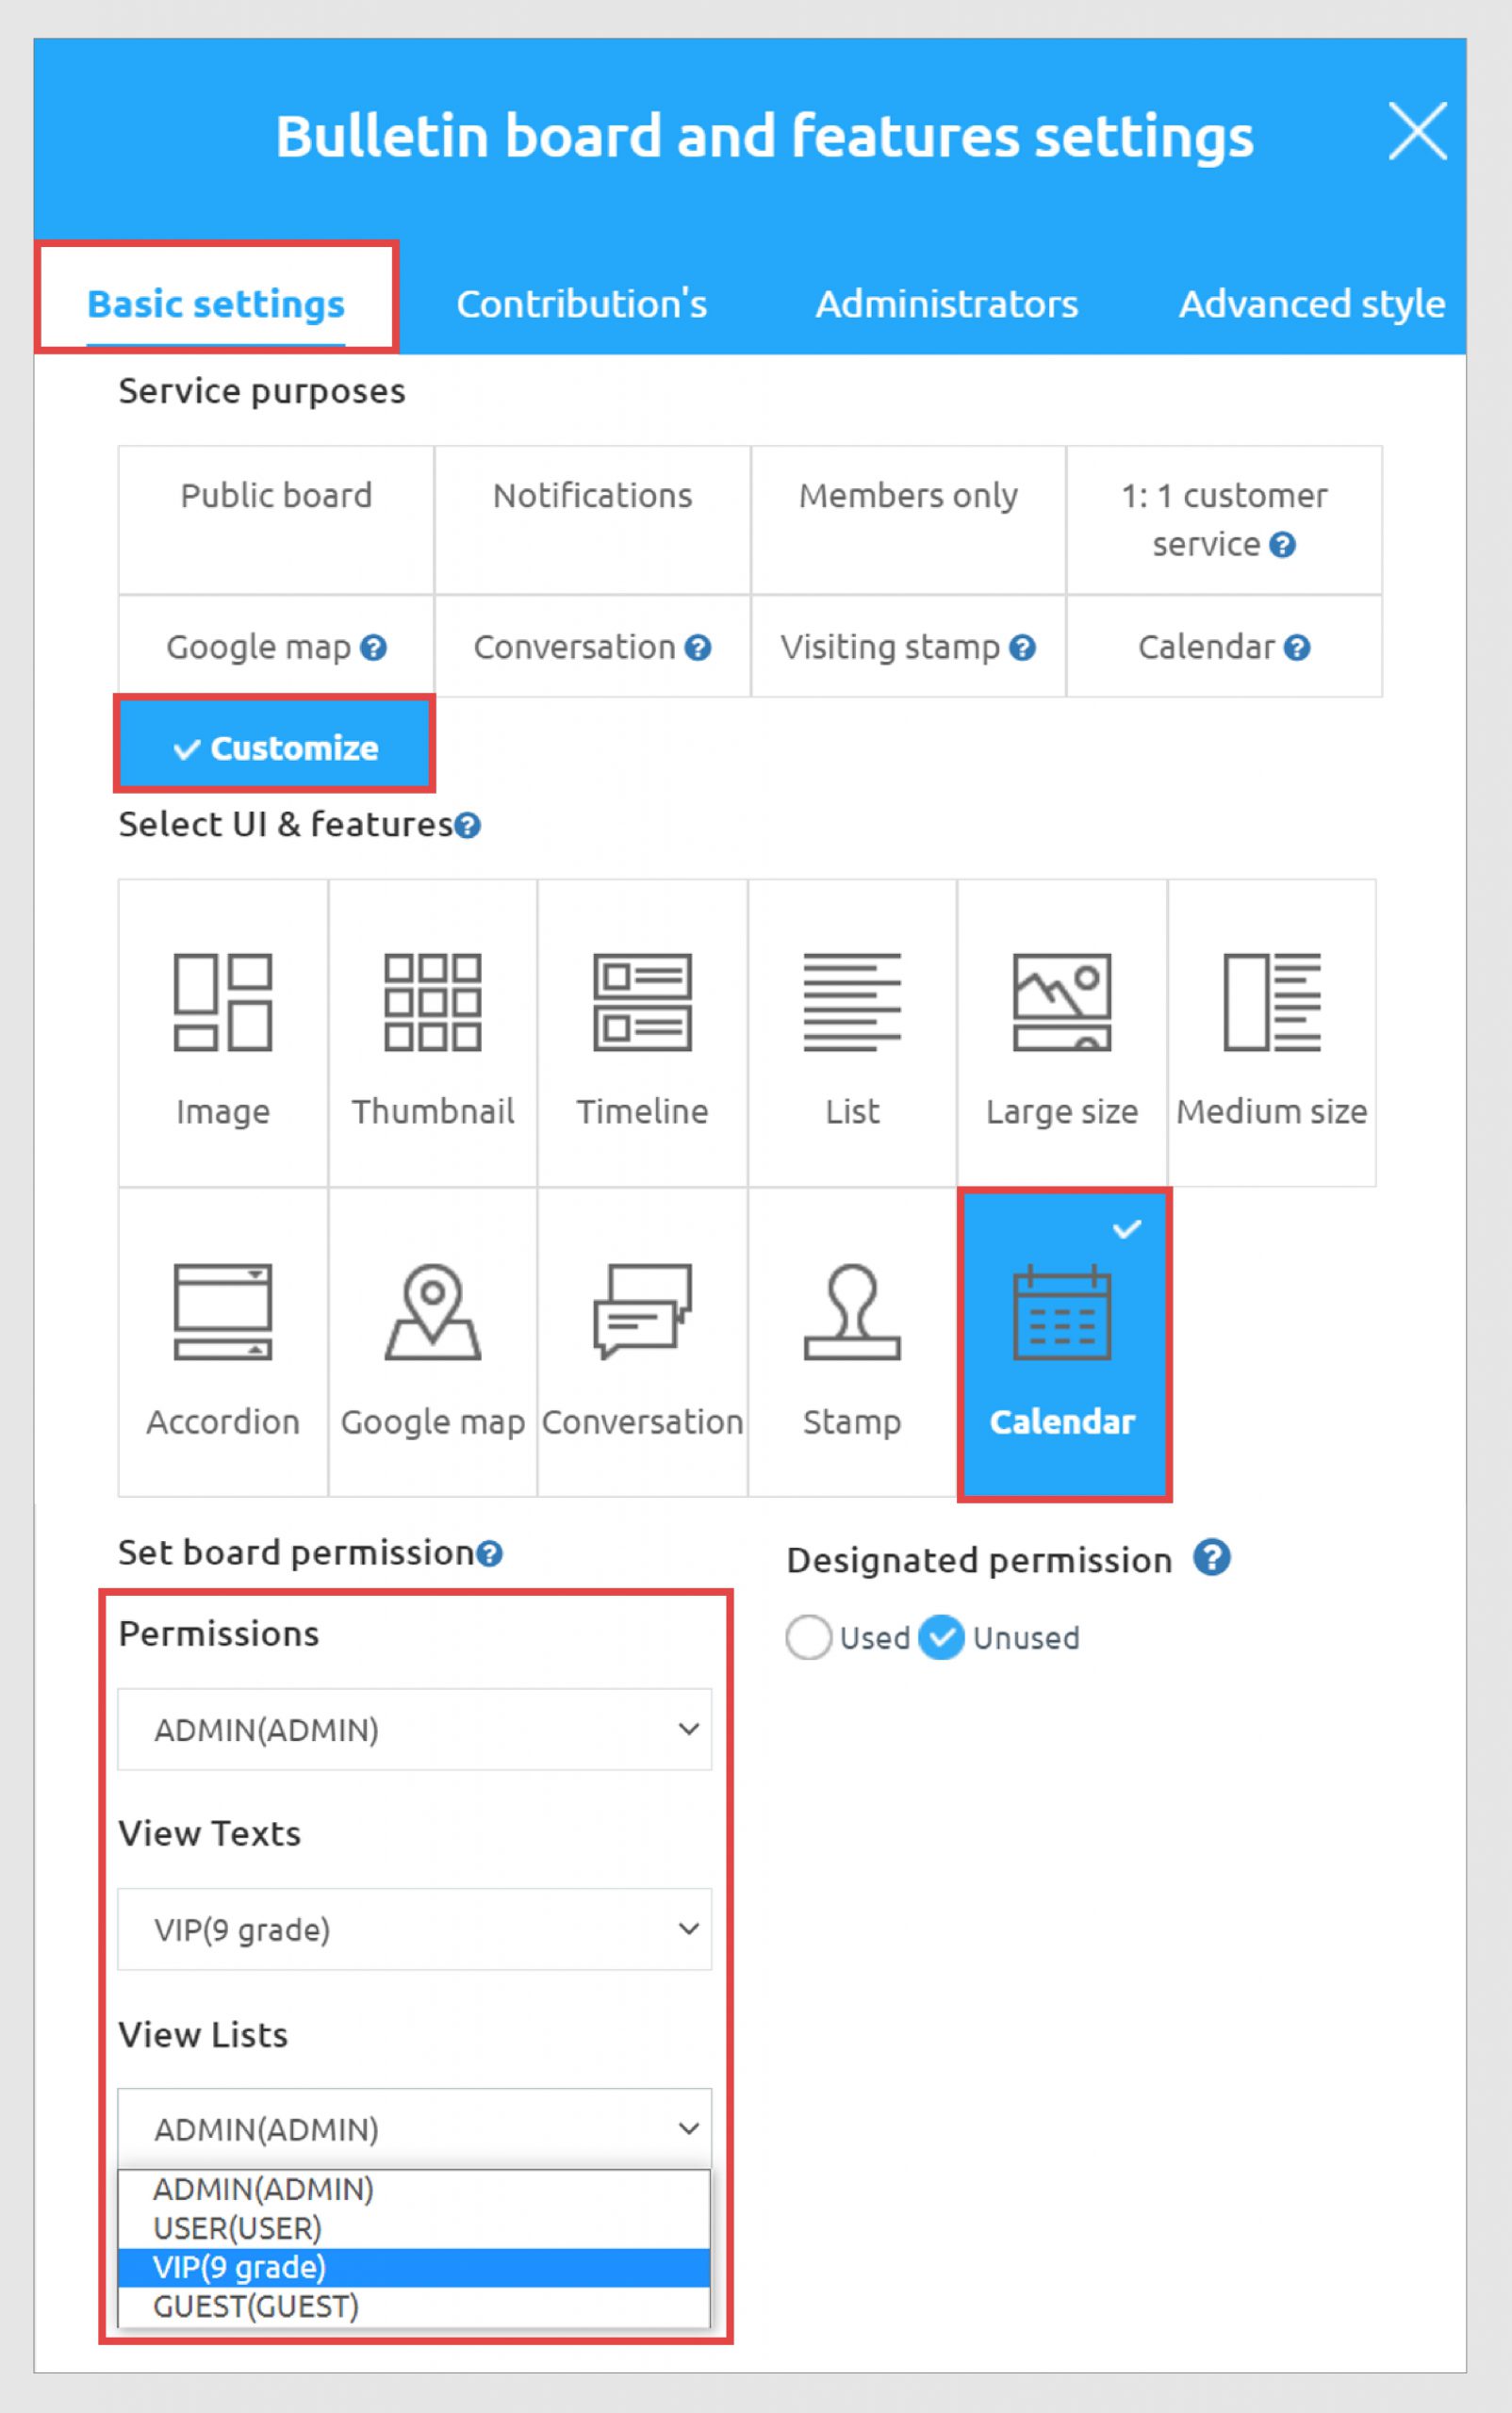
By changing permission group to VIP, now only users whom you allotted VIP member access can access this calendar.
Learn how to give admin permission to users for calendar bulletin board.
Use case 4
Since Admin group is default, we just need to move trainers to admin group and no need to make changes in calendar bulletin board.
The process is same as discussed in case 3.
On Manager Page -> Go to ‘Push and members’ -> Click on ‘Member view’
From list of users, select trainers -> Click on ‘Send group’ button -> Select ‘Admin’ -> Click on save button.
Now the trainers also have power of admin, but only for this calendar. Now trainers can edit calendar accordingly.
Additional features provided by the calendar of swing2app
- Can add multiple events
- Different schedules can be divided into text and backgrounds of different colors
- Schedule creation is the same as post HTML editor (image attachment, link, video attachment can be done)