The general sentiment around popups is kind of mixed. While some abhor certain types of the pop-up, many users and, of course, businesses really find them useful.
Well, since the utility purposes are numerous, so are the types of pop-ups. One of the infamous pop-ups is advertisements. The whole concept of pop-ups started primarily as a source to promote ads on the websites.
Fast forward to today, these pop-ups have evolved for the better with higher purposes to serve than just being an ad tool.
Now just websites, pop-ups have become a huge thing for mobile apps as well, possibly used even more popularly than the former.
Example – You may open a shopping mobile app and a pop-up with the deal of the day might show up, or you are using a maps-based app and a pop-up for location access may appear on the screen. These are some of the many instances of how brands and business are utilizing their potential.
Statistics proving pop-ups are not dead, YET
- Brands frequently use pop-ups to create their e-mail list to grow the business later. For instance, Sumo users were able to collect 23,645,948 email addresses.
- The conversion rate for the top 10% of pop-ups is nearly 9.28%. So, imagine if you have 1,00,000 traffic per month, you can have approximate 9000 subscribers or users every month.
- The average rate for conversion by pop-ups is 3.09%, which can translate into huge numbers depending on the traffic on your app.
Now, that we are clear on the advantage of using pop-ups for your website and business app, it is the right time for you to know how you can use these pop-ups for numerous purposes for your no-code app you developed with an app creator.
To enlighten you better and improve the chances of better understanding, we are going to show you some of the use cases. They will explain the ways to create, design, and place these pop-ups and increase your conversion rate.
So, let’s get the ball rolling!
USE CASE 1:
When admin wants to inform the user about offline delivery is closed.
App Type: E-commerce
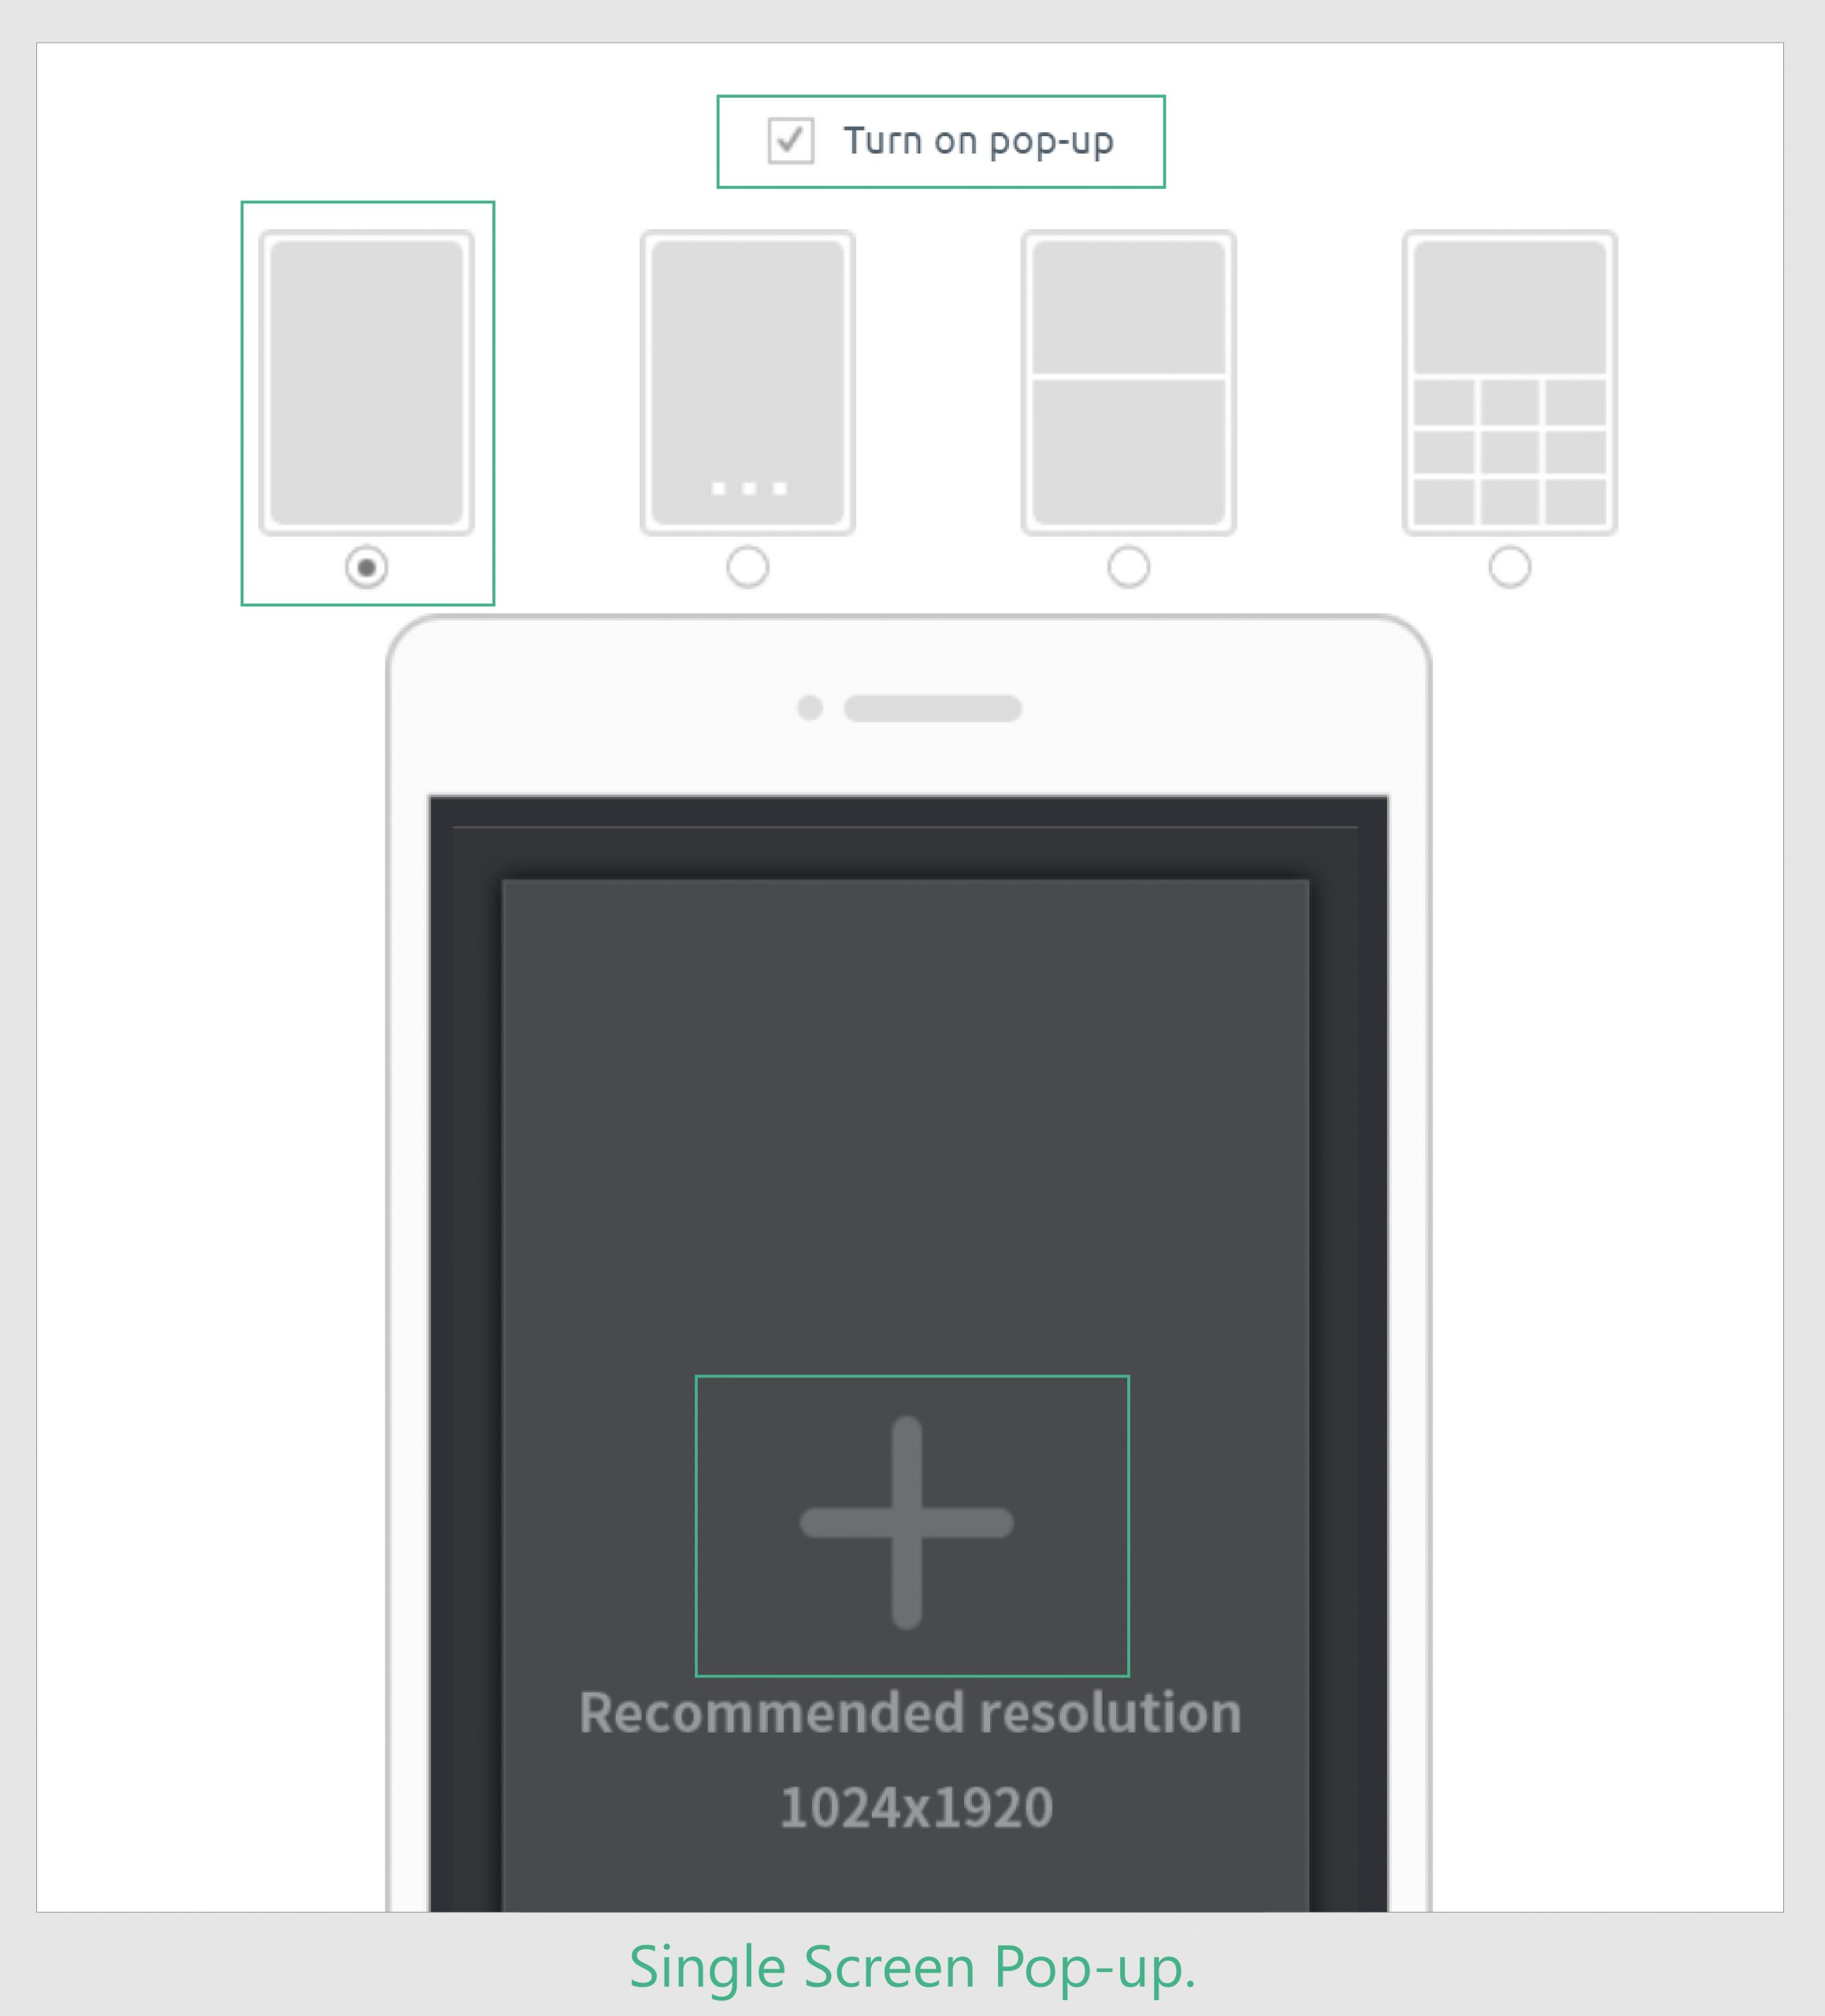
Pop-up type: Single screen pop up.
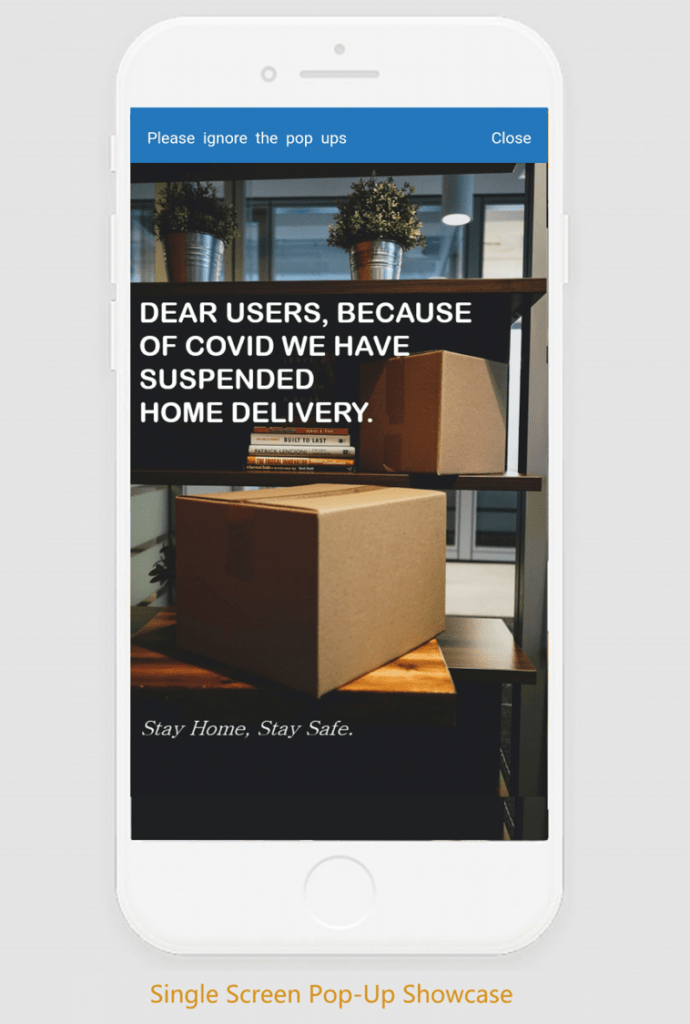
Here admin wants to notify his customers that because of covid19 for temporary they have stopped offline delivery. To make the customer experience better, he wants to notify them about this change in the start.
Steps to create pop-up:
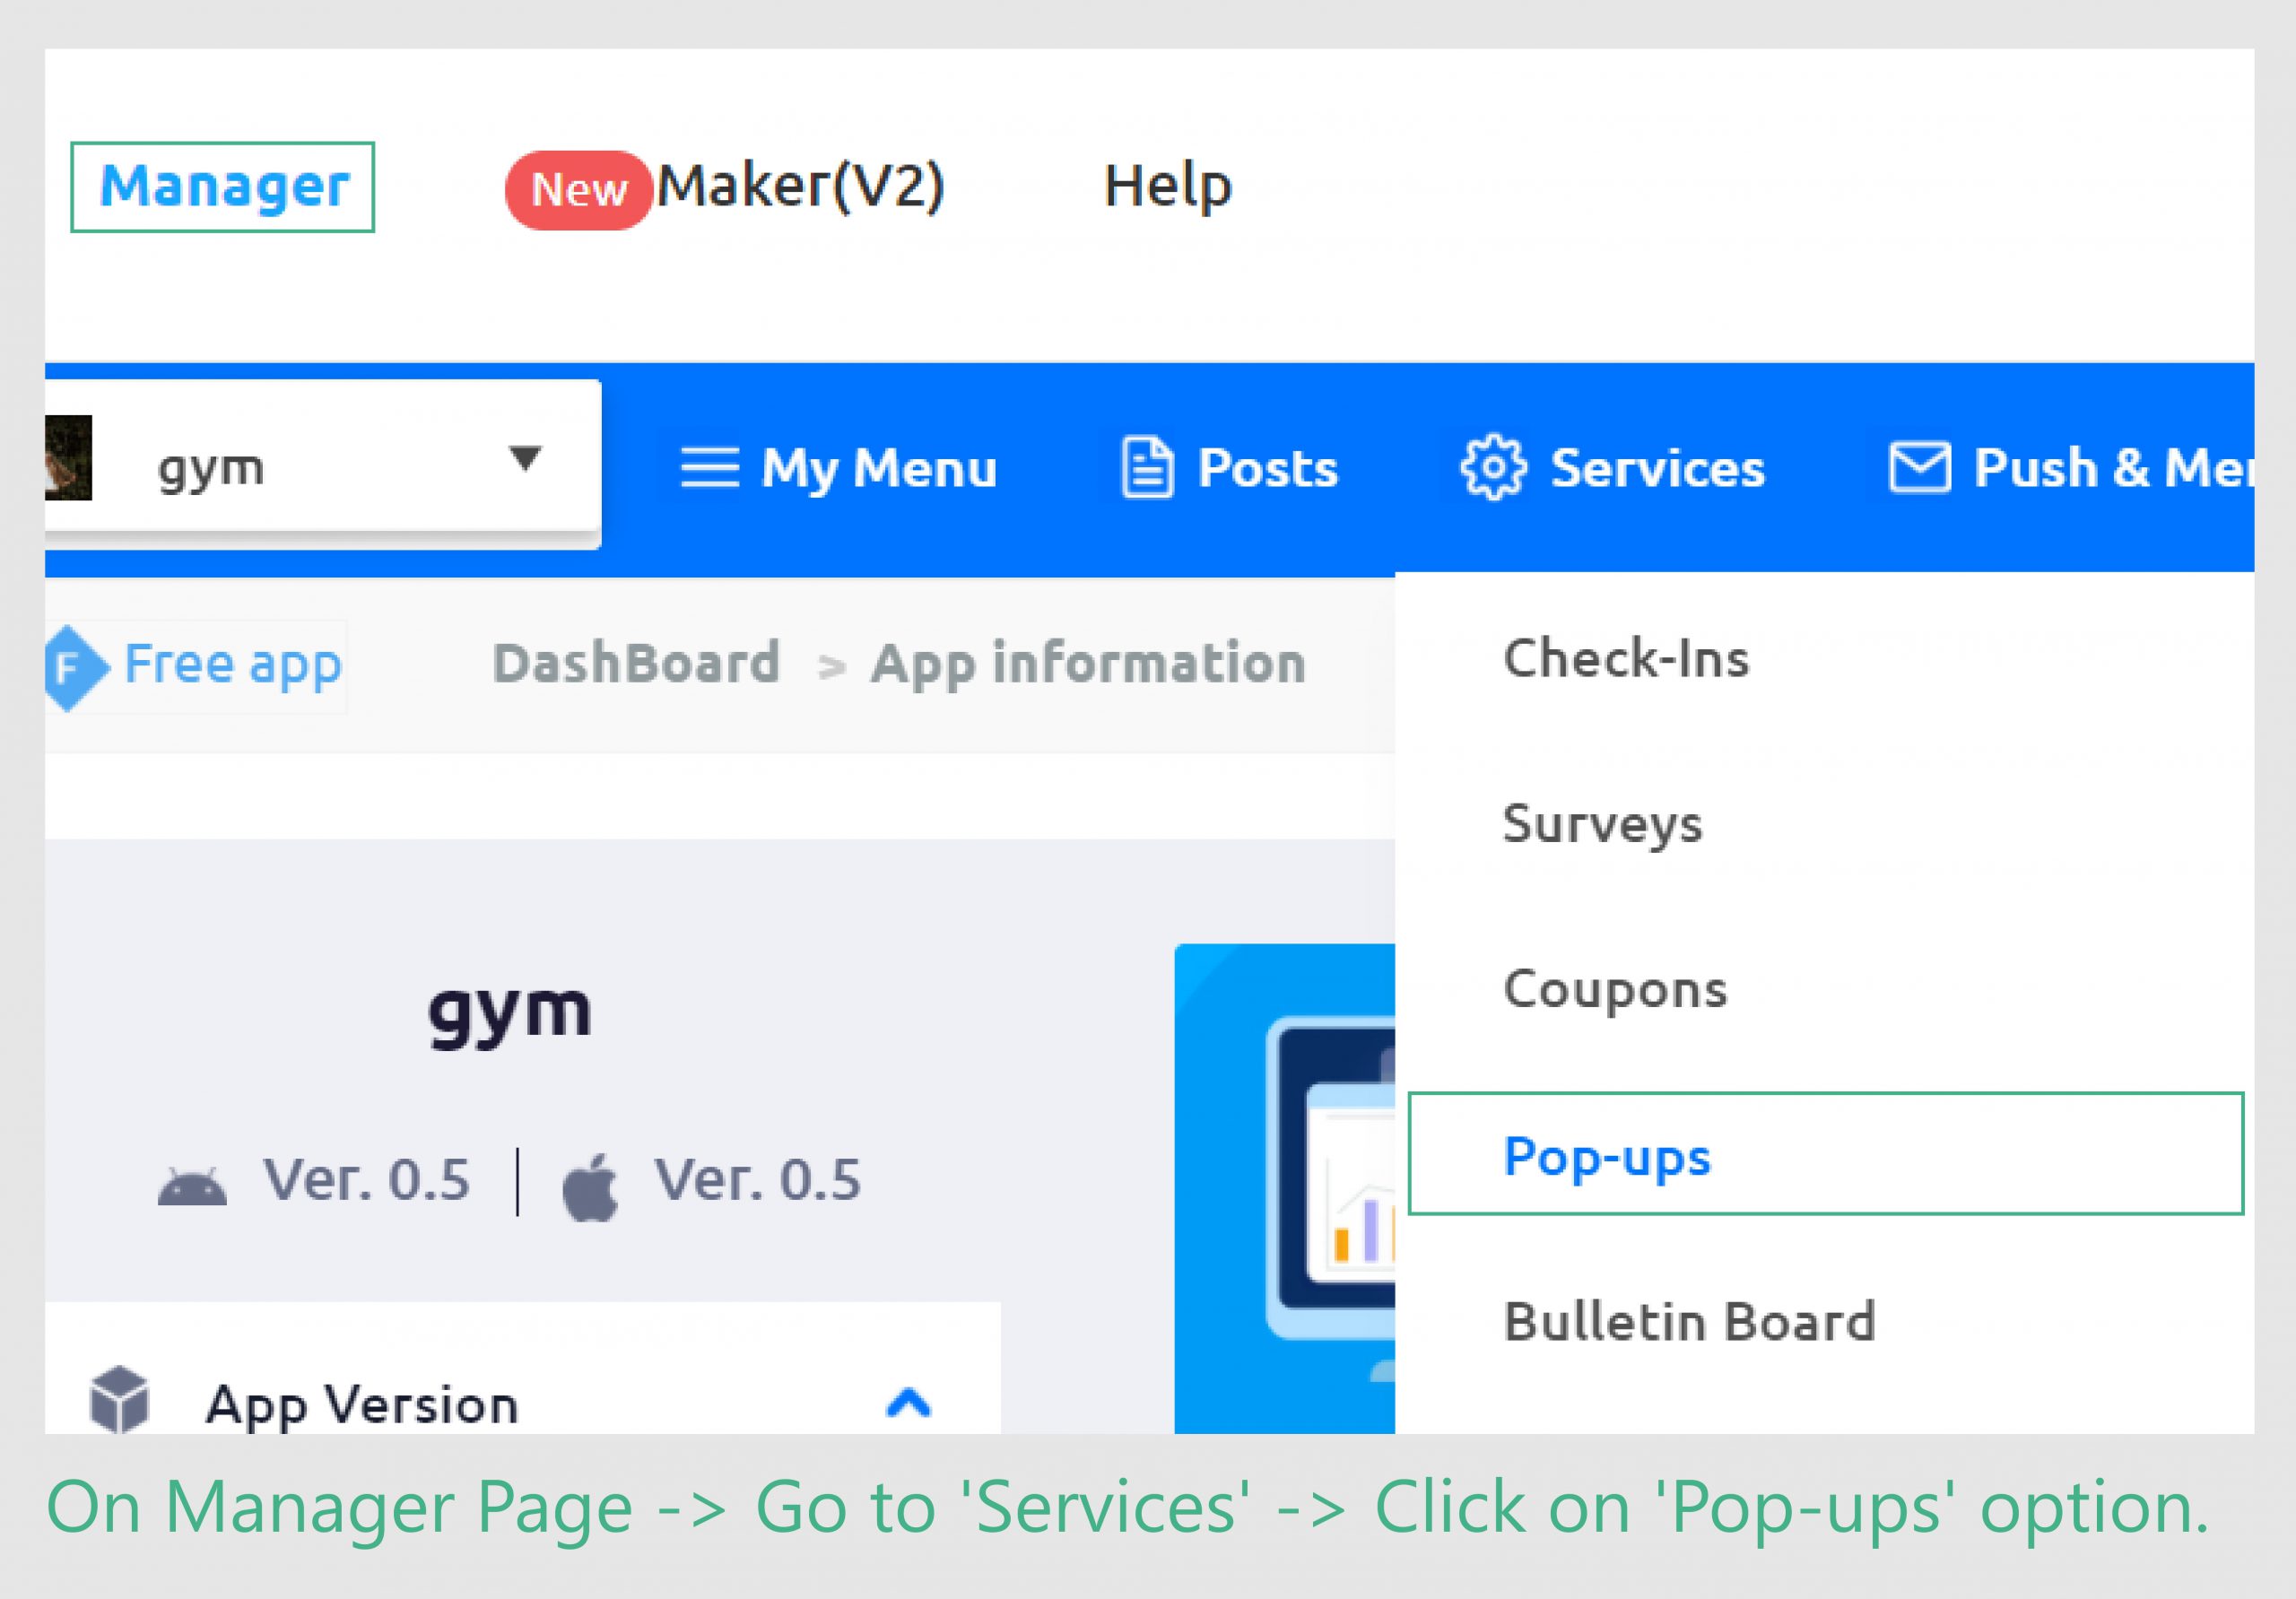
Now let’s start with first pop-up screen.
This is how users will see your pop-up notification.
Now if admin wants to stop this pop-up, he just need to uncheck box ‘Turn on pop-up’.
USE CASE 2:
When admin wants to notify about multiple things and want to link related pages with notification.
App type: Shopping App
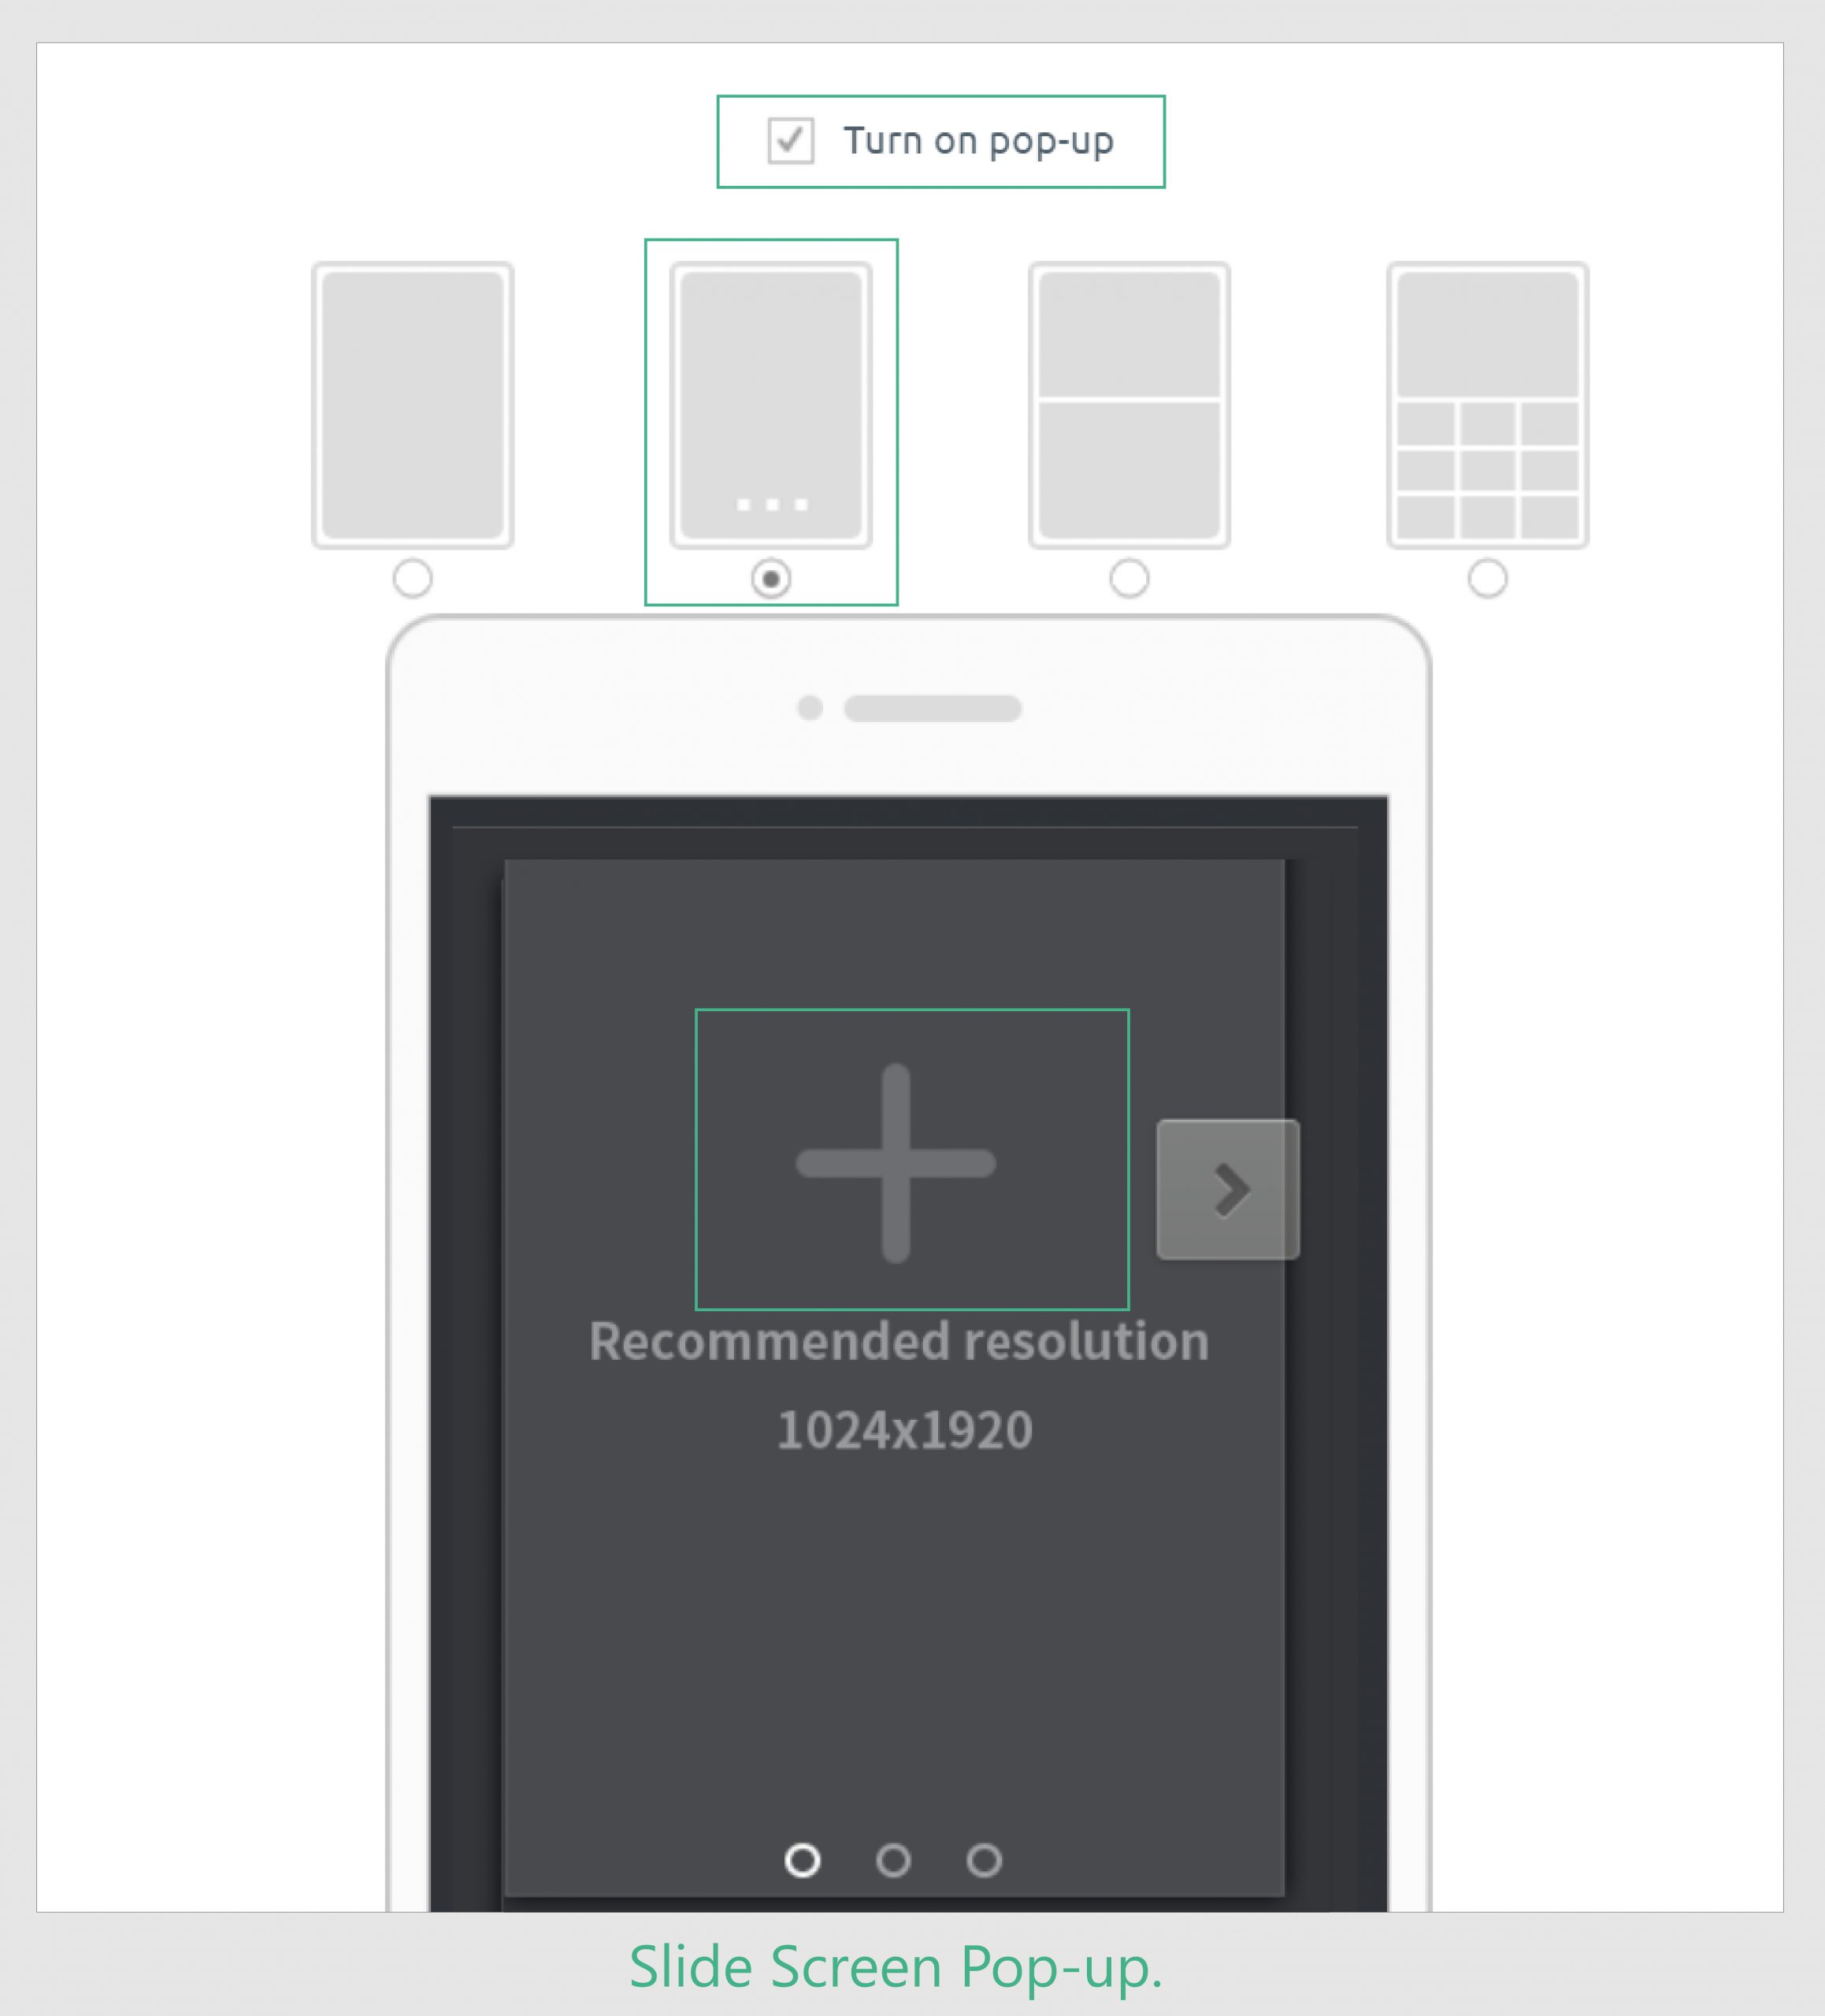
Pop up screen type: Pop up slide screen, where 3 images can be registered.
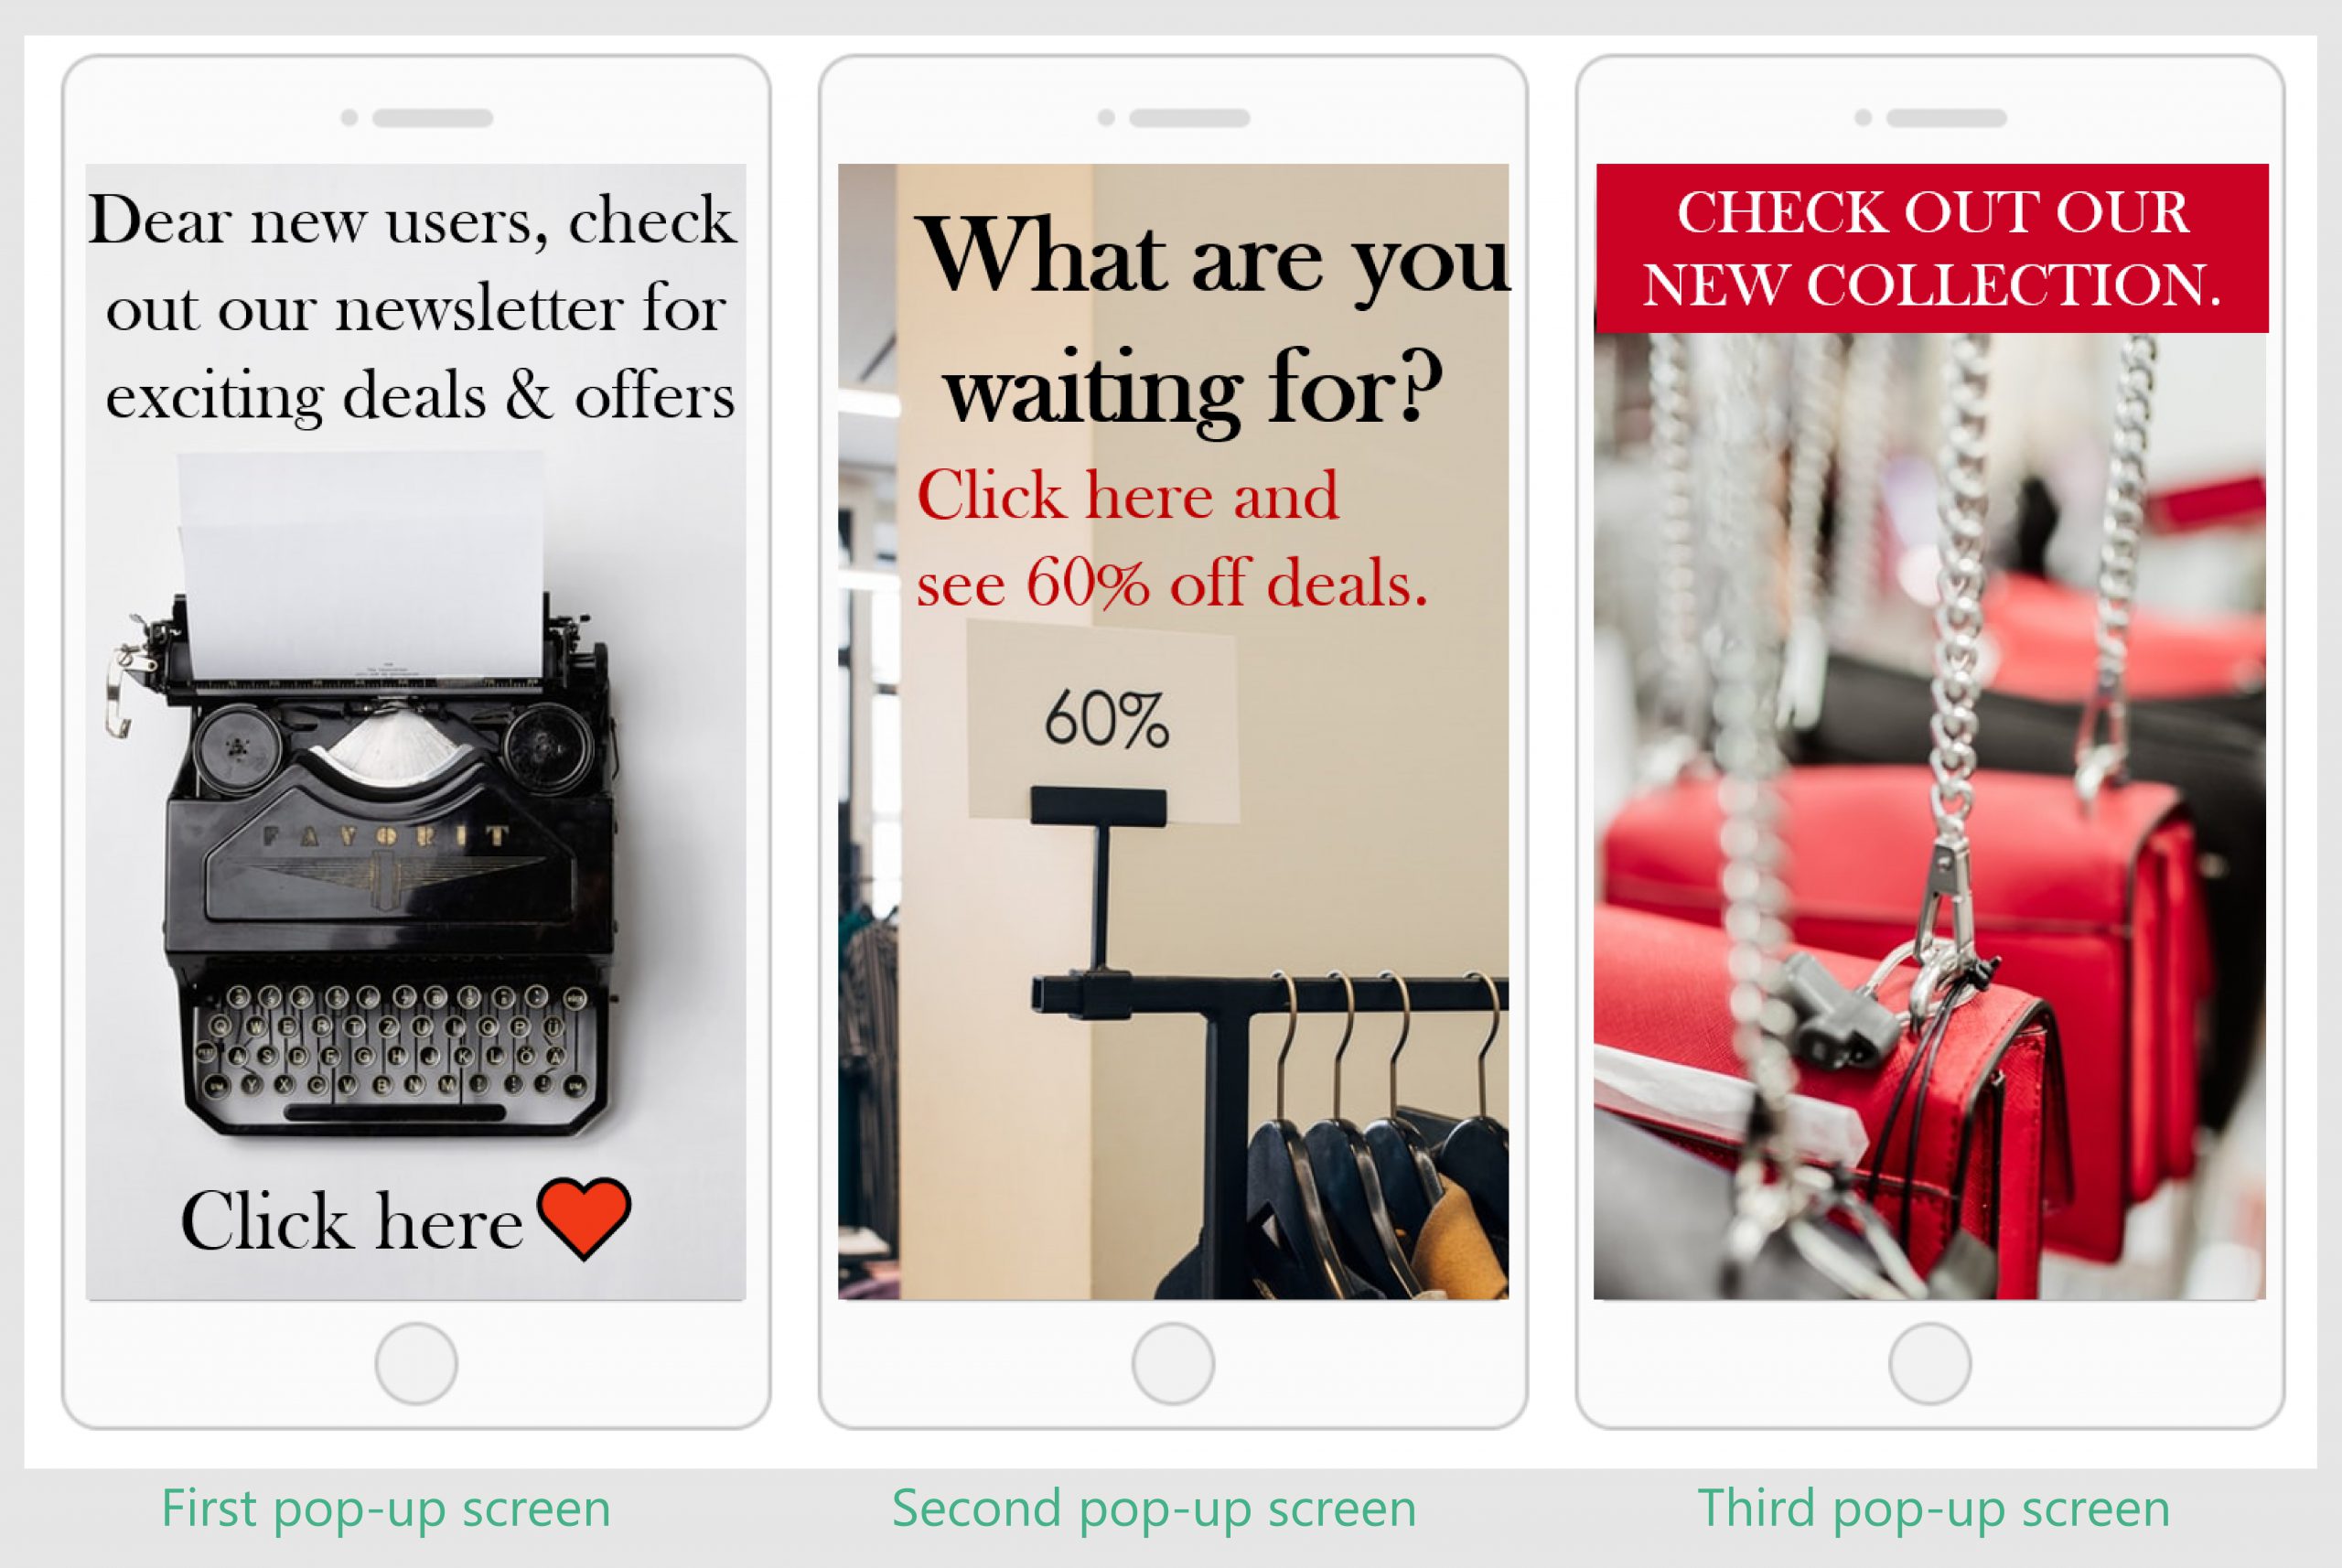
Here admin wants to notify users about on-going sales, new collection and Newsletter. He wants to link all 3 pop up screens with a respected page, so if a user is interested in any of this notification he can simply click on it and will get redirected to that page.
Now let’s start creating second pop-up screen.
Learn to link pup-up with different things like template, images, bulletin board, posts etc.
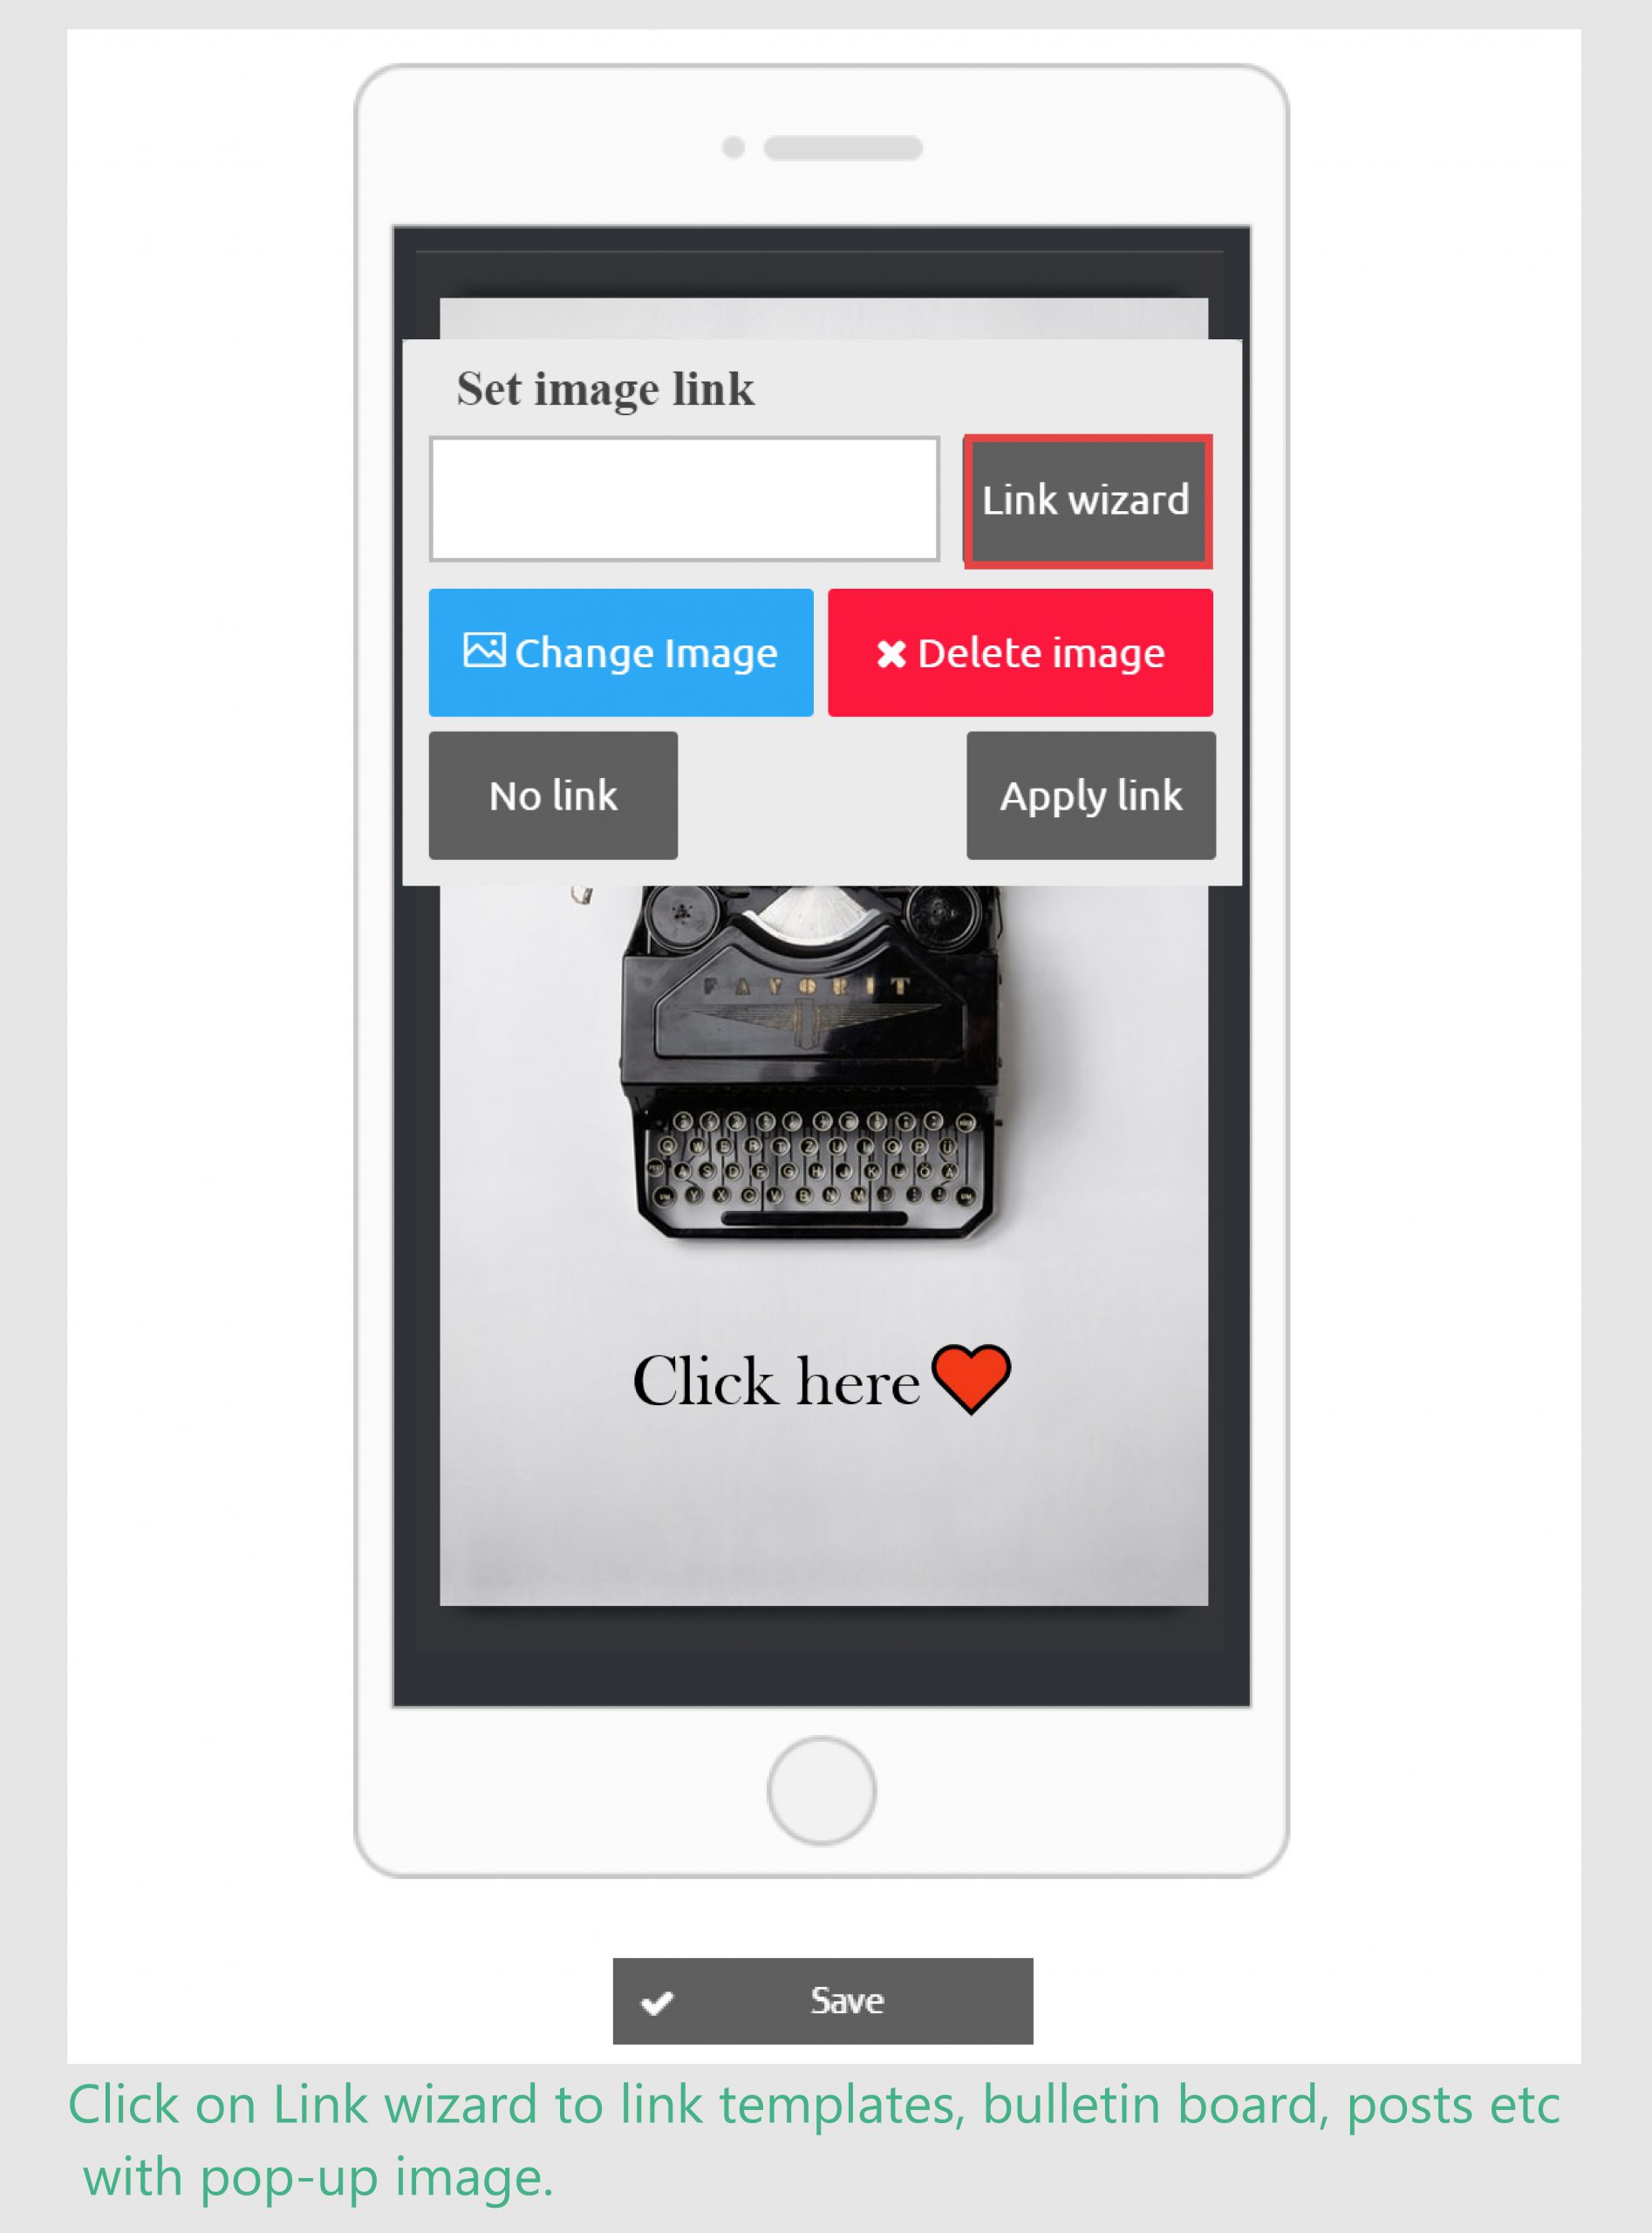
Follow the same steps as mentioned above to upload and link the image with different types of pages and links.
This is how your all screen of pop-ups will look.
This is how users will see your pop-up notification.
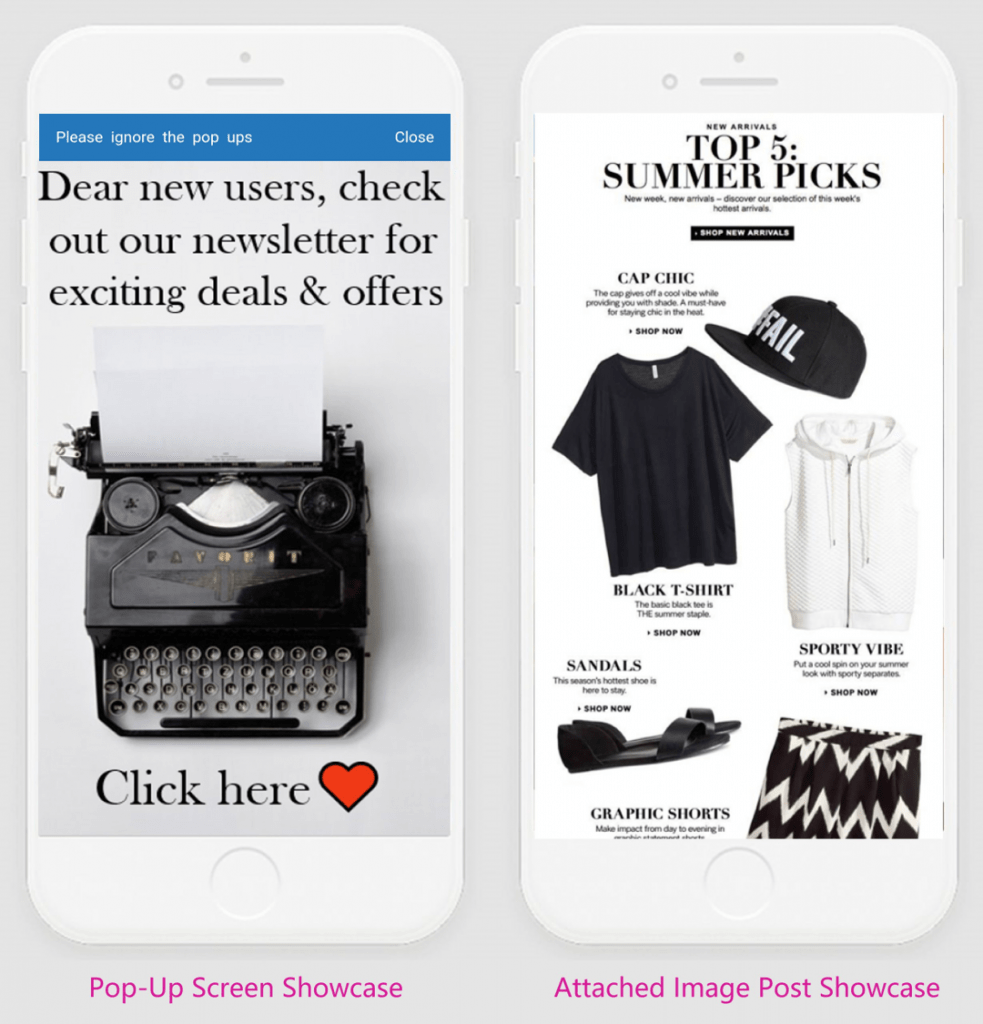
when the user will click on his preferred screen, he’ll be redirected to the attached page.
USE CASE 3:
When admin wants to redirect users to their preference page.
App type: Restaurant App
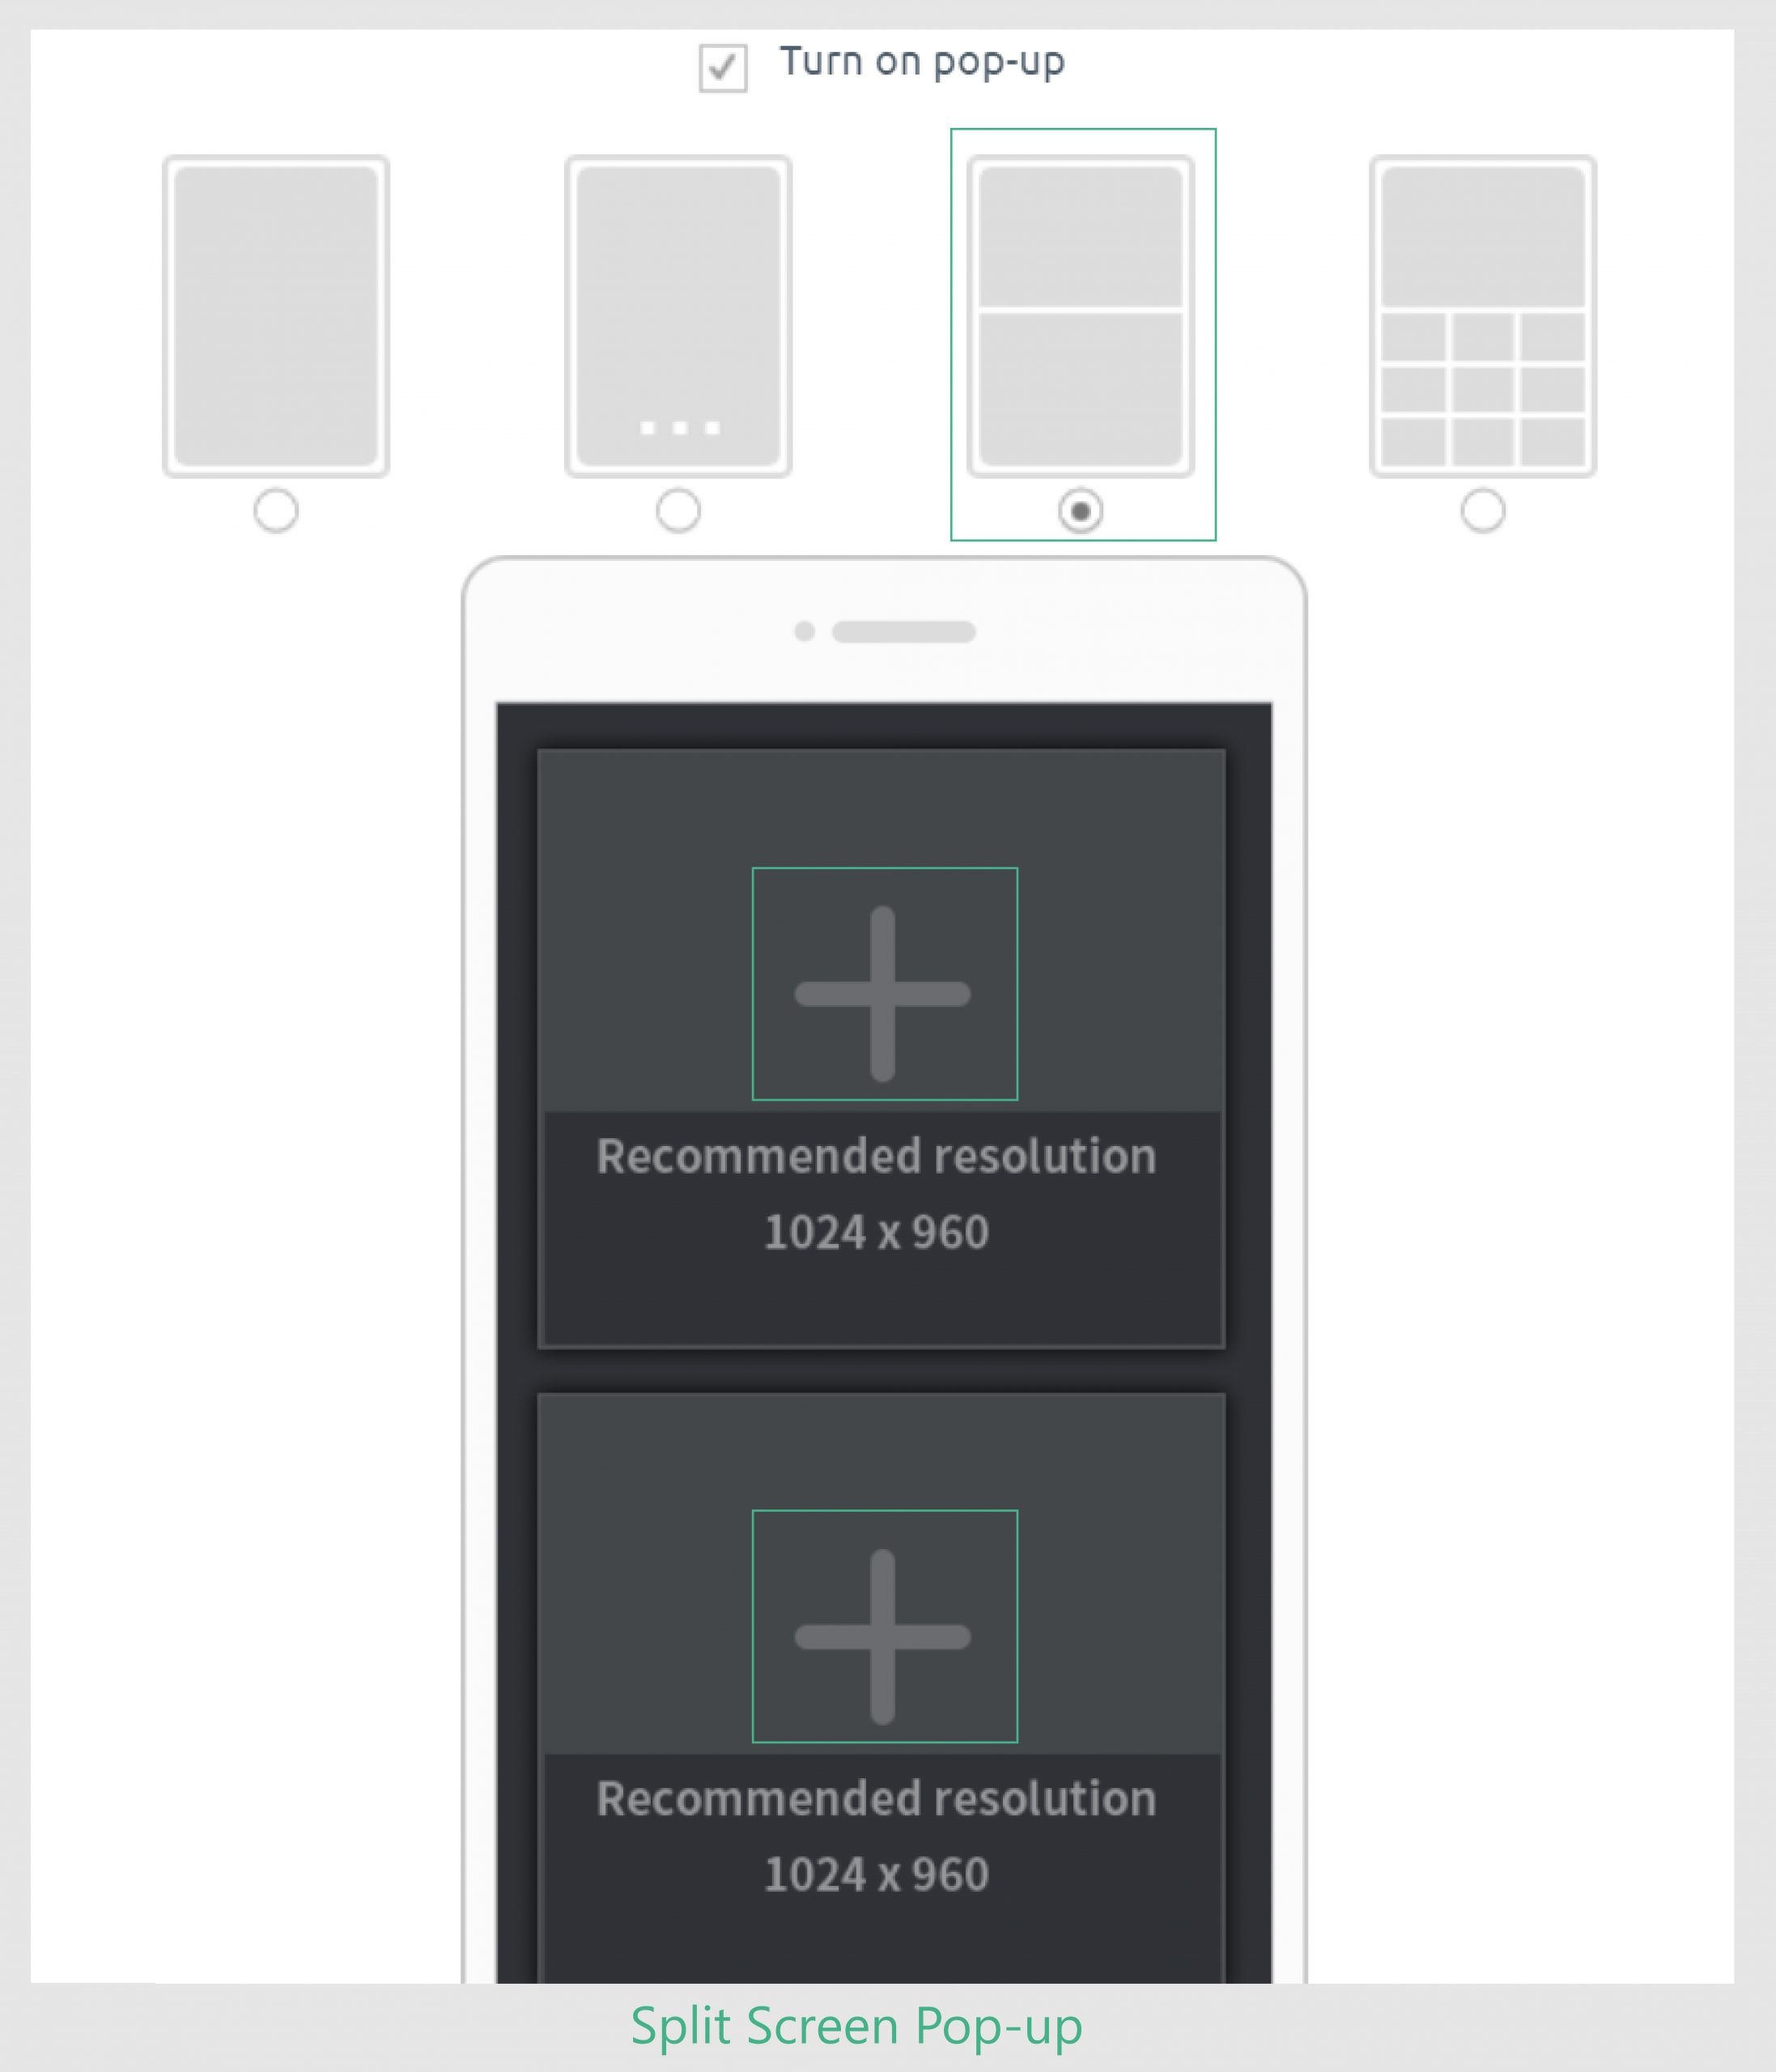
Pop-up screen Type: Split-screen style where images are displayed both at top and bottom on the screen
Here, admin is the owner of a restaurant which offers veg and non-veg menu. To give a better experience to his customers, he wants to redirect them to their preference when users will open the app.
So, admin has used 2 images, one that will redirect users to the veg menu and other to non-veg. This can be done by linking pop-up screen images with menu templates.
Now let’s start with third pop-up screen.
Follow the previous steps till image upload -> Click on ‘link wizard’ button -> Go to ‘user page’ Select menu template -> Click on ‘apply link’ button (follow same steps to link menu template with 2nd image) -> Click on ‘save’ button
As you know this image is divided into two sections, when the user clicks on any of the sections he’ll be redirected to the linked page.
This is how your users will see this pop-up and access menu.
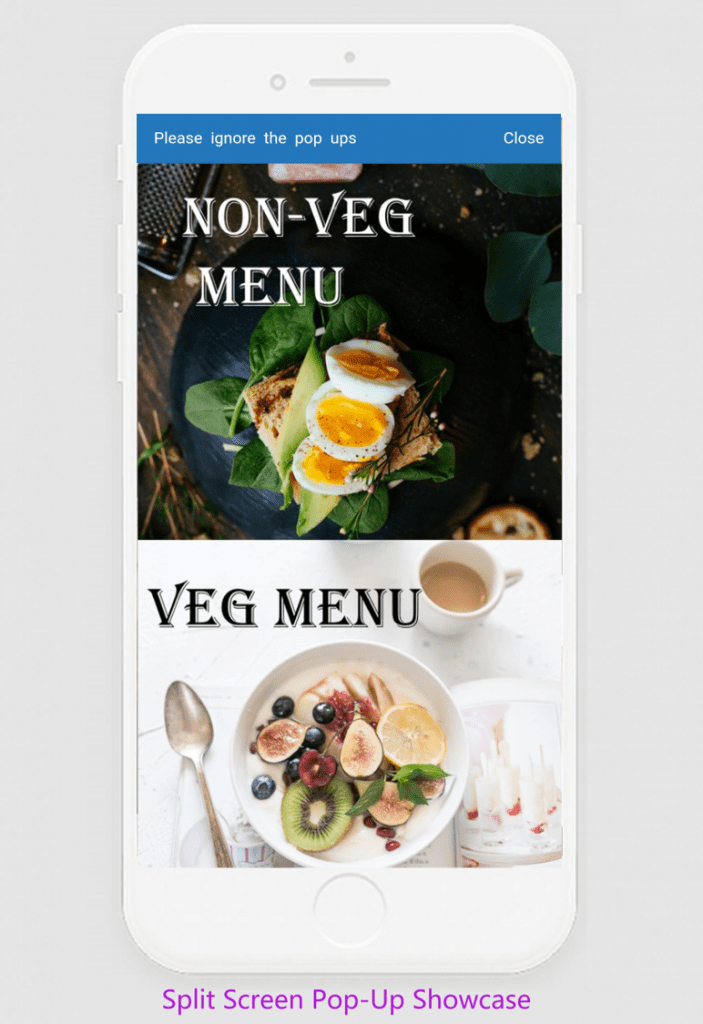
On this image, the user has clicked on ‘Veg Menu’ and got redirected to the veg menu template.
USE CASE 4:
When an admin has multiple genres and wants users to redirect to their preference page.
App type: Language learning app
Pop up screen type: On this screen, you can upload and link 9 images. And top screen it to highlight the image that the user will select.
Here admin wants to show languages that his app covers in the pop up screen. When users click on their preferred language, they will be redirected to that language.
Lets start with fourth pop-up screen
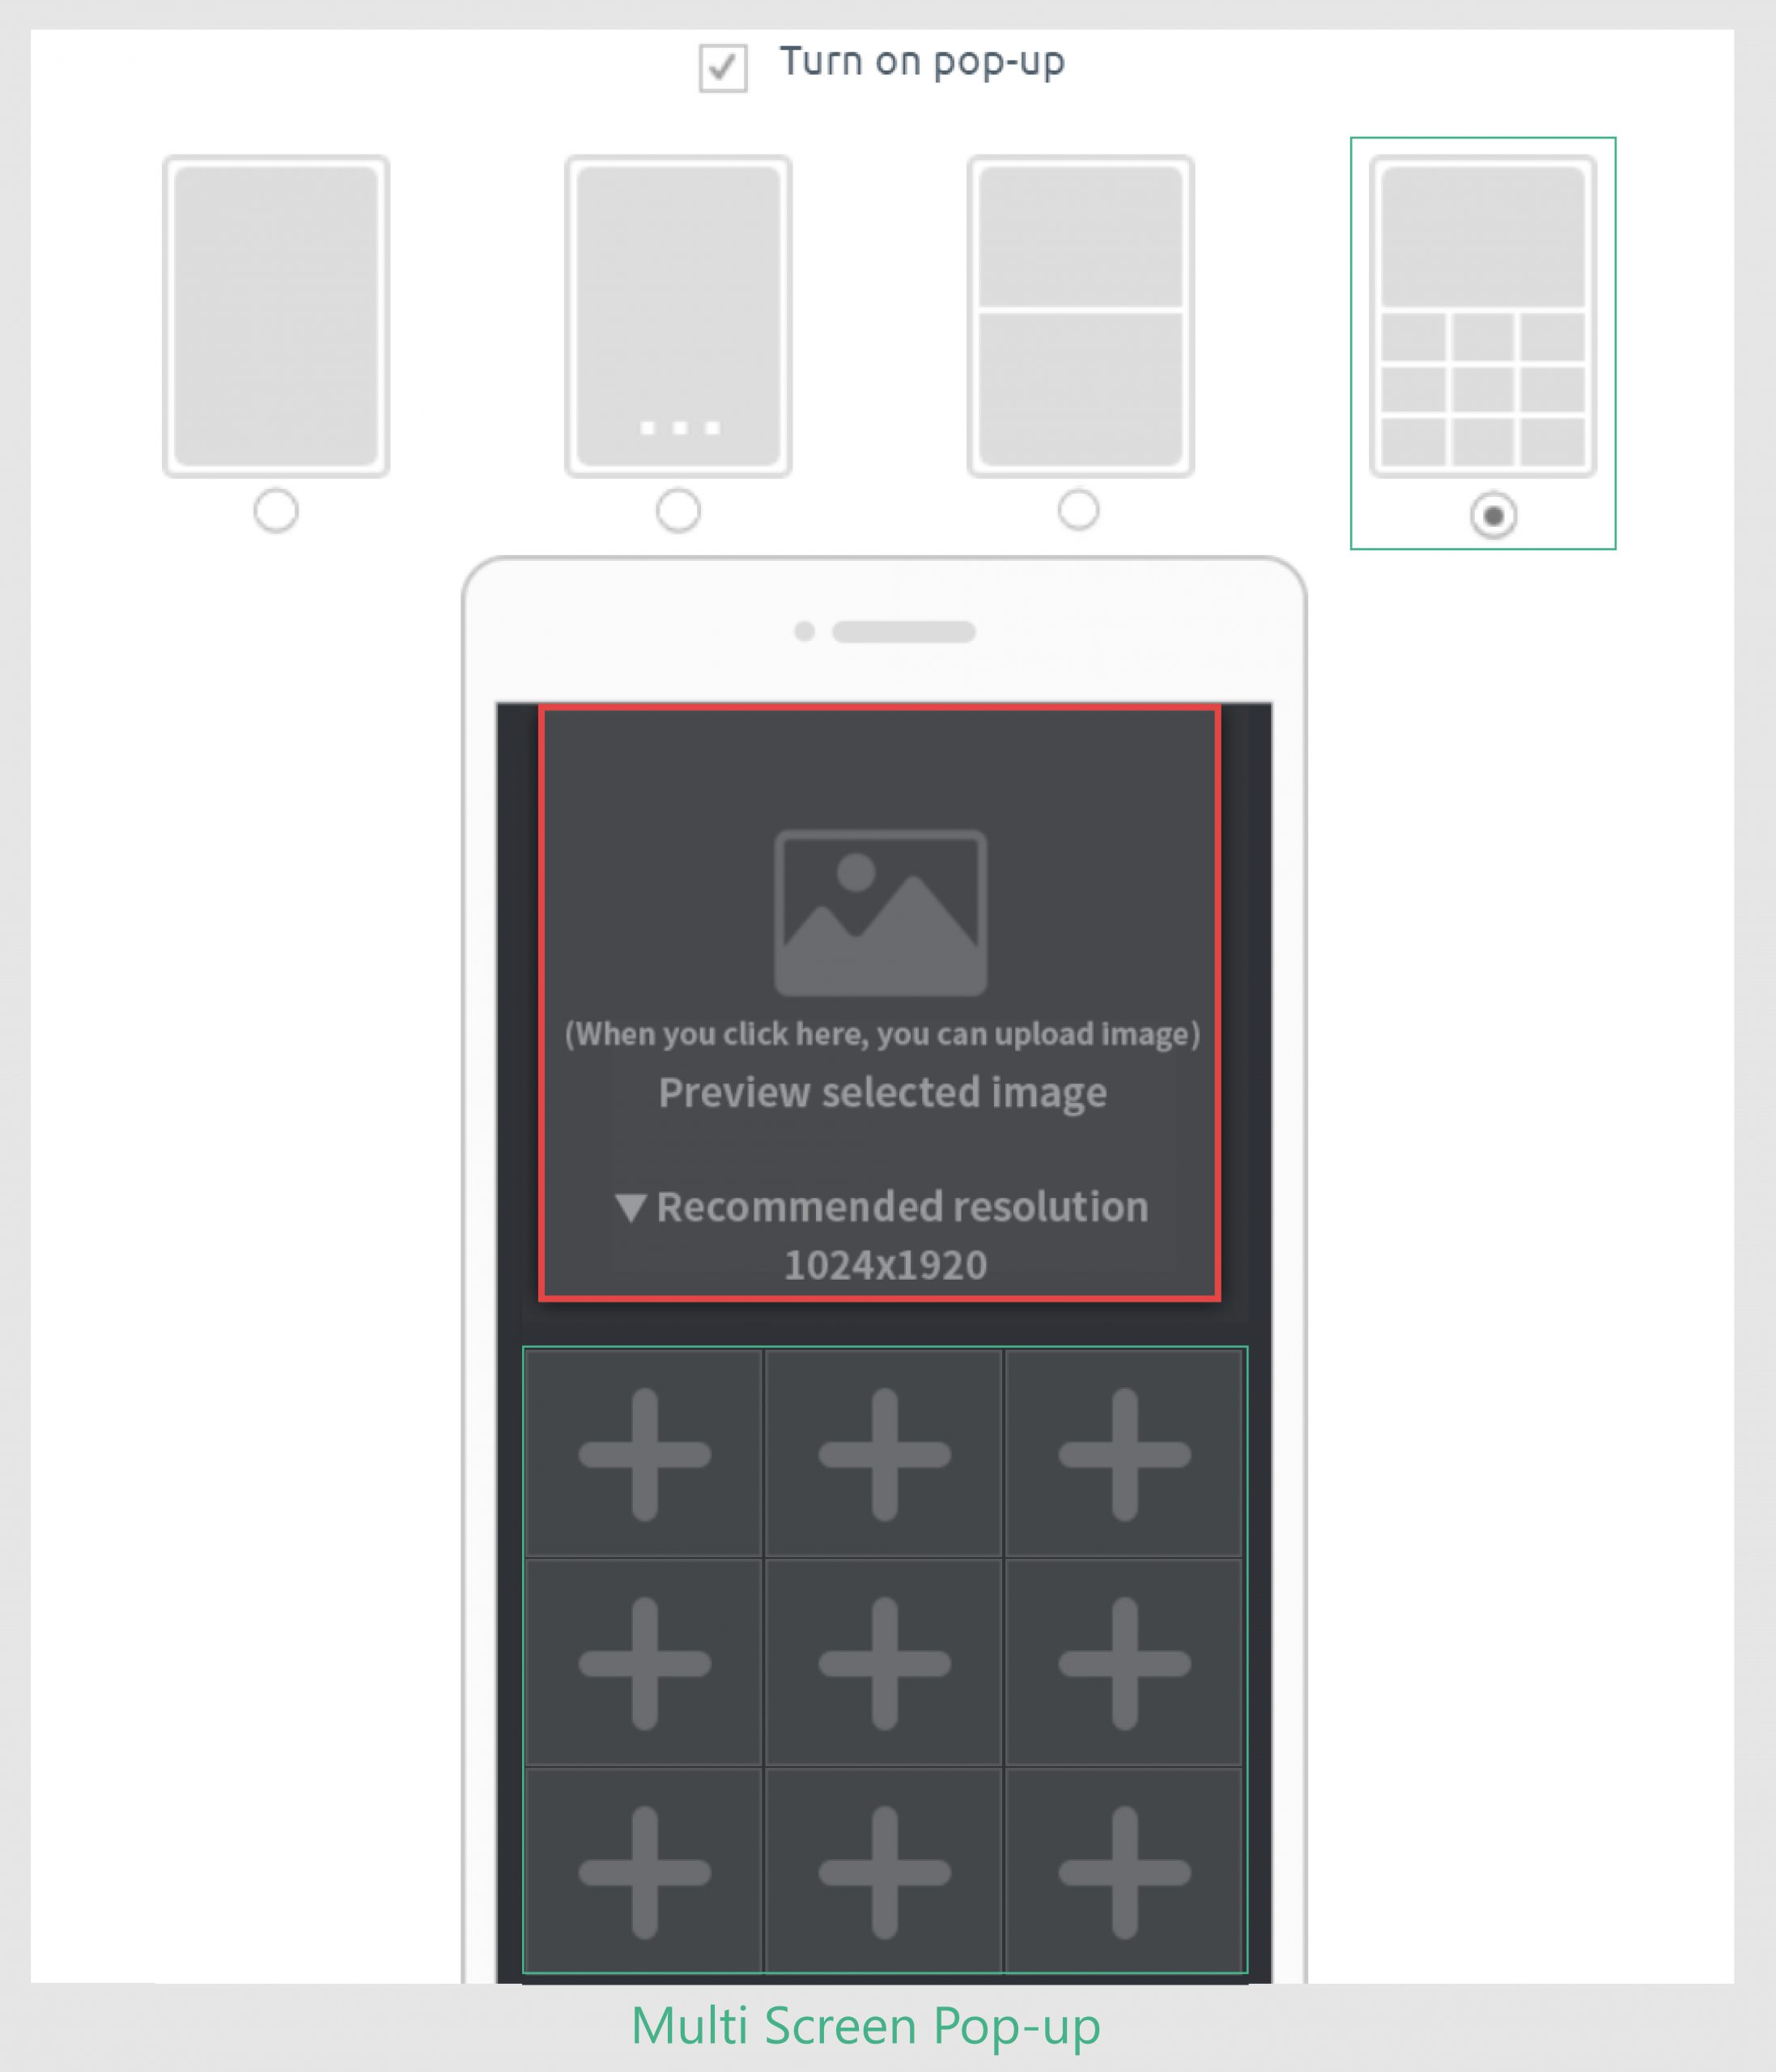
When the user will click on any of the 9 images, it will get highlighted on top image space. Then when the user clicks on the highlighted image, he’ll get redirected to the linked page.
This is how your users will see this pop-up and access menu.
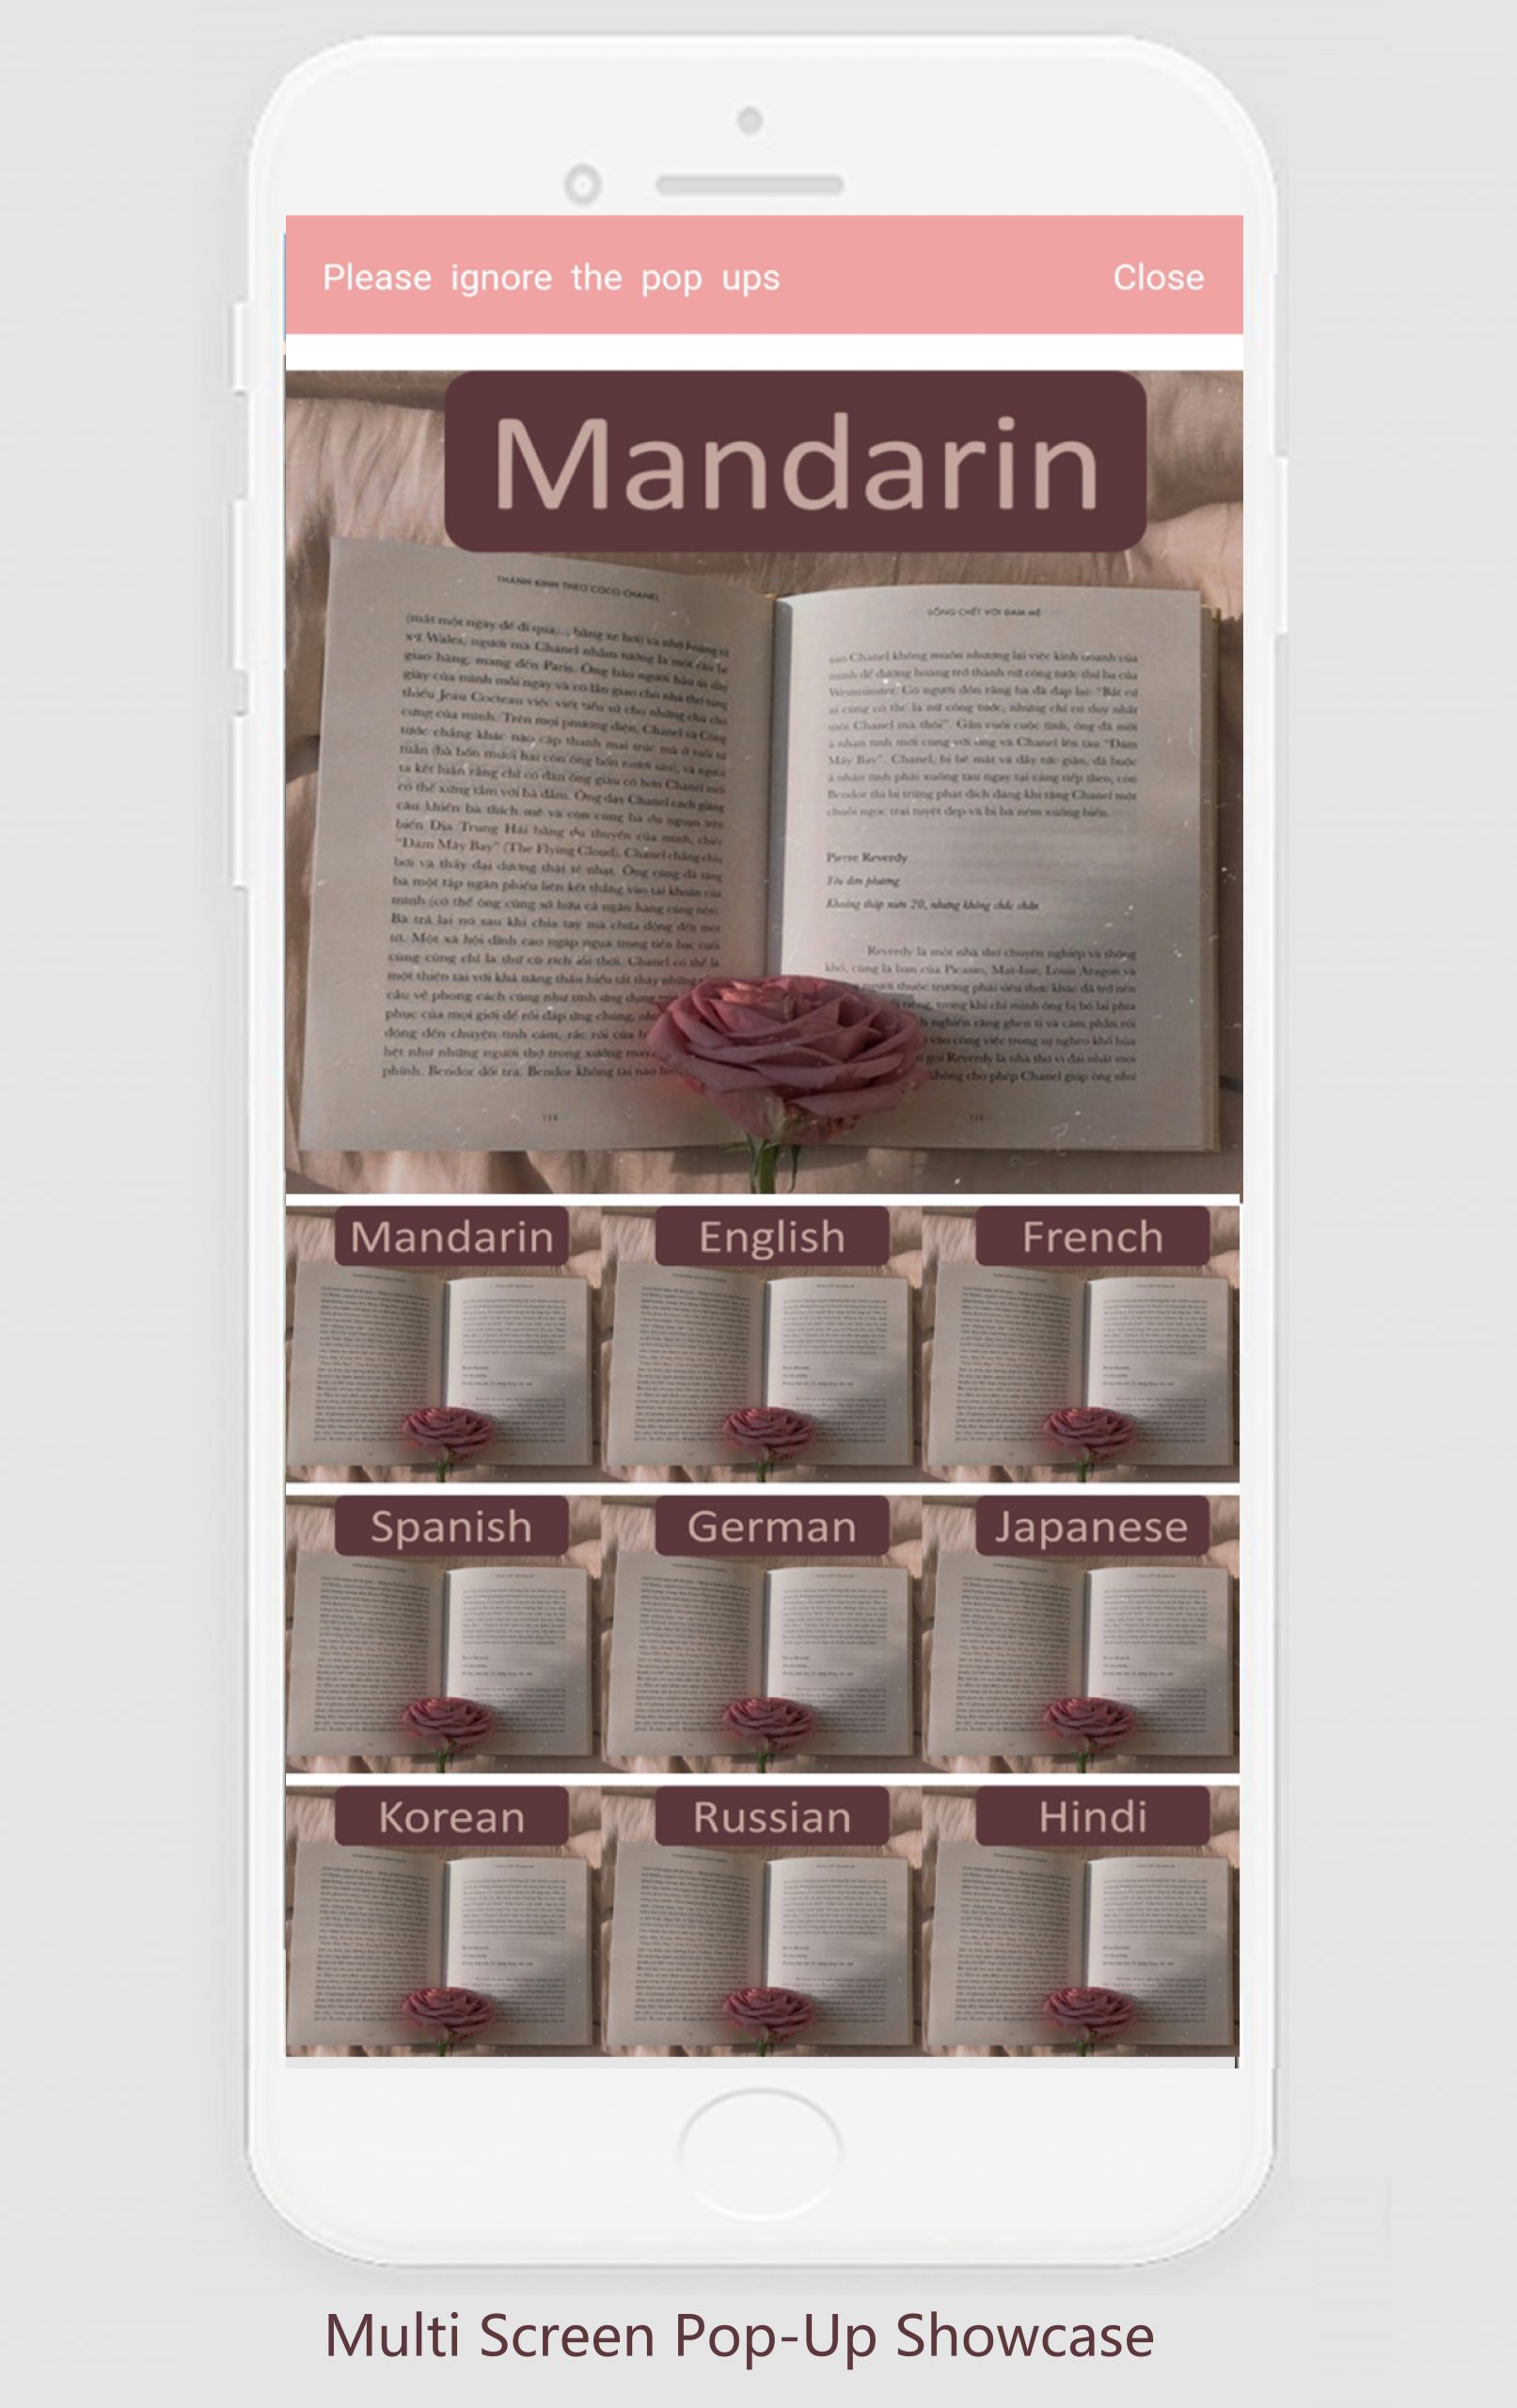
Here, when the user clicks on ‘Mandarin’ image, it’ll appear on top image section, now once the user clicks on top section image he’ll be redirected to the linked page.
Tips
1.You can partially link some images and rest you can keep unlinked.
2. If you want to stop pop up, just uncheck box ‘turn on pop up’ in pop-up screen settings.